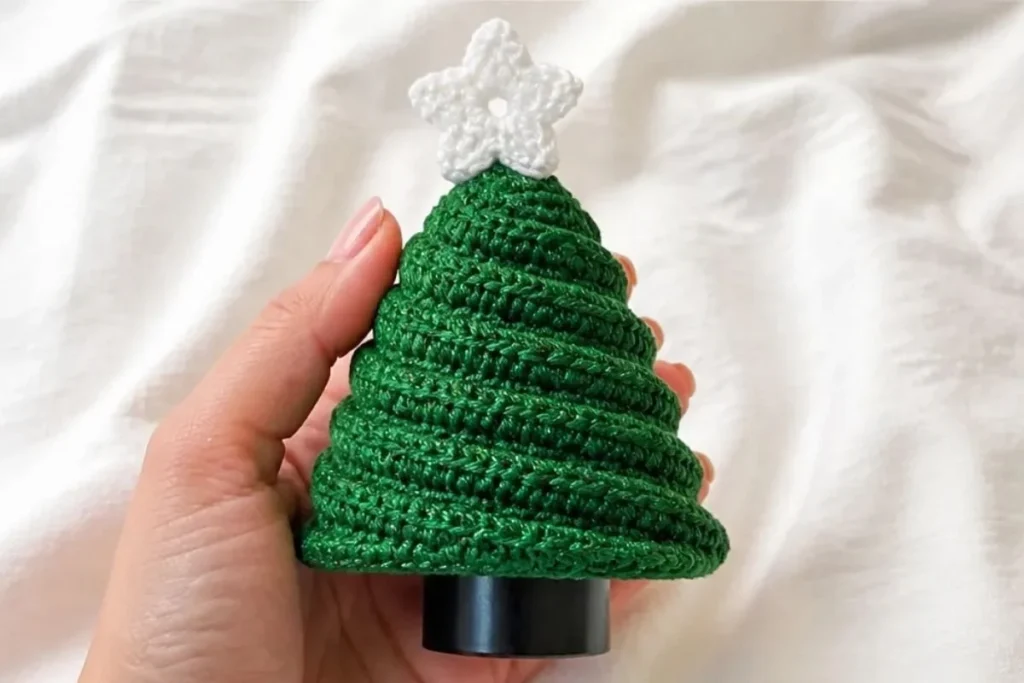
This DIY crochet Christmas tree bottle topper pattern creates a festive, textured decoration that slips over a bottle for holiday entertaining, gifting, or seasonal display. The tree is crocheted sideways in glittery green yarn, shaped with nine wedges, cinched at the top, and finished with a small white star. It is a satisfying project for crocheters who want to practice stitch-height changes, front-loop work, shaping, and simple assembly. For another beginner-friendly bottle decoration, explore this crochet bottle topper pattern for beginners.
Why You’ll Love This Crochet Project
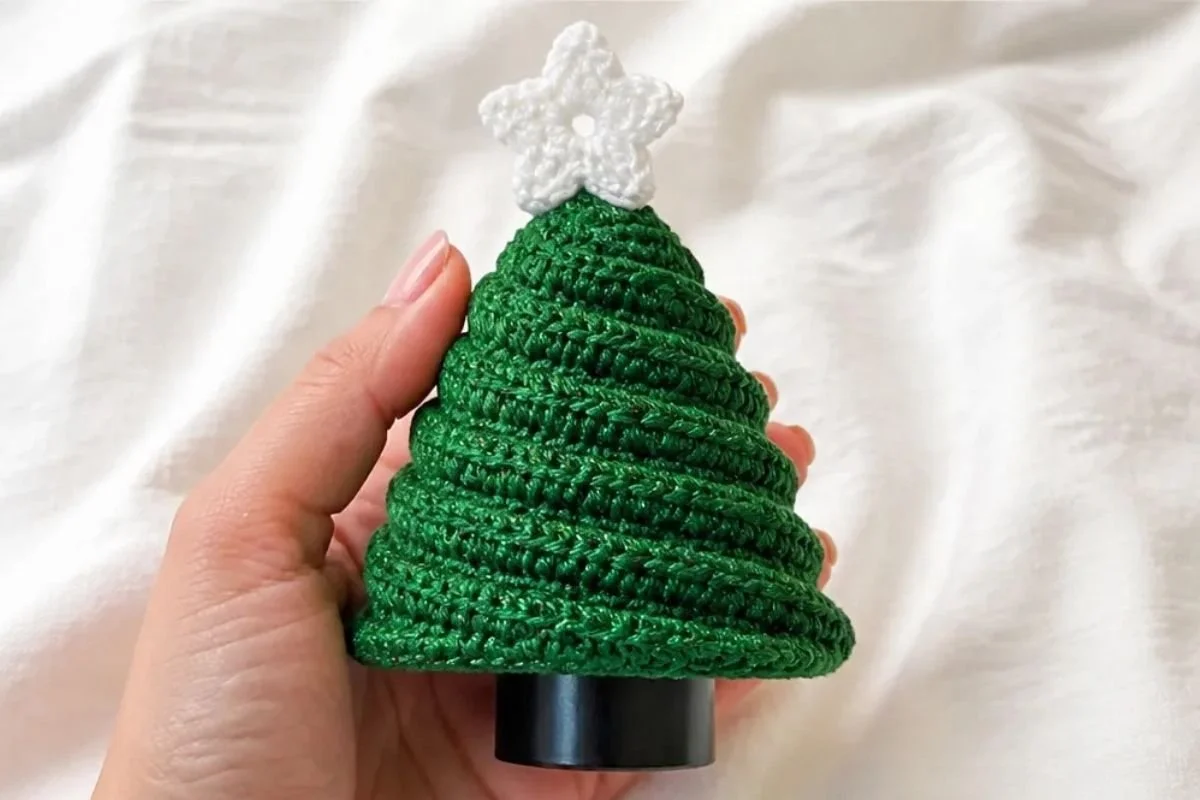
- It adds instant holiday character. The tree silhouette and glittery yarn turn an ordinary bottle into a festive centerpiece or gift presentation.
- It teaches shaping through stitch heights. The pattern moves from single crochet through half double, double, treble, and double treble crochet, creating the tapered tree form.
- The construction is efficient. The tree is worked sideways as one main piece rather than assembled from separate branches.
- The white star provides a crisp finishing detail. A small contrast accent makes the green tree easy to style with other Christmas decorations.
- It is useful for gifting. A finished topper can dress up a bottle of wine, sparkling cider, juice, or another packaged beverage.
My Crochet Flower Tip: Keep the first and last rows aligned carefully before sewing. A neat seam helps the topper sit more evenly around the bottle.
Before You Start Crocheting
This project includes one crocheted tree and one small crocheted star. The tree is worked sideways in Main Color, or MC, using the larger crochet hook. Its shaping comes from alternating rows: one row builds the wider edge of a wedge, and the following row narrows it. Repeating those rows creates 9 wedges.
After the tree is crocheted, ridges are added through the remaining back loops. The foundation chain and last row are sewn together, then the top is cinched closed. The star is worked separately in Contrast A with the smaller hook and sewn to the top.
The supplied instructions use US crochet terminology. Helpful abbreviations include:
- ch: chain
- sc: single crochet
- hdc: half double crochet
- dc: double crochet
- tr: treble crochet
- dtr: double treble crochet
- sl st: slip stitch
- RS: right side
- beg Tr5tog: begin treble-five-together decrease
The pattern also uses front loop only and remaining back loop techniques. When working in the front loop only, insert the hook under the front strand of the stitch. When working in the remaining back loop later, use the strand left behind on the opposite side of the fabric.
Materials You’ll Need
- Bernat® Happy Holidays™ yarn, 3.5 oz / 100 g, 240 yds / vgs / 219 m:
- Main Color (MC) Glittery Green (31711): 1 ball
- Contrast A Twinkly White (31709): approximately 10 yds / 9 m
- U.S. F/5 (3.75 mm) crochet hook
- U.S. 7 (4.5 mm) crochet hook
One ball of MC will make 2 Bottle Toppers. Use the larger hook for the tree and the smaller hook for the star, or use the size needed to obtain gauge.
How to Crochet This Project
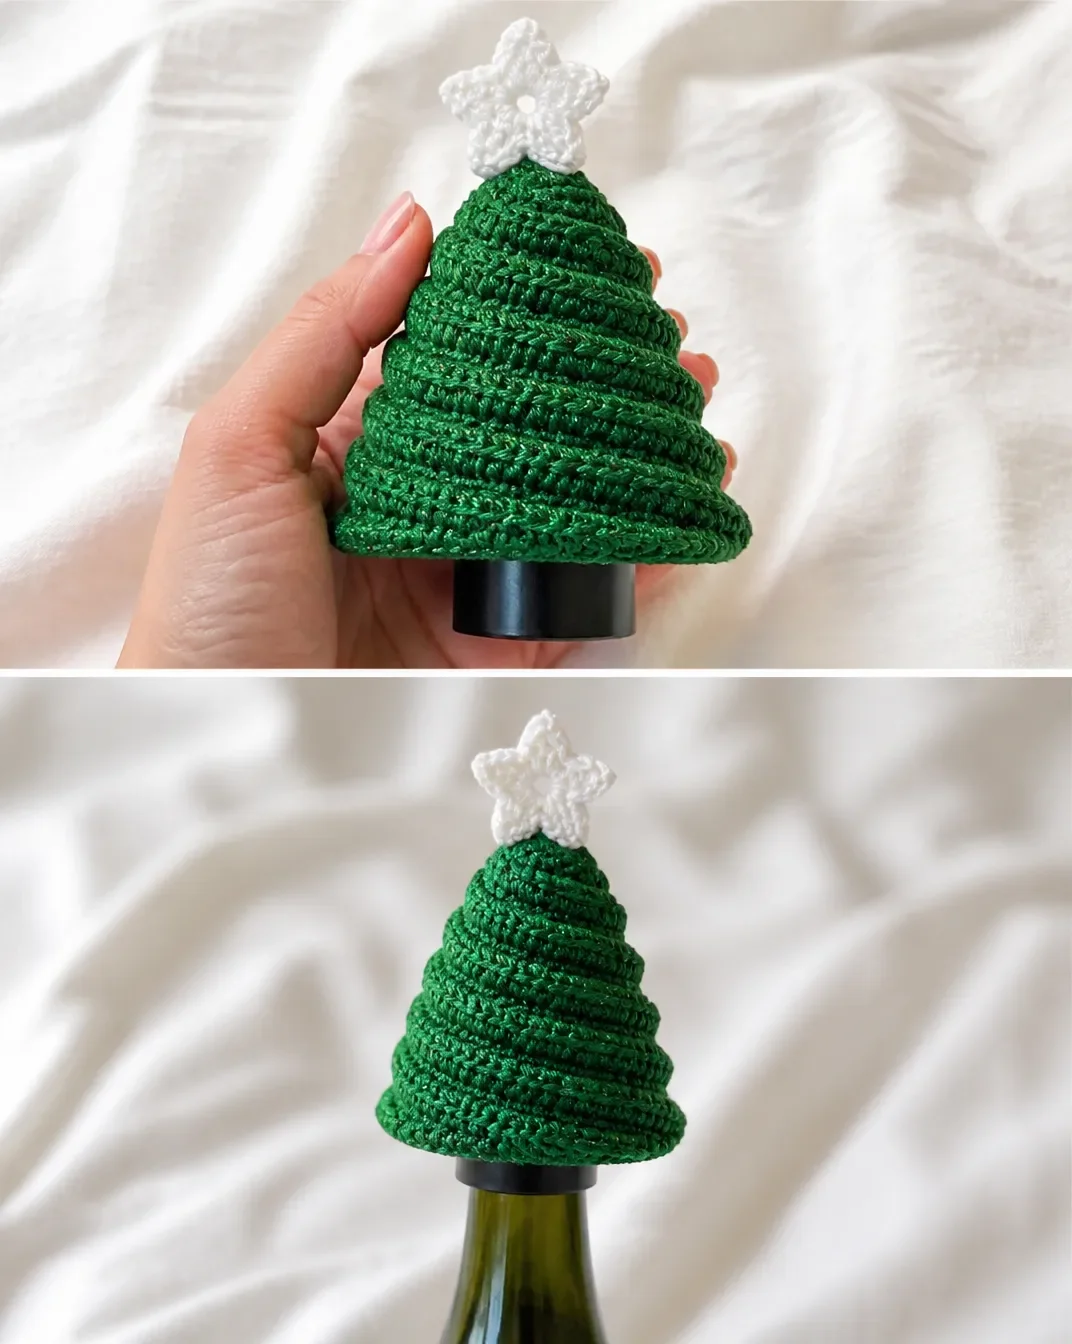
Tree
Note: Tree is worked sideways.
Starting Chain
With larger hook and MC, ch 37.
1st row
(RS).
1 sc in 2nd ch from hook.
1 sc in each of next 8 ch.
1 hdc in each of next 9 ch.
1 dc in each of next 9 ch.
1 tr in each of next 8 ch.
(4 tr. 1 dtr) in last ch.
40 sts. Turn.
Set-up for subsequent rows
From this point on, work all sts into front loop only.
2nd row
Beg Tr5tog.
1 tr in each of next 8 tr.
1 dc in each of next 9 dc.
1 hdc in each of next 9 hdc.
1 sc in each of next 5 sc.
1 sl st in each of next 4 sc.
36 sts.
One Wedge made. Turn.
3rd row
Ch 1.
1 sc in each of next 9 sc.
1 hdc in each of next 9 hdc.
1 dc in each of next 9 dc.
1 tr in each of next 8 tr.
(4 tr. 1 dtr) in last tr.
40 sts. Turn.
4th row
As 2nd row.
Rep last 2 rows 7 times more.
9 Wedges.
Fasten off.
Ridges
With RS facing and beg at bottom, or wider edge, of Tree, join MC with sl st to rem back loop at center of any Wedge.
Ch 1.
1 sc in each rem back loop to end of row.
Fasten off.
Rep for each Wedge around.
The ridges are worked one at a time across the remaining back loops. Begin at the wider bottom edge so the raised lines follow the tree’s wedge shaping consistently.
Seaming + Cinching
Sew foundation ch and last row of Tree tog.
Thread yarn through sts at top of Tree, catching last st of each Ridge row and cinch tightly.
Take care not to pull the seam unevenly while closing the top. The cinched opening forms the pointed upper part of the tree.
Star
With smaller hook and A, ch 4.
Star 1st rnd
9 dc in 4th ch from hook
(skipped ch-3 counts as dc).
Join with sl st to top of ch-3.
10 dc.
Star 2nd rnd
Ch 5. 1 sc in 2nd ch from hook. 1 hdc in next ch. 1 dc in next ch. 1 tr in next ch. Skip next dc. Sl st in next dc.
Rep from * around.
Fasten off.
Attach
Sew Star to top of Tree.
For an orderly finish, position the star over the cinched top before sewing it securely in place. Weave in or trim loose yarn ends neatly after the attachment is complete.
Ways to Display Your Finished Crochet
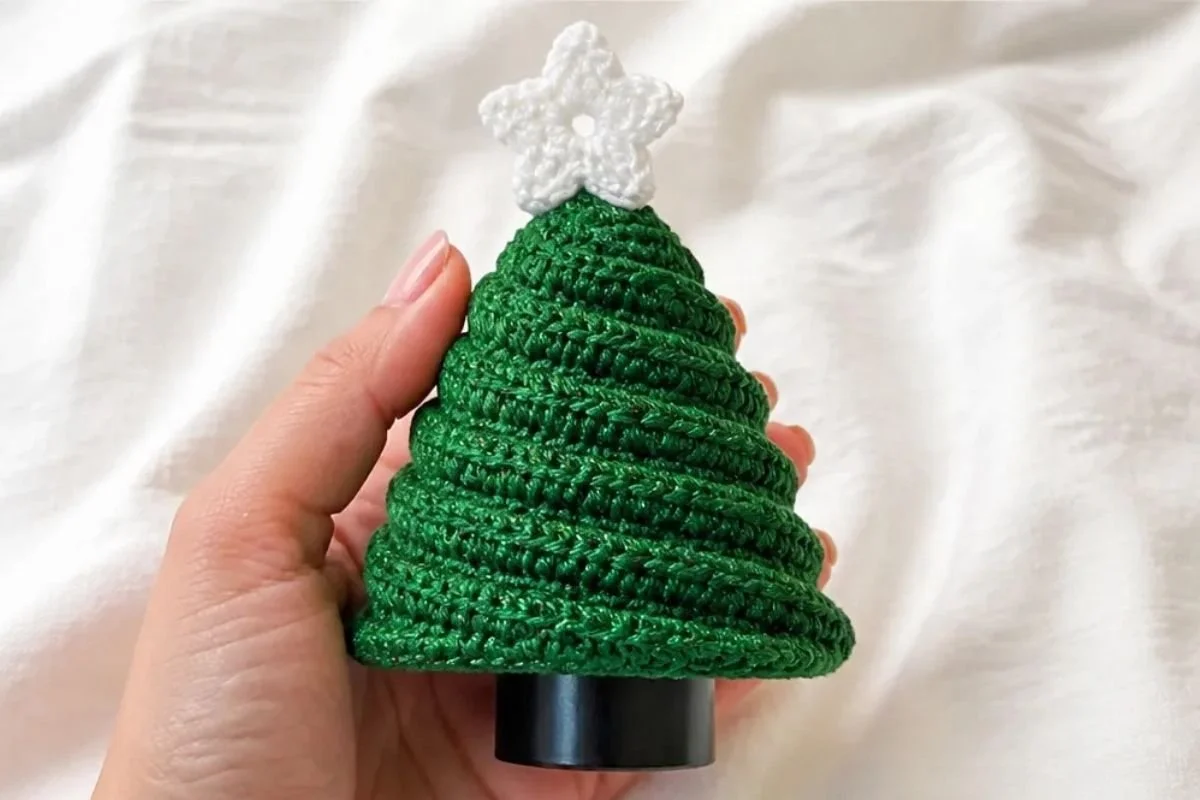
- Place the topper over a wine bottle or sparkling beverage for a holiday dinner table.
- Use it to decorate a bottled drink being given as a hostess, teacher, neighbor, or holiday exchange gift.
- Make several toppers for a coordinated seasonal display, using the matching glittery green color throughout.
- Arrange topped bottles along a sideboard, bar cart, dessert table, or entryway console.
- Pair the tree topper with other handmade seasonal decorations for a layered holiday arrangement.
- If you enjoy coordinated handmade displays, browse these all-in-one crochet bouquet patterns for additional decorative inspiration.
Caring for Your Crochet Project
Keep the finished topper dry and protect it from spills whenever possible. Because the project is shaped, seamed, and cinched, avoid machine washing, soaking, or twisting it. Instead, gently dust the surface with a soft, dry cloth or use a careful spot-cleaning method only when necessary.
Allow any damp area to air-dry completely away from direct heat. Do not place the topper on a radiator or use high heat, since excessive heat can affect the yarn’s texture and shape.
For storage, remove the topper from the bottle, let it air out, and store it in a clean, dry container. Keep it away from sharp objects that could catch the ridges or star. Storing it flat or loosely supported will help preserve the tree shape.
Tips for Better Results
- Count the starting chain carefully. The first row depends on the 37-chain foundation being accurate.
- Track the stitch-height sequence. The first row moves from sc to hdc, dc, tr, and dtr. Keeping the sections in order helps form the correct wedge.
- Work in the front loop only after the first row. The front-loop instruction begins with the set-up for subsequent rows, not the starting chain or first row.
- Check the stitch counts. The first and third rows have 40 sts, while the second row has 36 sts. These counts help confirm that the wedge shaping is progressing correctly.
- Mark the wedge repeats if helpful. Since the last 2 rows are repeated 7 times more, a small row tracker can help you reach exactly 9 Wedges.
- Begin ridges at the wider edge. The ridge instruction specifically begins at the bottom of the Tree and uses the remaining back loops.
- Cinch the top evenly. Catch the last st of each Ridge row when threading the yarn so the top closes securely and maintains a centered point.
- Shape the star points gently. Work each five-chain point consistently, then sew the star firmly to the top without flattening its points.
Color and Styling Variations
The approved pattern uses Glittery Green for the tree and Twinkly White for the star, but the color arrangement can be adapted as an optional styling choice. For example, a deep green tree with a warm white star can create a classic look, while a pale or metallic-toned tree may suit a contemporary holiday display.
You can also make a group of toppers in different seasonal colors while keeping the same construction. Use one color family for a coordinated table setting, or combine green trees with red, gold, silver, or white stars if you have suitable yarn available.
Changing yarn or hook size is optional and may affect gauge, finished dimensions, stitch definition, texture, and yarn requirements. If substituting yarn, choose a similar yarn construction when possible and use the hook size needed to obtain gauge. The star may also look larger or smaller if its yarn or hook is changed independently, so compare its proportion with the finished tree before attaching it.
Frequently Asked Questions
Is this project suitable for a beginner?
It can suit a beginner who is comfortable with basic crochet stitches and ready to practice taller stitches, front-loop-only crochet, a decrease, and simple sewing. The stitch sequence changes frequently, so careful counting is important.
Which hook is used for the tree?
Use the larger U.S. 7 (4.5 mm) crochet hook for the tree, or the size needed to obtain gauge.
Which hook is used for the star?
Use the smaller U.S. F/5 (3.75 mm) crochet hook for the star.
How much yarn is needed?
The pattern calls for one ball of Bernat® Happy Holidays™ in MC Glittery Green (31711) and approximately 10 yds / 9 m of Contrast A Twinkly White (31709). One ball of MC will make 2 Bottle Toppers.
How many wedges does the tree have?
The completed tree has 9 Wedges. The pattern creates one Wedge in the second row, then repeats the last 2 rows 7 times more.
Why are the later rows worked in the front loop only?
Working the subsequent rows into the front loop only leaves the remaining back loops available for making the raised ridges later. This construction also contributes to the tree’s textured, dimensional appearance.
How is the tree closed?
First, sew the foundation chain and last row of the Tree together. Then thread yarn through the stitches at the top, catching the last stitch of each Ridge row, and cinch tightly.
Can the colors be changed?
Yes. Color changes are optional, but changing yarn color, yarn type, or hook size may affect gauge, texture, dimensions, and yardage. Keep the approved stitch instructions unchanged when adapting the palette.
How should the finished topper be stored?
Remove it from the bottle and store it in a clean, dry place away from sharp objects, moisture, and excessive heat. Loose storage or flat storage can help protect the ridges and star.
Conclusion
This crochet Christmas tree bottle topper is a compact project with plenty of festive texture and personality. The sideways construction, raised ridges, cinched top, and contrasting star create a useful handmade decoration for holiday bottles and gift presentations. Enjoy making one for your own table or several for seasonal gifts, and compare the finished design with this free Bernat Christmas tree bottle topper pattern for another reference.