
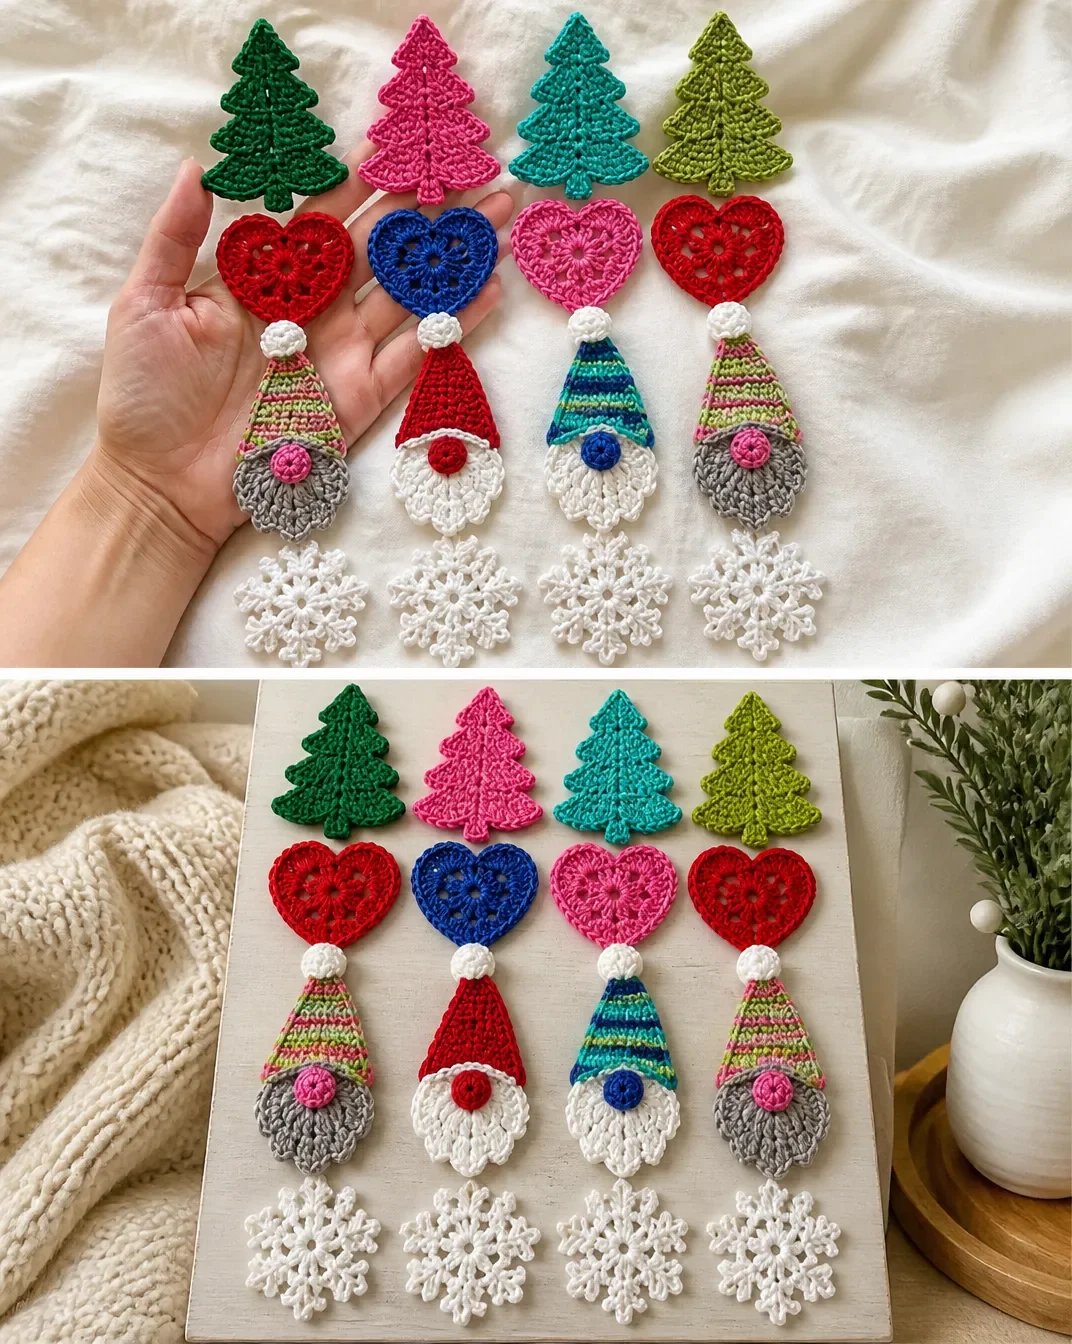
Christmas crochet appliques are a cheerful way to decorate cards, gift wrapping, ornaments, garlands, and seasonal displays. This Christmas Crochet Appliques Pattern – Ho Ho Holiday Santas includes four charming motifs: a shaped tree, heart, snowflake, and gnome. The bright colors and compact finished sizes make these projects useful for holiday crafting and handmade gifts. Crocheters who enjoy coordinated seasonal accessories may also like these beginner-friendly crochet bottle topper ideas for adding a festive touch to party décor.
Why You’ll Love This Crochet Project
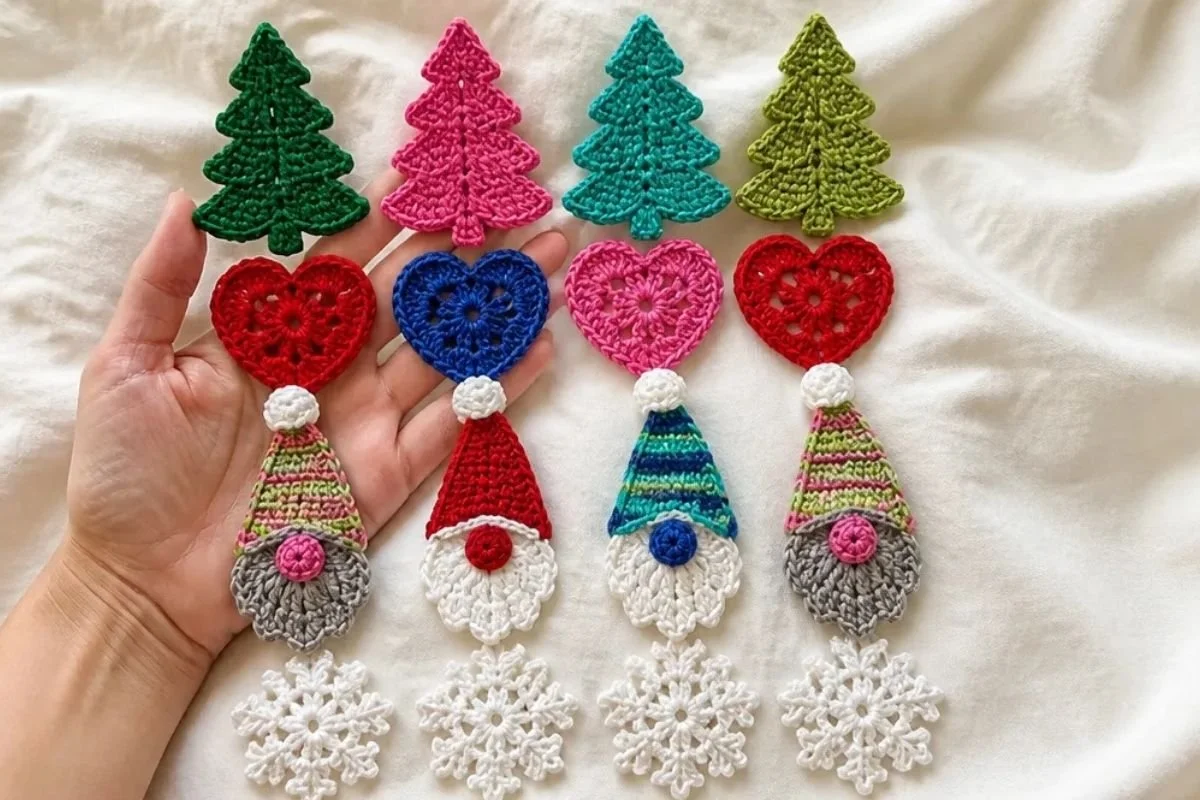
- Four decorative motifs: Make a tree, heart, snowflake, and gnome for a varied holiday collection.
- Colorful seasonal style: Jade, red, pink, royal, green, white, and gray create cheerful combinations beyond traditional Christmas colors.
- Useful shaping practice: The tree uses rows of single crochet and decreases, while the heart and gnome introduce granny-square construction.
- Small yarn requirements: Each applique uses a modest amount of yarn, making the project practical for coordinated decorations.
- Flexible display options: Use individual motifs on gifts, cards, ornaments, stockings, wreaths, or holiday table settings.
My Crochet Flower Tip: Keep each motif flat as you work by checking the shape after every section. This makes sewing, gluing, or attaching the finished appliques much easier.
Before You Start Crocheting
The pattern includes four separate components:
- Tree: approximately 5 × 6 in. (12.5 × 15 cm)
- Heart: approximately 5 × 5 in. (12.5 × 12.5 cm)
- Snowflake: approximately 4 × 4 in. (10 × 10 cm)
- Gnome: approximately 4 × 8 in. (10 × 20.5 cm)
The tree is crocheted in two connected sides. The heart is made from a three-round granny-square shape, with treble crochet forming the upper curves. The gnome begins with a granny-square beard, followed by a striped or solid hat, a round nose, and a white pom-pom. The snowflake is built from a magic loop, six chain spaces, and pointed decorative sections.
The instructions use US crochet terminology. The supplied diagrams use these symbols and abbreviations:
- ch: chain
- sl st: slip stitch
- sc: single crochet
- dc: double crochet
- tr: treble crochet
- sc2tog: single crochet two together
- dc2tog: double crochet two together
- dc3tog: double crochet three together
- RS: right side
- MC: main color
The diagrams also show working in the back loop only and using a magic loop.
Materials You’ll Need
Yarn
Use Red Heart® Super Saver® Super Craft Kit™, which includes 12 balls, 1.7 oz/50 g each, or 21 oz/600 g total. Each ball contains 93 yds/85 m, with 1116 yds/1020 m total in the kit.
The following yardages are for one applique; the kit will make multiples.
- Tree: Jade, Shocking Pink, or Spring Green 1 ball or 17 yds/15.5 m
- Heart: Cherry Red, Royal, or Shocking Pink 1 ball or 15 yds/4.5 m
- Snowflake: Soft White 1 ball or 10 yds/9 m
- Gnome beard: Soft White or Gray Heather 1 ball or 8 yds/7.5 m
- Gnome striped hat, Contrast A: Jade or Spring Green 1 ball or 6 yds/5.5 m
- Gnome striped hat, Contrast B: Shocking Pink or Royal 1 ball or 6 yds/5.5 m
- Gnome solid hat: Cherry Red 1 ball or 6 yds/5.5 m
- Gnome nose, Contrast C: Cherry Red, Shocking Pink, or Caffé Latte 1 ball or 6 yds/5.5 m
Tools and Notions
- Size U.S. H/8 (5 mm) Susan Bates® Silvalume® crochet hook, or size needed to obtain gauge
- Susan Bates® yarn needle
Complete Crochet Instructions
Work each applique separately, referring to the stitch key above when reading the pattern.
Tree
Right Side of Tree
With Jade, Shocking Pink, or Spring Green, ch 7.
- 1st row: Ch 1. 1 sc in 2nd ch from hook and each ch to end of chain. Turn. 6 sc.
- 2nd and 3rd rows: Ch 1. 1 sc in each sc to end of row. Turn.
- 4th row: Ch 6. Working in back of chain, 1 sc in 2nd ch from hook and each of next 4 ch. 1 sc in each of next 3 sc. Turn. Leave rem 3 sts unworked.
- 5th row: Ch 1. 1 sc in each of next 6 sc. Sc2tog. Turn. 7 sts.
- 6th row: Ch 1. Sc2tog. 1 sc in each of next 5 sc. Turn. 6 sts.
- 7th row: Ch 1. 1 sc in each of next 4 sc. Sc2tog. Turn. 5 sts.
- 8th row: Ch 1. Sc2tog. 1 sc in each of next 3 sc. Turn. 4 sts.
- 9th row: Ch 1. 1 sc in each of next 4 sts. Turn.
- 10th row: Ch 4. 1 sc in 2nd ch from hook and each of next 2 ch. 1 sc in each of next 4 sc. Turn. 7 sc.
- 11th row: Ch 1. 1 sc in each of next 5 sc. Sc2tog. Turn. 6 sts.
- 12th row: Ch 1. Sc2tog. 1 sc in each of next 4 sc. Turn. 5 sts.
- 13th row: Ch 1. 1 sc in each of next 3 sc. Sc2tog. Turn. 4 sts.
- 14th row: Ch 1. Sc2tog. 1 sc in each of next 2 sc. Turn. 3 sts.
- 15th row: Ch 1. 1 sc in each of next 3 sc. Turn.
- 16th row: Ch 3. 1 sc in 2nd ch from hook and next ch. 1 sc in each of next 3 sc. Turn. 5 sc.
- 17th row: Ch 1. 1 sc in each of next 3 sc. Sc2tog. Turn. 4 sts.
- 18th row: Ch 1. Sc2tog. 1 sc in each of next 2 sc. Turn. 3 sts.
- 19th row: Ch 1. 1 sc in next sc. Sc2tog. Turn. 2 sts.
- 20th row: Ch 1. Sc2tog.
Fasten off, leaving a 16-in. (40.6-cm) tail.
Left Side of Tree
With RS facing, join yarn with sl st at last unworked sc of 3rd row.
- 1st row: Ch 6. Working in back of chain, 1 sc in 2nd ch from hook and each of next 4 ch. 1 sc in each of next 3 sc. Sl st to corresponding sc of 4th row of Right Side Of Tree. Turn.
- 2nd row: Ch 1. 1 sc in each of next 6 sc. Sc2tog. Turn. 7 sts.
- 3rd row: Ch 1. Sc2tog. 1 sc in each of next 5 sc. Sl st to corresponding sc of 6th row of Right Side Of Tree. Turn. 6 sts.
- 4th row: Ch 1. 1 sc in each of next 4 sc. Sc2tog. Turn. 5 sts.
- 5th row: Ch 1. Sc2tog. 1 sc in each of next 3 sc. Sl st to corresponding sc of 8th row of Right Side Of Tree. Turn. 4 sts.
- 6th row: Ch 1. 1 sc in each of next 4 sts. Turn.
- 7th row: Ch 4. 1 sc in 2nd ch from hook and each of next 2 ch. 1 sc in each of next 4 sc. Sl st to corresponding sc of 10th row of Right Side Of Tree. Turn. 7 sc.
- 8th row: Ch 1. 1 sc in each of next 5 sc. Sc2tog. Turn. 6 sts.
- 9th row: Ch 1. Sc2tog. 1 sc in each of next 4 sc. Sl st to corresponding sc of 12th row of Right Side Of Tree. Turn. 5 sts.
- 10th row: Ch 1. 1 sc in each of next 3 sc. Sc2tog. Turn. 4 sts.
- 11th row: Ch 1. Sc2tog. 1 sc in each of next 2 sc. Sl st to corresponding sc of 14th row of Right Side Of Tree. Turn. 3 sts.
- 12th row: Ch 1. 1 sc in each of next 3 sc. Turn.
- 13th row: Ch 3. 1 sc in 2nd ch from hook and next ch. 1 sc in each of next 3 sc. Sl st to corresponding sc of 16th row of Right Side Of Tree. Turn. 5 sc.
- 14th row: Ch 1. 1 sc in each of next 3 sc. Sc2tog. Turn. 4 sts.
- 15th row: Ch 1. Sc2tog. 1 sc in each of next 2 sc. Sl st to corresponding sc of 18th row of Right Side Of Tree. Turn. 3 sts.
- 16th row: Ch 1. 1 sc in next sc. Sc2tog. Turn. 2 sts.
- 17th row: Ch 1. Sc2tog. Sl st to top of Right Side Of Tree. Fasten off.
Granny-Square Heart
Magic Loop Setup and Rounds
- 1st rnd: Ch 3. 3 dc in magic loop. (Ch 2. 4 dc) 3 times in magic loop. Ch 2. Join. Pull tail to tighten, closing center hole.
- 2nd rnd: Sl st through back loop only in each dc to corner ch-2 sp. Ch 3. (3 dc. Ch 2. 4 dc) in same sp as last sl st. [(Ch 2. 4 dc) twice in next ch-2 sp] 3 times. Ch 2. Join.
- 3rd rnd: Ch 1. 1 sc in same sp as sl st. 1 sc in each of next 3 dc. 3 sc in next ch-2 sp. 1 sc in each of next 4 dc. 2 sc in next ch-2 sp. 1 sc in each of next 4 dc. Sl st in next ch-2 sp. (Skip next 4 dc. 12 tr in next ch-2 sp. Skip next 4 dc. Sl st in next ch-2 sp) twice. 1 sc in each of next 4 dc. 2 sc in next ch-2 sp. Join with sl st to first sc. Fasten off.
Gnome
Beard
With MC, make Magic Loop.
- 1st rnd: Ch 3. 3 dc in magic loop. (Ch 2. 4 dc) 3 times in magic loop. Ch 2. Join. Pull tail to tighten, closing center hole.
- 2nd rnd: Sl st through back loop only in each dc to corner ch-2 sp. Ch 3. 3 dc in same sp as last sl st. Skip next 4 dc. 12 tr in next ch-2 sp. Skip next 4 dc. 4 dc in next ch-2 sp. Join A.
Do not fasten off.
Hat Worked in Rows
- 1st row: With A, ch 10. Skip next (4 dc, ch-2, 4 dc). Join with sl st to first dc of 2nd rnd. Turn. Cont working in rows.
- 2nd row: Ch 2. 15 dc in ch-10 sp. Join B. Break A. Turn. 15 dc.
- 3rd row: With B, ch 2. Dc2tog. 1 dc in each of next 11 dc. Dc2tog. Join A. Break B. Turn. 13 sts.
- 4th row: With A, ch 2. Dc2tog. 1 dc in each of next 9 dc. Dc2tog. Join B. Break A. Turn. 11 sts.
- 5th row: With B, ch 2. Dc2tog. 1 dc in each of next 7 dc. Dc2tog. Join A. Break B. Turn. 9 sts.
- 6th row: With A, ch 2. Dc2tog. 1 dc in each of next 5 dc. Dc2tog. Join B. Break A. Turn. 7 sts.
- 7th row: With B, ch 2. Dc2tog. 1 dc in each of next 3 dc. Dc2tog. Join A. Break B. Turn. 5 sts.
- 8th row: With A, ch 2. Skip first st. Dc3tog. Ch 2. Sl st to top of last st. Fasten off.
Nose
With C, make Magic Loop.
- 1st rnd: Ch 1. 10 sc in magic loop. Join with sl st to first sc. Fasten off, leaving a generous tail to sew nose on and pull through loop. Center nose below hat on top of the two 4-dc in 1st rnd of Granny Square. Stitch into place. Weave in ends.
Pom-Pom
With Soft White, make Magic Loop.
- 1st rnd: Ch 3. 11 dc in magic loop. Join with sl st to top of ch-3. Fasten off, leaving a generous tail to sew pom-pom on and pull through loop. Stitch to tip of hat, weave in ends.
Snowflake
Setup and Round 1
With Soft White, make Magic Loop.
- 1st rnd: Ch 1. 12 sc in magic loop. Join with sl st to first sc. 12 sc.
Round 2
- 2nd rnd: Ch 5. Skip first 2 sc. Sl st in next sc.
(Ch 5. Skip next sc. Sl st in next sc) 5 times.
Ch 5. Skip last sc. Join with sl st to first st of 1st rnd. 6 ch-5 sps.
Round 3
- 3rd rnd: (Sl st. Ch 1. 2 sc. Ch 3. 1 sc. Ch 5. 1 sc. Ch 3. 2 sc) all in first ch-5 sp.
(2 sc. Ch 3. 1 sc. Ch 5. 1 sc. Ch 3. 2 sc) all in next ch-5 sp. Rep from * around. Join with sl st to first sc. Fasten off. Weave in ends.
Finished Project Inspiration
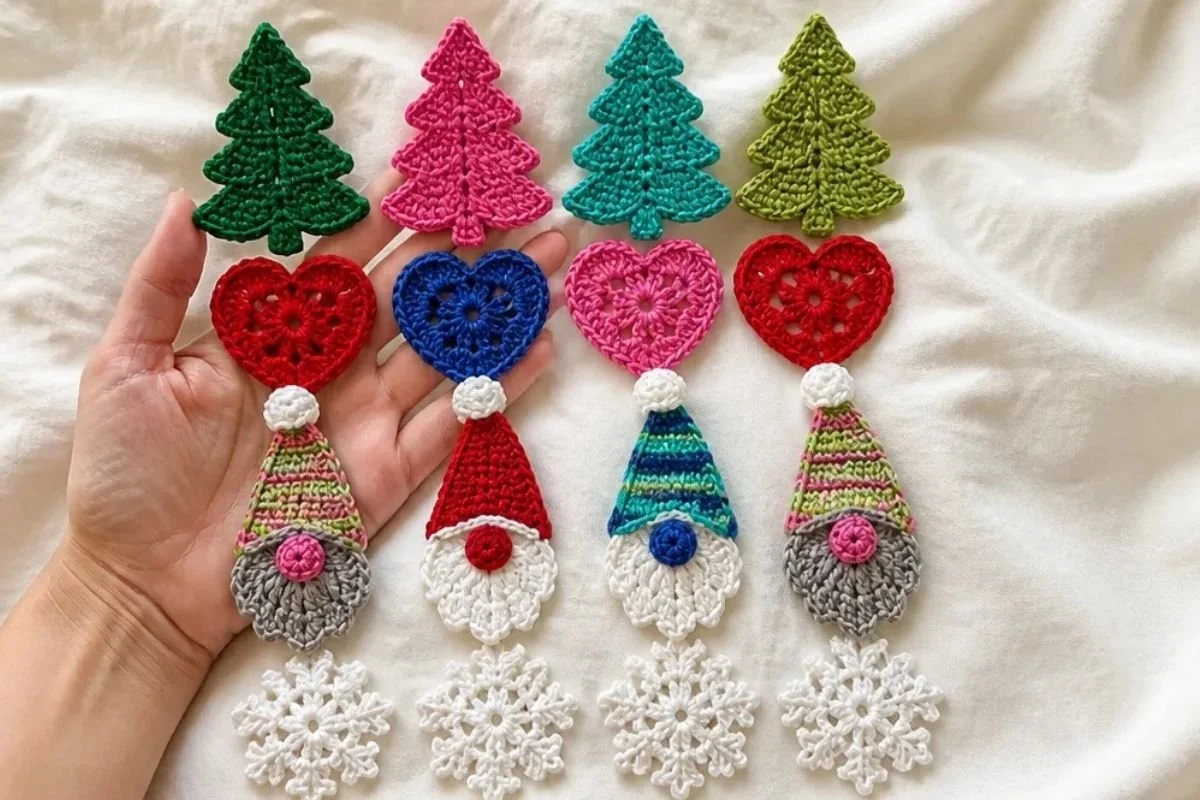
- Gift wrapping: Sew or attach a tree, heart, snowflake, or gnome to kraft paper, ribbon, or a fabric gift bag.
- Holiday cards: Use a single flat applique as a handmade card embellishment.
- Seasonal garland: Arrange several motifs along twine or ribbon, alternating colors and shapes.
- Tree ornaments: Add a hanging loop to a finished motif and display it on a Christmas tree.
- Table decorations: Place appliques around a centerpiece, napkin, or place setting.
- Coordinated displays: Combine these motifs with other seasonal crochet pieces, such as patterns from these all-in-one crochet bouquet patterns, for a fuller handmade arrangement.
Caring for Your Crochet Project
Dust the finished appliques gently with a soft, dry cloth or a clean, soft brush. Because the pieces include small details such as the gnome’s nose and pom-pom, handle them carefully rather than pulling on individual components.
For a small mark, use cautious spot cleaning with minimal moisture and allow the applique to air-dry completely. Avoid excessive heat, which may affect the yarn’s shape. Store the motifs flat in a clean, dry container, separated from items that could snag the stitches. If a piece becomes slightly distorted, reshape it gently with your fingers and let it rest flat.
Tips for Better Results
- Count after every shaping row. The tree changes stitch counts frequently, so compare your work with the stated count before turning.
- Mark the right side. A small removable marker can help you identify the RS when joining the tree’s left side.
- Work back-loop-only slip stitches carefully. In the heart and gnome beard, insert the hook only through the back loop as directed.
- Keep magic loops adjustable. Do not tighten the center completely until the required stitches have been worked.
- Watch color changes in the gnome hat. Join and break A and B exactly where specified to keep the stripes in sequence.
- Shape the snowflake points evenly. Use the same tension in each ch-3 and ch-5 section so the six points spread consistently.
- Secure the gnome details firmly. Use the generous tails to stitch the nose and pom-pom securely, then weave in the ends.
- Check the tree tail length. The 16-in. (40.6-cm) tail is intentionally left for finishing, so do not trim it early.
Color and Styling Variations
The approved pattern already allows several color choices. Make the tree in Jade, Shocking Pink, or Spring Green; the heart in Cherry Red, Royal, or Shocking Pink; and the snowflake in Soft White.
For the gnome, choose a soft white or gray beard, then make a striped hat with Jade or Spring Green as Contrast A and Shocking Pink or Royal as Contrast B. A Cherry Red solid hat is another approved option. The nose can be Cherry Red, Shocking Pink, or Caffé Latte.
Optional styling ideas include:
- Use one color family, such as pink, red, and white, for a coordinated display.
- Combine green trees with red hearts for a traditional palette.
- Make several snowflakes in Soft White for a light garland.
- Alternate gnomes and snowflakes on a holiday table runner.
- Attach contrasting appliques to dark fabric so the shapes stand out.
If you substitute yarn or change the hook size, your tension, texture, yarn requirements, and finished dimensions may change. Treat those adjustments as optional modifications rather than changes to the approved instructions.
Frequently Asked Questions
Is this pattern suitable for a beginner?
It includes beginner-friendly single crochet, double crochet, slip stitch, and basic shaping, but the tree’s connected sections and the gnome’s color changes require careful counting. Familiarity with a magic loop is also helpful.
How many appliques does the pattern include?
There are four applique designs: a tree, a granny-square heart, a gnome, and a snowflake. Each has its own finished measurement and yarn requirements.
What hook size should I use?
Use a size U.S. H/8 (5 mm) Susan Bates® Silvalume® crochet hook, or the size needed to obtain gauge.
Can I change the colors?
Yes. The pattern specifically provides multiple approved color options for the tree, heart, gnome beard, hat, and nose. You may also create optional color combinations, keeping in mind that a yarn or hook change can affect the finished result.
How do I make the gnome hat striped?
Follow the supplied color sequence: work with A for the first row, join B for the second row, then alternate A and B through the shaping rows as written. Break each color only where the instructions specify.
How is the gnome assembled?
The beard is worked first, the hat is crocheted in rows from the granny-square base, and the nose and pom-pom are made separately. Stitch the nose below the hat on top of the two 4-dc groups from the first round, then stitch the pom-pom to the tip of the hat.
How should I store the finished pieces?
Store them flat in a clean, dry container and protect the small sewn details from snagging. Gentle dusting and careful spot cleaning are preferable to rough handling.
Conclusion
This collection of Christmas crochet appliques brings together bright colors, recognizable holiday shapes, and useful crochet techniques. Make one motif as a quick seasonal accent or create several for coordinated gifts, cards, and decorations. For another festive crochet idea, explore this free crochet Christmas tree and Santa hat pattern alongside your finished appliques.