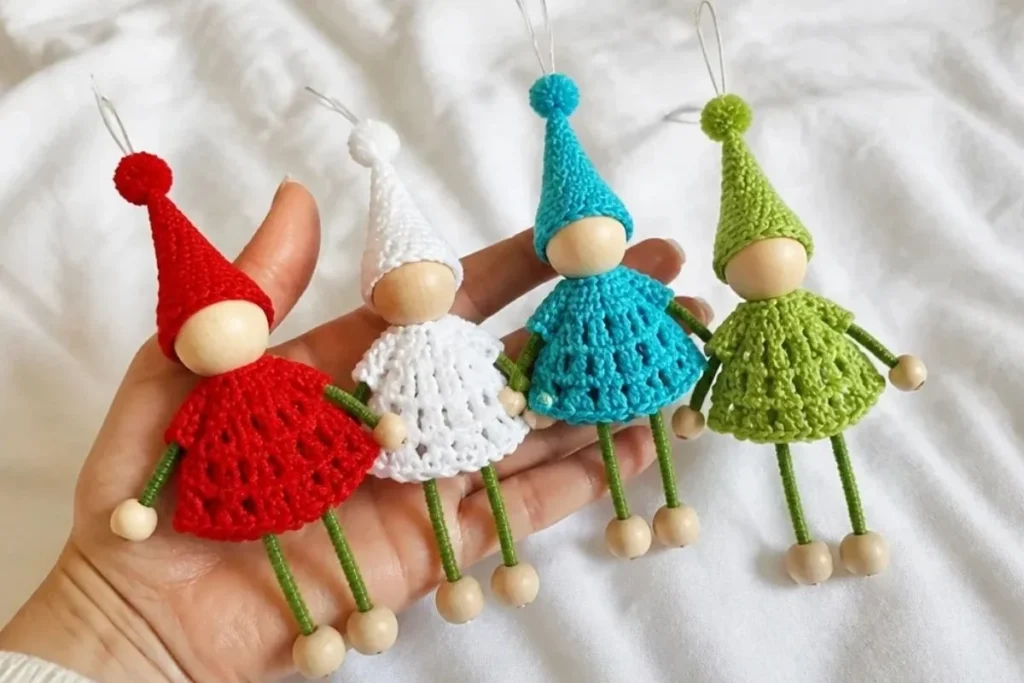
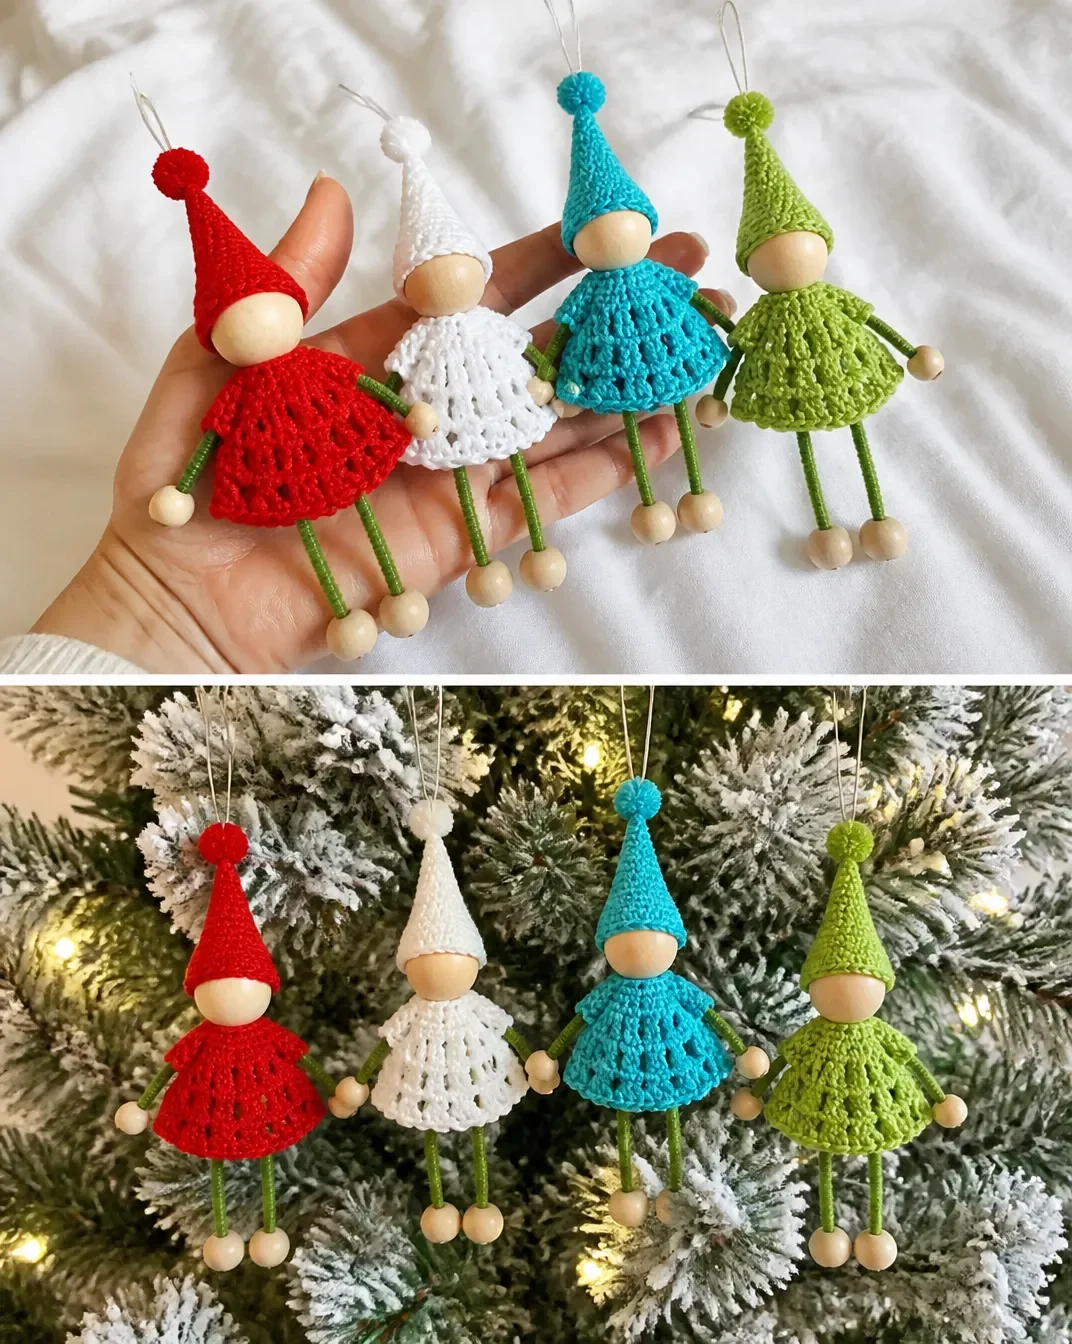
Crochet tree elves bring a playful handmade touch to holiday decorating. This Crochet Tree Elves Pattern by Aunt Lydia creates small, colorful ornaments with a lacy crocheted top, pointed hat, wooden hands and feet, and a pipe-cleaner framework. Make them in white, red, green, or aqua, then hang them on a Christmas tree, gift box, or bottle. If you enjoy making coordinated handmade decorations, you may also like these all-in-one crochet bouquet patterns for additional gift and display ideas.
Why You’ll Love This Crochet Project
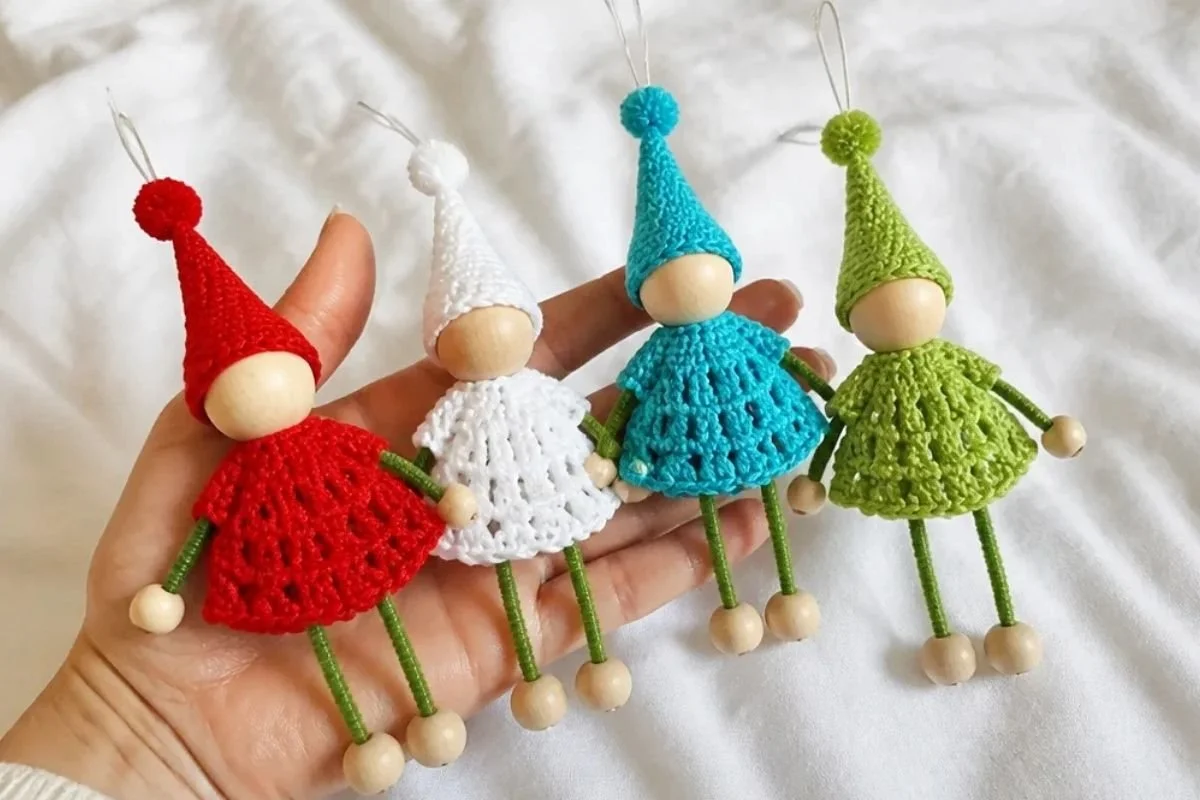
- It uses a small amount of crochet thread. One ball of each listed color can make approximately 10 elves, making this project suitable for creating a coordinated set.
- The construction is distinctive. The crocheted top and pointed hat combine with wooden balls and pipe cleaners to create a dimensional holiday character.
- It offers focused practice. The top works increases in joined rounds, while the hat uses simple single crochet decreases.
- It is useful for decorating and gifting. Finished elves can become tree ornaments or festive accents for bottles and gift boxes.
- It supports color customization. The four suggested thread colors create a cheerful group, while working each elf in one color keeps the design simple.
My Crochet Flower Tip: Prepare and label the pipe-cleaner pieces before assembly so the body, arms, and legs do not get mixed up.
What to Know Before You Begin
Each elf includes two crocheted components: one circular Elf’s Top and one tapered Elf’s Hat. The remaining structure comes from one body pipe cleaner, one arm pipe cleaner, one leg pipe cleaner, one medium wooden head ball, four small wooden balls for the hands and feet, and a small pom-pom.
Crochet the top first with the U.S. B/1 (2.25 mm) hook. It begins with a magic loop and expands through five rounds of double-crochet increases before the final round creates the open V-stitch edge. The hat is crocheted separately with the U.S. 7 (1.5 mm) steel hook, then seamed and finished with a pom-pom.
Assembly follows a specific order: construct the pipe-cleaner body and legs, insert the body through the top, attach the head, add the arms, secure the hands and feet, and finally attach the hat. Work carefully around the small wooden balls and use hot glue only with appropriate adult supervision.
Helpful Abbreviations
- ch: chain
- dc: double crochet
- sc: single crochet
- sc2tog: single crochet two stitches together
- sl st: slip stitch
- PM: place marker
- rep: repeat
- rnd: round
Materials You’ll Need
Crochet Thread
- Aunt Lydia’s® Classic™ Crochet Thread size 10, White: 400 yds / 366 m Elf 1: 1 ball
- Aunt Lydia’s® Classic™ Crochet Thread size 10, Atom Red (2160): 350 yds / 320 m Elf 2: 1 ball
- Aunt Lydia’s® Classic™ Crochet Thread size 10, Wasabi (0397): 350 yds / 320 m Elf 3: 1 ball
- Aunt Lydia’s® Classic™ Crochet Thread size 10, Aqua (0450): 350 yds / 320 m Elf 4: 1 ball
- One ball of each color will make approximately 10 elves.
Hooks and Construction Supplies
- U.S. B/1 (2.25 mm) Susan Bates® Silvalume® crochet hook for Elf’s Top
- U.S. 7 (1.5 mm) Susan Bates® Steelite® crochet hook for Elf’s Hat, or size needed to obtain gauge
- Pipe cleaner: per elf, 12″ [30.5 cm] long
- One medium wooden ball for the head: 2¼” [5.5 cm] diameter
- Four small wooden balls for the hands and feet
- Small purchased pom-pom
- Hot glue gun
If the head ball is significantly different in size, the hat size may need to be adjusted. The designer used an assorted bag of wooden balls, selecting a smaller ball for the hands and a slightly larger one for the feet.
These decorations contain small parts and are not suitable for children under 8 years of age.
Complete Crochet Tutorial
Elf’s Top
With the U.S. B/1 (2.25 mm) crochet hook, make a magic loop.
Rounds
1st rnd: Ch 3. 11 dc in magic loop. Join. PM on top of first dc for beg of rnd. 12 dc.
2nd rnd: Ch 3. 1 dc in same sp as sl st. 2 dc in each dc around. Join. 24 dc.
3rd rnd: Ch 3. 1 dc in same sp as sl st. 1 dc in next dc. *2 dc in next dc. 1 dc in next dc. Rep from * around. Join. 36 dc.
4th rnd: Ch 3. 1 dc in same sp as sl st. 1 dc in each of next 2 dc. *2 dc in next dc. 1 dc in each of next 2 dc. Rep from * around. Join. 48 dc.
5th rnd: Ch 3. 1 dc in same sp as sl st. 1 dc in each of next 3 dc. *2 dc in next dc. 1 dc in each of next 3 dc. Rep from * around. Join. 60 dc.
6th rnd: Ch 5, which counts as ch 2 and 1 dc. 1 dc in same sp as sl st. *Skip next dc. (1 dc. Ch 2. 1 dc) in next dc. Rep from * around. Skip last dc. Join with sl st to 3rd ch of ch-5. Fasten off.
The final round forms the open V-stitch edge used later when the arms are inserted.
Elf’s Hat
With the U.S. 7 (1.5 mm) crochet hook, ch 23.
Rows
1st row: 1 sc in 2nd ch from hook and each ch to end of chain. Turn. 22 sc.
2nd row: Ch 1. Sc2tog. 1 sc in each sc to last 2 sts. Sc2tog. Turn. 20 sts.
Rep last row until 4 sts rem.
Next row: Ch 1. (Sc2tog) twice. Turn.
Next row: Ch 1. Sc2tog. Fasten off. Weave in ends.
Assembly and Finishing
Cut the pipe cleaner as follows:
- 3″ [7.5 cm] for the body
- 4″ [10 cm] for the arms
- 5″ [12.5 cm] for the legs
- Fold the leg pipe cleaner in half.
- Fold up the lower end of the body pipe cleaner approximately ½” [3 mm] to form a “U.”
- Place the legs in the “U” and twist closed.
- Insert the top of the body through the hole in the center of Elf’s Top and push Elf’s Top down approximately 1½” [4 cm].
- Place the head wooden ball on top of the body pipe cleaner. Twist the body pipe cleaner end at the top of the wooden ball in a knot. Make sure it does not pull back through the hole.
- Fold the arm pipe cleaner in half and wrap it around the body pipe cleaner approximately ½” [3 mm] below Elf’s Top.
- Slide the feet wooden balls onto the leg pipe cleaner and secure the end. Repeat for the second leg.
- Insert the arm through the V-stitch edge of Elf’s Top and attach a hand wooden ball to the arm pipe cleaner. Secure the end. Repeat for the second arm.
- Sew the back hat seam. Attach the pom-pom to the tip of the hat.
- Glue the hat to the head wooden ball, keeping the seam at the back.
- Insert an ornament hook through 2 sts at the top of the hat to hang the Tree Elf on a Christmas tree, bottle, or gift box.
Handmade Gift and Decoration Ideas
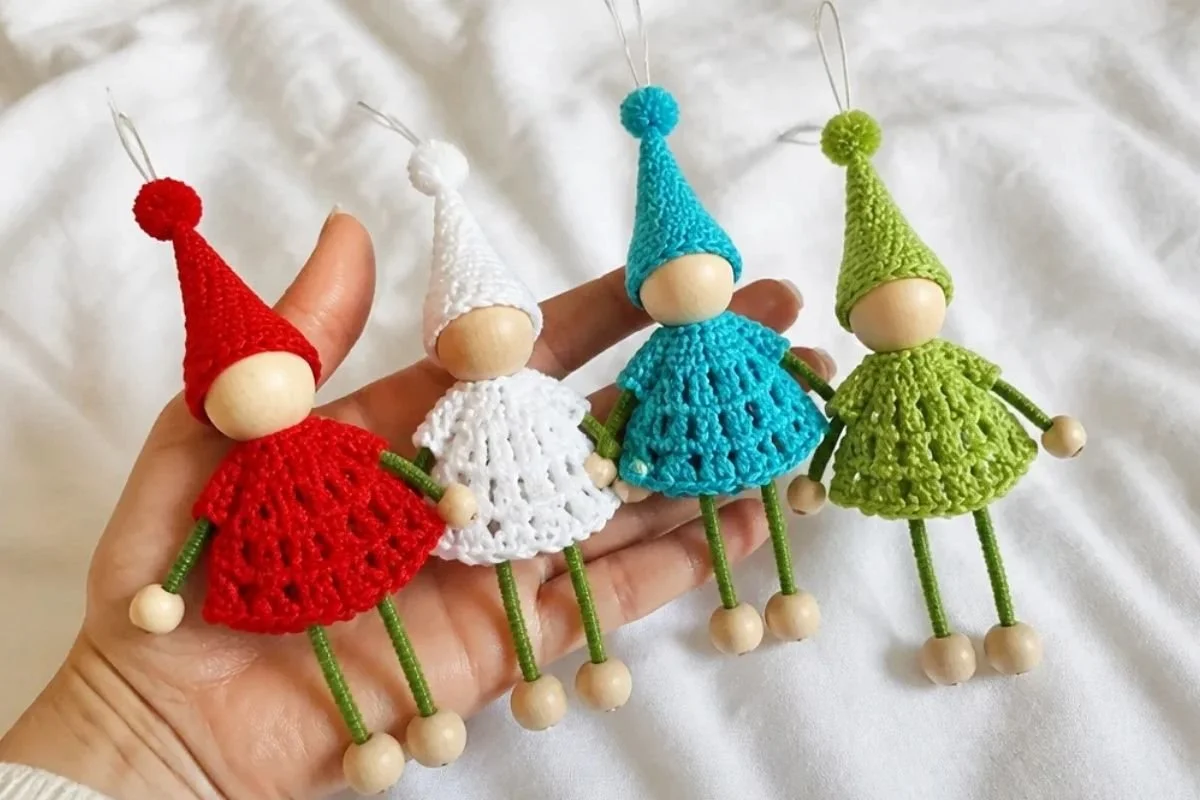
- Create a coordinated tree display: Make elves in White, Atom Red, Wasabi, and Aqua for a colorful collection of matching ornaments.
- Decorate wrapped gifts: Attach an elf to a gift box with ribbon, removing the ornament hook if a flat presentation is preferred.
- Add one to a bottle: The pattern specifically allows the finished elf to hang on a bottle, making it a cheerful holiday hostess accent.
- Use them as place-setting decorations: Place an elf beside each napkin or table setting, keeping the small parts away from young children.
- Build a seasonal character group: Make several elves with different thread colors and arrange them together on a mantel or tabletop.
- Pair them with other handmade décor: A small crochet accent such as this crochet rose for wine glasses can complement a handmade holiday gift presentation.
Caring for Your Crochet Project
These elves combine crochet thread with wooden balls, pipe cleaners, a pom-pom, and hot glue, so they should be handled as decorative items rather than washable toys.
- Dust the crocheted surfaces gently with a soft, dry cloth or a clean, soft brush.
- For a small mark, use careful spot cleaning with minimal moisture and avoid saturating the thread or wooden parts.
- Do not machine wash, soak, or tumble dry the finished elf.
- Keep the decoration away from excessive heat, which may affect the hot glue, wooden balls, or pom-pom.
- Store elves in a dry container with enough space to prevent the hats and V-stitch edges from being crushed.
- Remove ornament hooks before long-term storage if they could snag the thread or other decorations.
Tips for Better Results
- Keep track of the beginning of each round. Place the marker on top of the first double crochet as instructed so the increases remain easy to follow.
- Count after every increase round. The top should have 12 dc after the first round, then 24, 36, 48, and 60 dc.
- Make the magic loop firm but adjustable. Tighten it enough to close the center neatly without distorting the first round.
- Use the smaller hook for the hat. The U.S. 7 (1.5 mm) steel hook creates the compact fabric needed for the tapered hat.
- Do not skip the hat decreases. The repeated sc2tog shaping narrows the piece toward its point.
- Check the head-ball fit before gluing. If the wooden head is significantly different from the stated size, the hat may need adjustment.
- Secure pipe-cleaner ends carefully. Twist or bend exposed ends so they remain attached to the wooden balls and do not protrude sharply.
- Keep the hat seam at the back. This gives the elf a cleaner front view when it is hanging on a tree or gift.
Color and Styling Variations
The approved pattern uses one color for each elf, but the color arrangement can be customized without changing the construction.
- Make a classic holiday set with Atom Red and White.
- Use Wasabi and Aqua for a cooler winter palette.
- Crochet a full group in one color for a coordinated tree.
- Alternate the top and hat colors for a striped visual effect, provided the color change is treated as an optional adaptation rather than part of the approved instructions.
- Choose pom-poms that coordinate with the thread colors.
- Use different color combinations for elves intended for bottles, gift boxes, and tree branches.
Changing the thread type or hook size may affect the fabric, component dimensions, hat fit, and amount of thread required. If substituting materials, compare the resulting top and hat with the wooden balls before completing assembly.
Frequently Asked Questions
How many elves can one ball of thread make?
The pattern notes that one ball of each listed color will make approximately 10 elves. Actual usage can vary with tension and finishing.
Which hook is used for the Elf’s Top?
Use the U.S. B/1 (2.25 mm) Susan Bates® Silvalume® crochet hook for Elf’s Top.
Which hook is used for the Elf’s Hat?
Use the U.S. 7 (1.5 mm) Susan Bates® Steelite® crochet hook for Elf’s Hat, or the size needed to obtain gauge.
Can I use different colors?
Yes. The listed White, Atom Red, Wasabi, and Aqua colors are suitable for separate elves, and other color combinations can be used as optional styling changes. Different thread can affect the finished fit and appearance.
What wooden balls are needed?
Use one medium wooden ball measuring 2¼” [5.5 cm] in diameter for the head and four small wooden balls for the hands and feet. The designer notes that a smaller ball was used for the hands and a slightly larger one for the feet.
How are the arms and legs attached?
The body, arm, and leg pipe cleaners form the internal support. The feet are secured to the leg pipe cleaner, and the arms pass through the V-stitch edge of Elf’s Top before the hand balls are attached.
How do I hang the finished elf?
Insert an ornament hook through 2 sts at the top of the hat. The elf can hang on a Christmas tree, bottle, or gift box.
Is this decoration suitable for young children?
No. The finished decorations contain small parts and are not suitable for children under 8 years of age.
Conclusion
This Crochet Tree Elves Pattern by Aunt Lydia combines simple thread crochet with wooden accents and a pipe-cleaner structure to create charming seasonal decorations. Make a single elf for a gift package or a colorful collection for the Christmas tree, then personalize the display with your preferred palette and pom-poms. For more classic crochet-thread décor inspiration, browse these crochet thread décor patterns.