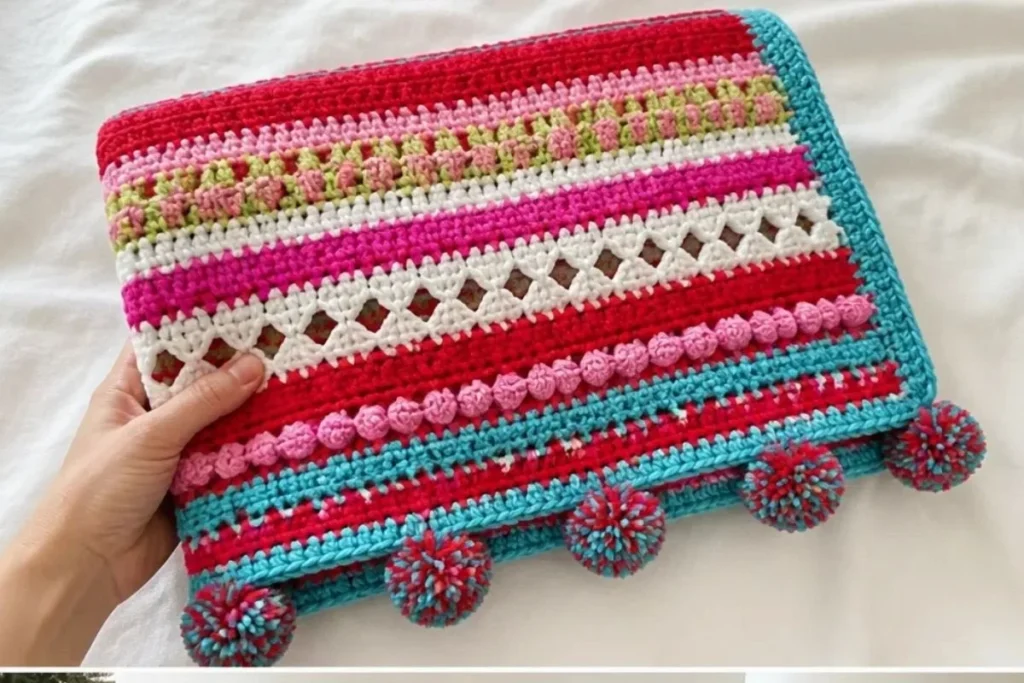
The Christmas Morning Crochet Striped Throw Pattern creates a cheerful, generously striped blanket with bobbles, openwork, V-stitches, and colorful pom-poms. Cherry red and turquoise provide a festive foundation, while green, pink, soft white, and shocking pink add playful contrast. This project is ideal for crocheters who enjoy structured row repeats and want a handmade throw for seasonal decorating, cozy gifting, or everyday use. For more coordinated handmade display ideas, explore these all-in-one crochet bouquet patterns.
Why You’ll Love This Crochet Project
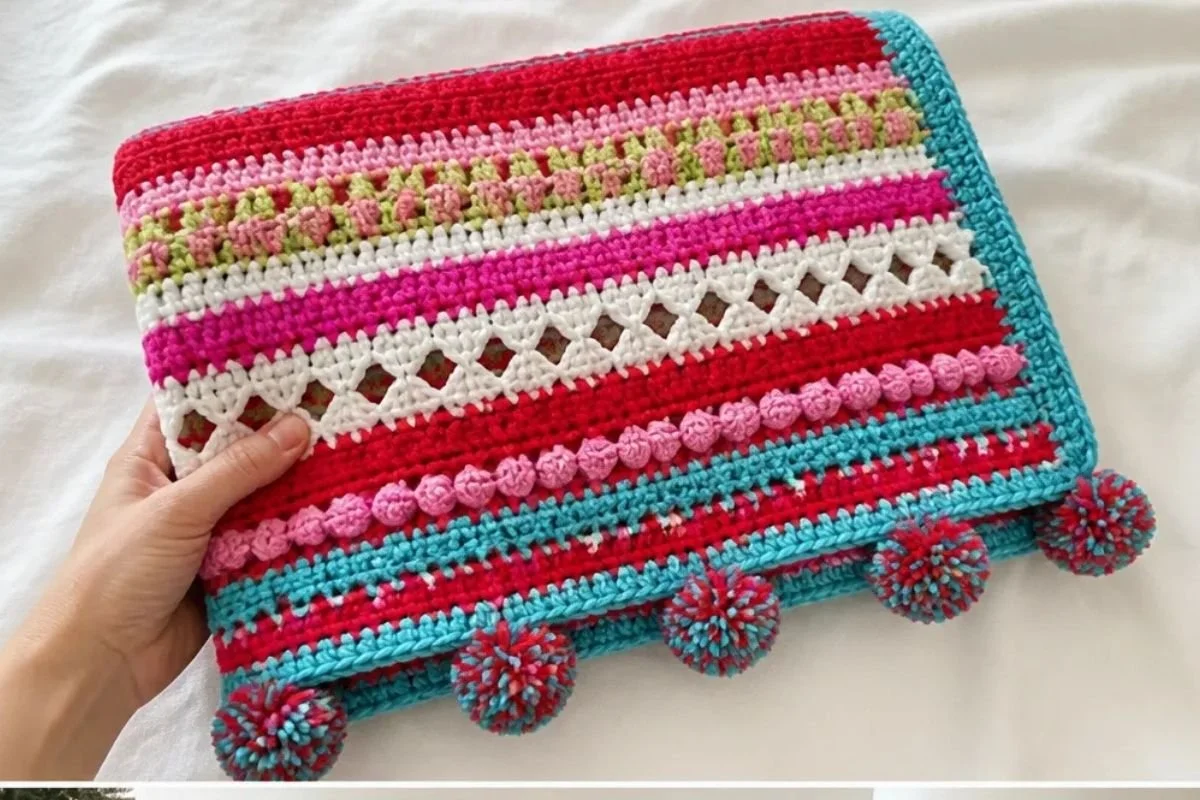
This throw combines several recognizable crochet textures without requiring separate motifs or complicated assembly. You may also find Crochet Rose For Wine Glasses Easy Flower Pattern useful.
- Festive colorwork: Six coordinated shades create bold horizontal sections that suit Christmas and winter decorating.
- Texture practice: You will work double crochet rows, open chain spaces, V-stitches, and bobbles.
- Clear repeat structure: The first 41 rows establish the main sequence, which is repeated to build the body.
- Gift-ready design: The finished throw makes a thoughtful handmade gift for a family member, host, or new homeowner.
- Decorative finishing: A four-round border and fourteen two-color pom-poms give the blanket a polished seasonal look.
My Crochet Flower Tip: Place each yarn color in a separate bag or basket before beginning, and label the colors A through F. This makes the repeated color sequence much easier to follow.
Before You Start Crocheting
The project is made as one rectangular throw, worked from the foundation chain upward. The body begins with 140 single crochet stitches and develops through alternating solid, openwork, V-stitch, and bobble sections. After the body is complete, a four-round border is added, followed by fourteen pom-poms sewn to the short edges.
The pattern uses US crochet terminology. The 5 mm (US H-8) hook is used throughout, and the supplied yarn is RED HEART® Super Saver® (Art. 300). The pattern does not provide a finished measurement or gauge, so maintain consistent tension and use the stated materials for the intended fabric.
Useful abbreviations include:
- ch: chain
- sc: single crochet
- dc: double crochet
- sl st: slip stitch
- st: stitch
- V-st: V-stitch
- RS: right side
A V-stitch is written into the pattern as V-st; follow the supplied instructions exactly when working those rows. The bobble construction is referenced by name in Row 19 and its repeat, so use the bobble method you normally use consistently throughout.
Materials You’ll Need
- RED HEART® Super Saver® (Art. 300)
- 4 skeins 319 Cherry Red (Color A)
- 2 skeins 512 Turqua (Color B)
- 1 skein 672 Spring Green (Color C)
- 1 skein 706 Perfect Pink (Color D)
- 1 skein 316 Soft White (Color E)
- 1 skein 718 Shocking Pink (Color F)
- Susan Bates® Crochet Hook: 5 mm (US H-8)
- Susan Bates® Easy Pom Pon Maker: 1¾” (4.5 cm) diameter
- Yarn needle
Complete Crochet Tutorial
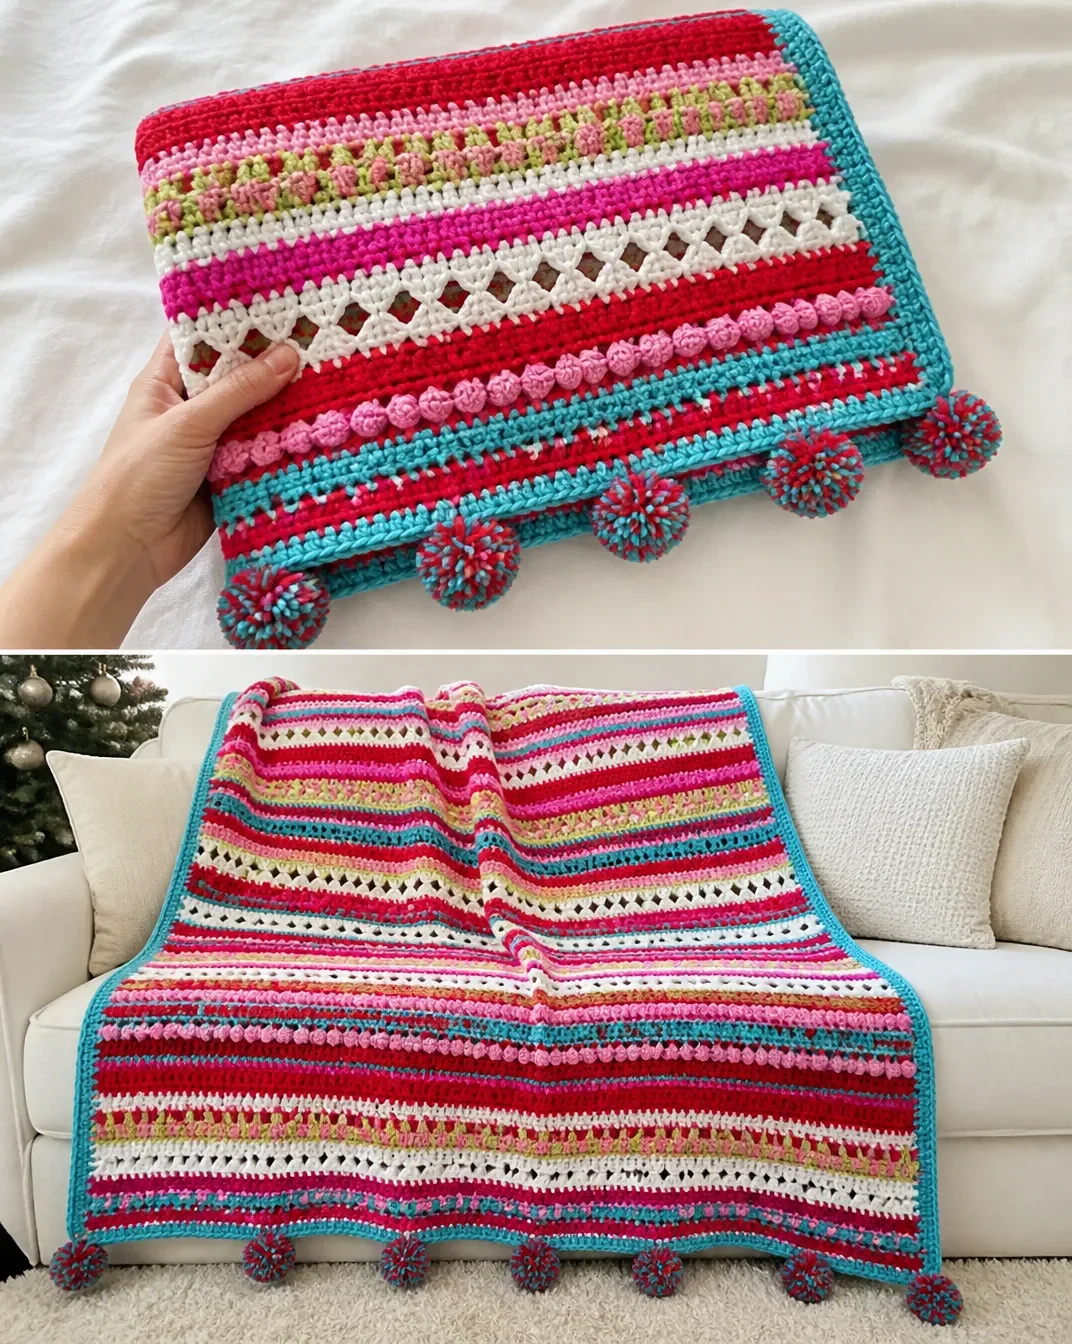
Foundation and Body
With B, ch 141.
Row 1 (right side): Sc in second ch from hook and each ch across, turn – 140 sc.
Row 2: With A, ch 3 (counts as 1 dc here and throughout), dc in each sc across, turn.
Row 3: Ch 3, dc in each dc across, turn.
Row 4: With C, ch 1, sc in first dc, [ch 1, skip next dc, sc in next dc] 69 times, sc in last dc, turn.
Row 5: With D, ch 1, sc in first sc, ch 1, skip next sc, [sc in next ch-1 space, ch 1, skip next sc] 68 times, sc in last ch-1 space and in last sc, turn.
Row 6: With C, repeat Row 5.
Row 7: With D, repeat Row 5.
Row 8: With C, repeat Row 5.
Row 9: With A, ch 3, dc in each sc and ch-1 space across, turn – 140 dc.
Row 10: Ch 3, dc in each dc across, turn.
Row 11: With E, ch 1, sc in each dc across, turn.
Row 12: Ch 3, skip first 2 sc, V-st in next sc, skip next sc, dc in next sc, [skip next sc, V-st in next sc, skip next sc, dc in next sc] 33 times, skip next sc, dc in next sc, ch 1, dc in last sc, turn.
Row 13: Ch 3, dc in next ch-1 space, [skip next dc, V-st in next dc, dc in next ch-1 space] 34 times, dc in each of last 2 dc, turn.
Row 14: Ch 1, sc in each dc and ch-1 space across, turn – 140 sc.
Row 15: With A, ch 3, dc in each sc across, turn.
Row 16: Ch 3, dc in each dc across, turn.
Row 17: With F, ch 1, sc in each dc across, turn.
Row 18: Ch 1, sc in each sc across, turn.
Row 19: With B, ch 1, sc in each of first 2 sc, [bobble in next sc, sc in each of next 4 sc] 27 times, bobble in next sc, sc in each of last 2 sc, turn.
Row 20: With F, ch 1, sc in each sc and bobble across, turn – 140 sc.
Row 21: Ch 1, sc in each sc across, turn.
Rows 22 and 23: With A, repeat Rows 2 and 3.
Row 24: With D, repeat Row 4.
Row 25: With C, repeat Row 5.
Row 26: With D, repeat Row 5.
Row 27: With C, repeat Row 5.
Row 28: With D, repeat Row 5.
Rows 29 and 30: With A, repeat Rows 9 and 10.
Rows 31–34: With E, repeat Rows 11–14.
Rows 35 and 36: With A, repeat Rows 15 and 16.
Rows 37 and 38: With B, repeat Rows 17 and 18.
Row 39: With F, repeat Row 19.
Rows 40 and 41: With B, repeat Rows 20 and 21.
Rows 42–136: Repeat Rows 2–41 twice, then repeat Rows 2–16 only once more.
Row 137: With B, ch 1, sc in each dc across, do not turn – 140 sc.
Border
Rotate throw so you are ready to work down left side edge.
Round 1 (right side): With A, ch 3, dc last sc made, work 5 dc in each color E section and 4 dc in each other color section, working in unused loop of foundation ch, 3 dc in first st, dc in each of next 138 sts, 3 dc in last st, work second side edge same as first side edge, 3 dc in first sc of Row 137, dc in each of next 138 sc, dc in same st as first dc of round, join with slip st to top of beginning ch 3.
Rounds 2 and 3: Ch 3, dc in same st as joining slip st, [dc in each dc corner dc, 3 dc in corner dc] 3 times, dc in each dc to end, dc in same st as first dc of round, join with slip st to top of beginning ch-3.
Round 4: With B, ch 1, 3 sc in same st as joining slip st, [sc in each dc to corner dc, 3 sc in corner dc] 3 times, sc in each dc to end, join with slip st in first sc. Fasten off.
Pom-Poms and Final Steps
Make 14 pom pons with A and B held together.
Sew 7 each, evenly spaced, to short edges of Throw.
Weave in all loose ends.
Ways to Display Your Finished Crochet
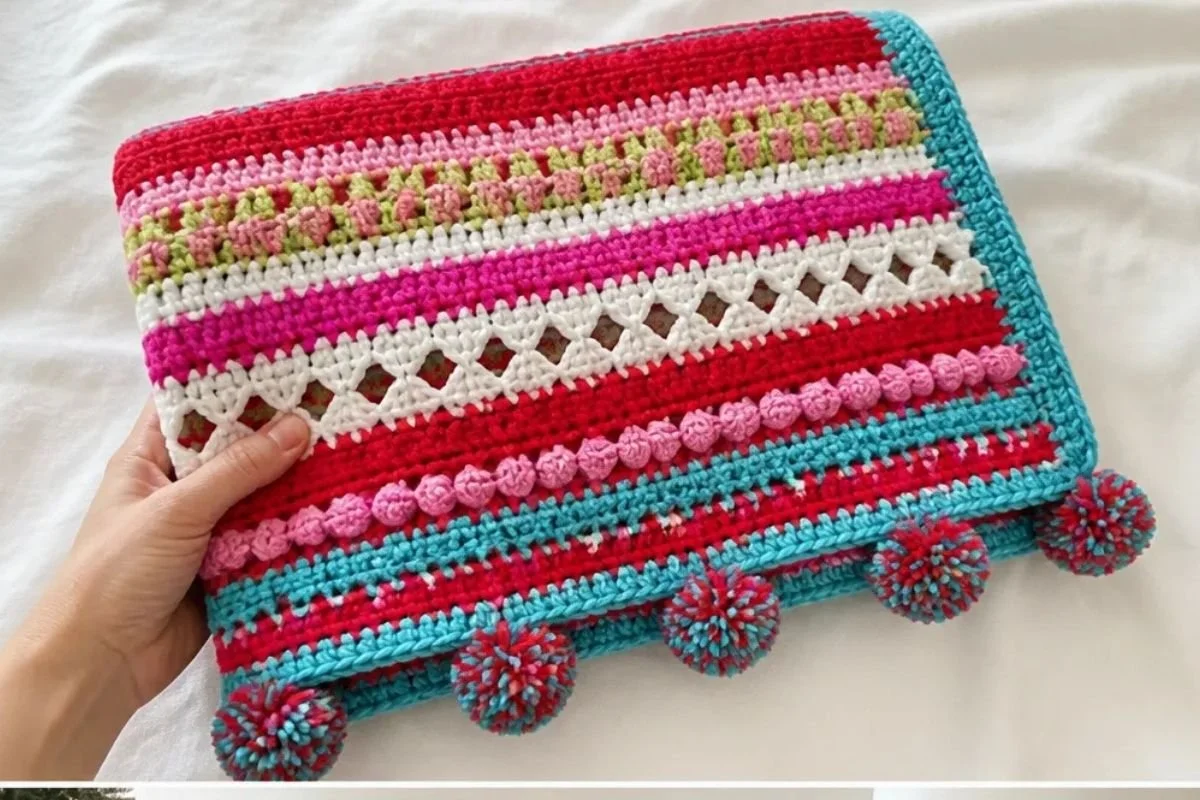
- Fold the throw over the arm of a sofa or reading chair so the color bands and bobble sections remain visible.
- Drape it across the foot of a bed for a festive seasonal accent.
- Place it in a basket near a fireplace or entryway as both decoration and an easy extra layer.
- Give it as a handmade Christmas gift, especially when paired with coordinating wrapped presents.
- Use it as a holiday table-side or porch seating throw where the pom-pom edges can be displayed.
- Coordinate it with other handmade décor, such as a small crochet floral arrangement or a seasonal centerpiece.
Caring for Your Crochet Project
Handle the pom-poms gently when moving or folding the throw. They are sewn to the short edges and may become misshapen if pulled.
For routine care, shake the throw outdoors or use gentle surface dusting to remove loose particles. If spot cleaning is necessary, test a small inconspicuous area first and avoid aggressive rubbing around the bobbles and pom-poms. Follow the yarn manufacturer’s care instructions for the RED HEART® Super Saver® yarn.
Store the throw fully dry in a cool, clean place. Fold it rather than hanging it for long periods, since hanging can stretch the fabric. Keep it away from excessive heat, sharp objects, and prolonged direct sunlight, which may affect the bright colors.
Tips for Better Results
- Count the foundation carefully. Chain 141 so Row 1 produces exactly 140 single crochet stitches.
- Track the 140-stitch width. After rows that state 140 stitches, count before beginning the next color section.
- Mark the color sequence. The repeated sections use several color changes, so write the color beside each row in a notebook.
- Keep openwork tension even. Loose or tight chain-1 spaces can change the width of Rows 4–8 and Rows 24–28.
- Check V-stitch placement. Rows 12 and 13 build on skipped stitches and chain-1 spaces; read both rows fully before working them.
- Count the bobbles. Row 19 contains 27 repeated groups, then one additional bobble, with two single crochet stitches at each end.
- Use enough side-edge stitches. In Border Round 1, work 5 dc in each color E section and 4 dc in each other color section as written.
- Shape the corners deliberately. The three-dc corner increases in the border keep the throw lying flat.
- Space pom-poms evenly. Measure visually across each short edge before sewing so the seven pom-poms have balanced spacing.
- Weave ends securely. Work loose ends through several nearby stitches on the wrong side, especially at color-change points.
Creative Ways to Customize Your Project
The approved pattern uses a bright Christmas palette, but the construction can be personalized without changing the stitch sequence.
- Use a softer holiday palette: Replace the bright pink shades with cream, burgundy, or muted green while keeping the color roles organized.
- Create a winter look: Combine soft white, turquoise, silver-gray, and deep blue for a cooler seasonal effect.
- Match home décor: Select six shades that coordinate with your sofa, bedroom, or holiday ornaments.
- Coordinate the pom-poms: Keep the two-color pom-poms for contrast, or use two colors from the body for a more blended finish.
- Change the yarn cautiously: A different yarn may alter gauge, drape, texture, finished dimensions, and yarn requirements. If substituting, make a test swatch and be prepared for the throw to change size.
- Change the hook only as an optional experiment: A larger or smaller hook can affect stitch definition and fabric density, so it may also change the amount of yarn needed.
These are optional styling choices; the complete approved instructions above remain unchanged.
Frequently Asked Questions
Is this Christmas morning crochet throw beginner-friendly?
It is suitable for crocheters comfortable with basic stitches and color changes. The pattern also includes openwork, V-stitches, bobbles, border increases, and pom-pom finishing, so beginners may want to practice each textured stitch separately first.
What yarn and hook are recommended?
The pattern calls for RED HEART® Super Saver® (Art. 300) and a Susan Bates® 5 mm (US H-8) crochet hook. Use the listed color names and quantities when following the approved version.
How many pom-poms are added?
Make 14 pom-poms with Colors A and B held together. Sew 7 evenly spaced pom-poms to each short edge of the throw.
Can I change the colors?
Yes. Color changes are an optional customization, but keep track of the color assigned to each letter because the row instructions refer to Colors A through F. A different palette may change the overall seasonal appearance without changing the stitch pattern.
How is the throw bordered?
Round 1 is worked with Color A around the side edges, foundation edge, and final row. Rounds 2 and 3 continue in double crochet with corner increases, and Round 4 uses Color B for single crochet and corner increases.
Can I use another yarn?
A substitute may work, but it can affect gauge, drape, texture, dimensions, and yarn quantity. A test swatch is recommended before committing to the full throw.
How should I keep the pom-poms looking neat?
Avoid pulling them during washing, folding, or storage. Smooth each pom-pom by hand and reshape it gently after handling.
How should the finished throw be stored?
Store it clean and completely dry, folded in a cool place away from excessive heat and prolonged direct sunlight. Avoid hanging it for extended periods because the fabric may stretch.
Conclusion
The Christmas Morning Crochet Striped Throw Pattern brings together festive stripes, textured stitches, bobbles, a neat border, and cheerful two-color pom-poms. Follow the row sequence carefully, organize the color changes, and finish with even edging and secure ends. For another seasonal crochet project to pair with your handmade décor, see this free Christmas Morning striped throw pattern.