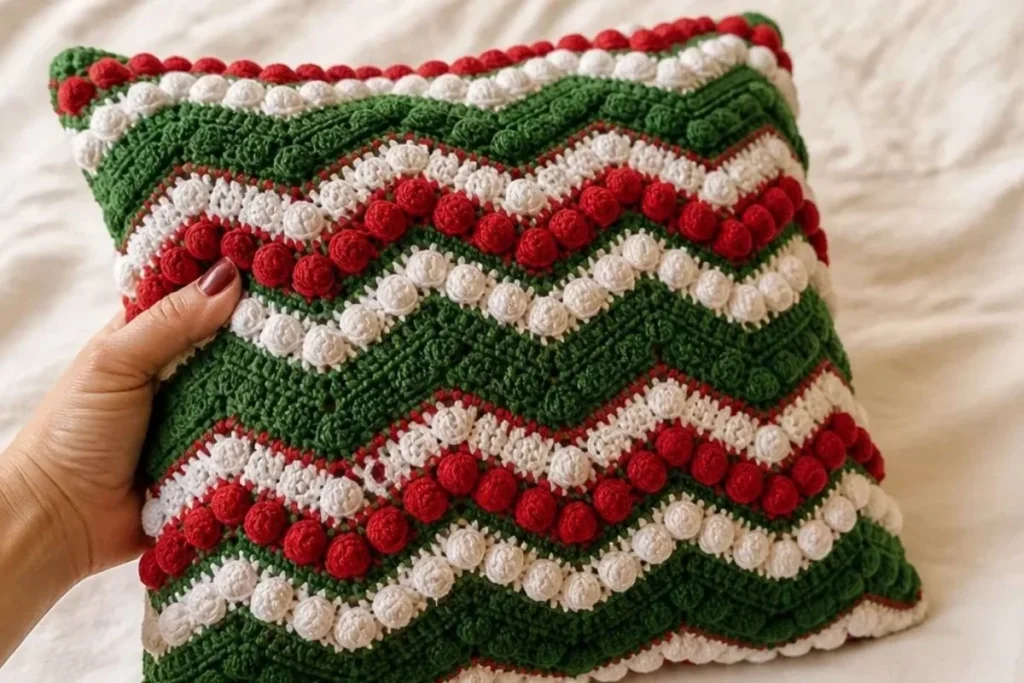
A DIY Crochet Christmas Ripple Pillow Pattern brings classic holiday color and texture to your home with bold ripple stripes, raised popcorn details, and a cozy 18-inch pillow form. This project is useful for seasonal decorating, thoughtful handmade gifts, and festive sofa or chair accents. Crocheters who enjoy rhythmic stitch patterns will appreciate the repeating construction, while anyone planning a coordinated display can also explore these crochet bouquet pattern ideas for an added handmade touch.
Why You’ll Love This Crochet Project
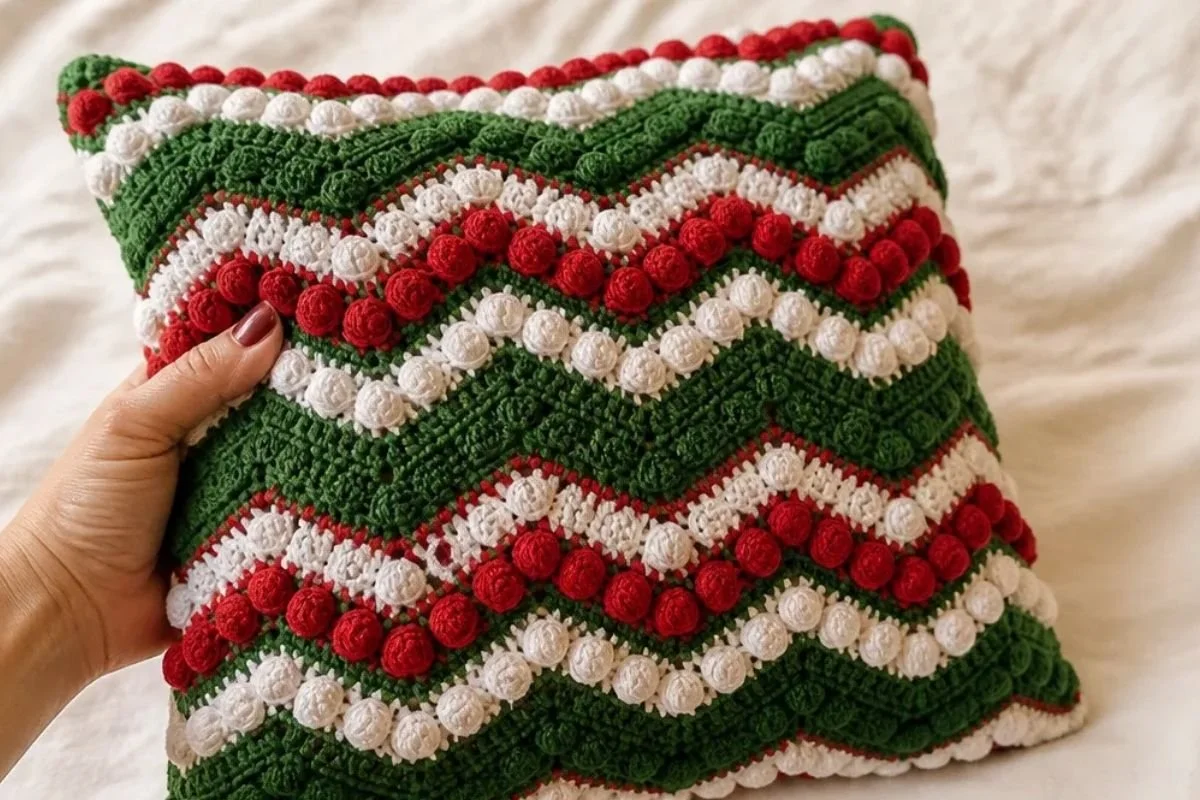
- Festive texture: Ripple shaping creates movement across the cover, while popcorn stitches add dimensional holiday accents.
- Reusable seasonal décor: The finished pillow can be displayed year after year as part of a Christmas decorating collection.
- Structured construction: The pattern uses repeated rows, making it easier to recognize the color and stitch sequence as you work.
- A practical handmade gift: Because the project finishes around two 18-inch pillow forms, it makes a useful gift for a living room, guest room, or reading nook.
- Technique practice: You’ll work increases, skipped stitches, color changes, popcorn stitches, whipstitch seams, and neat finishing.
My Crochet Flower Tip: Keep the three yarn colors in separate bags or bowls while working. This helps prevent the green, red, and white strands from tangling during the color changes.
Before You Start Crocheting
This pattern makes two pillow covers, with one cover required for each 18-inch pillow form. Each cover is crocheted flat in rows, beginning with a ripple foundation and continuing through repeating color and texture sections. After the final row, the cover is folded, seamed, turned right side out, stuffed with a pillow form, and closed.
The pattern uses three colors:
- Color A: Green/Green
- Color B: Red/Red
- Color C: White/Silver
The main ripple section is built with single crochet, skipped stitches, and three single crochets worked into designated stitches. The raised accent sections use popcorn stitches separated by chain-1 spaces. Read each repeat carefully, especially where the center ripple is formed by (popcorn, ch 1, popcorn) or 3 sc in next ch-1 space.
Abbreviations
- ch: chain
- sc: single crochet
- dc: double crochet
- st: stitch
- yo: yarn over
- sl st: slip stitch, when needed for general finishing terminology
Materials You’ll Need
- RED HEART® “Holiday Yarn,” 4 balls 6060 Green/Green = Color A
- RED HEART® “Holiday Yarn,” 1 ball 9090 Red/Red = Color B
- RED HEART® “Holiday Yarn,” 2 balls 0140 White/Silver = Color C
- 6mm [US J-10] crochet hook
- Yarn needle
- Two 18” x 18” pillow forms
Color A is used for most of the ripple fabric and assembly. Color B creates the red popcorn accent row, while Color C forms the white or silver accent section.
Step-by-Step Crochet Instructions
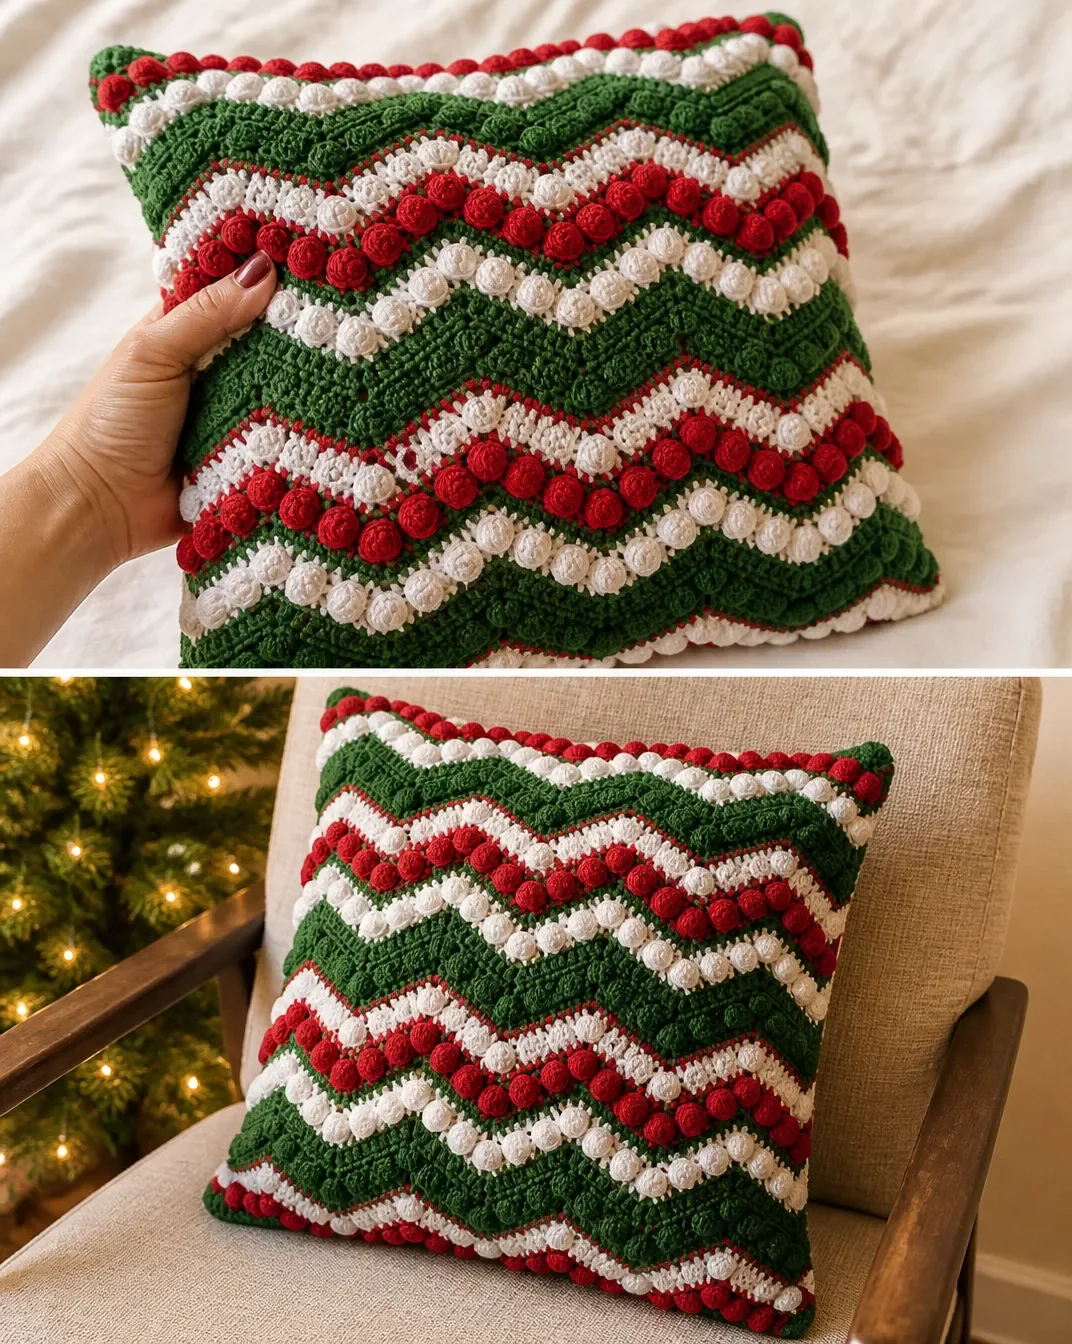
Special Stitch
Popcorn
- Work 3 dc in indicated st.
- Remove hook and insert it from front to back in the top of the first dc.
- Pick up the loop and draw it through.
Color Change Note
To change color, work the last stitch of the row until 2 loops remain on hook, drop the old color, yarn over with the new color, and complete the stitch. Fasten off the old color.
Pillow Cover
Make 2.
Row 1 Wrong Side
With A:
- ch 72
- sc in 2nd ch from hook
- skip next ch
[sc in next 10 ch, 3 sc in next ch, sc in next 10 ch, skip next 2 ch]2 times- sc in next 10 ch
- 3 sc in next ch
- sc in next 10 ch
- skip next ch
- sc in last ch
- turn 3 ripples
Rows 2–5
- Ch 1
- sc in first sc
- skip next sc
[sc in next 10 sc, 3 sc in next sc, sc in next 10 sc, skip next 2 sc]2 times- sc in next 10 sc
- 3 sc in next sc
- sc in next 10 sc
- skip next sc
- sc in last sc
- changing to B at end of Row 5
- turn
Fasten off A.
Row 6
- Ch 3
- skip first 2 sc
* popcorn in next sc, ch 1, [skip next sc, popcorn in next sc, ch 1] 4 times, skip next sc, (popcorn, ch 1, popcorn) in next sc, ch 1, [skip next sc, popcorn in next sc, ch 1] 4 times, skip next sc, popcorn in next sc, skip next 2 sc- repeat from
*2 more times - end at
* - skip next sc
- dc in last sc
- changing to A
- turn
Fasten off B.
Row 7
- Ch 1
- sc in first dc
* [sc in next ch-1 space, sc in next popcorn]5 times- 3 sc in next ch-1 space
[sc in next popcorn, sc in next ch-1 space]5 times- skip next 2 popcorn
- repeat from
*2 times - end at
** - skip next popcorn
- sc in top of beginning ch-3
- turn
Rows 8–11
Repeat Rows 2–5, changing to C at end of Row 11.
Fasten off A.
Row 12
Repeat Row 6, changing to A at the end of row.
Turn.
Fasten off C.
Row 13
Repeat Row 7.
Rows 14–84
Repeat Rows 2–13 five times, then repeat Rows 2–12.
Fasten off C.
Assembly
- Fold the pillow cover in half, with right sides together, bringing the first row up to meet the last row.
- With A, whipstitch the first row to the last row.
- Flatten the pillow so the seam is centered on the back.
- Whipstitch one side seam.
- Turn the pillow cover right side out.
- Insert the pillow form.
- Whipstitch the remaining side seam.
- Weave in ends.
Work the seams evenly so the cover keeps a square shape around the pillow form. When closing the final side, avoid pulling the yarn too tightly, which can cause puckering along the edge.
Finished Project Ideas
- Christmas sofa accents: Place the pillows on a sofa or armchair with solid red, green, or neutral cushions.
- Festive reading corner: Use one pillow on a chair beside a seasonal throw blanket.
- Holiday guest room: Add the finished pillows to a bed or bench for a coordinated Christmas welcome.
- Handmade gift set: Give the pair together as a practical holiday present.
- Seasonal display: Arrange the pillows with wrapped gifts, a small tree, or other handmade decorations.
- Coordinated crochet décor: Pair the ripple pillows with other handmade floral or seasonal pieces; a detailed crochet rose pattern for wine glasses can add a delicate accent to a holiday table.
Caring for Your Crochet Project
- Dust the pillow gently with a soft brush or use a vacuum with a low-suction upholstery attachment.
- For small marks, spot clean carefully with a slightly damp cloth rather than soaking the entire cover.
- Avoid excessive heat, which may affect the yarn’s shape and the pillow form.
- Store the pillow in a cool, dry place when it is out of season.
- Keep it away from rough surfaces that could catch the popcorn stitches.
- Before storing, make sure the cover is completely dry.
- If the cover becomes compressed, reshape it gently around the pillow form instead of pulling on individual stitches.
Tips for Better Results
- Count the foundation chain carefully. Row 1 begins with ch 72, and the skipped chains are part of the ripple structure.
- Mark the center ripple if needed. The section containing
3 sc in next schelps establish the central rise and can make the pattern easier to follow. - Use the color-change method exactly. Complete the final stitch until two loops remain, then finish with the new color for a cleaner transition.
- Keep popcorn stitches consistent. Work all three double crochets with similar tension so the raised details have an even appearance.
- Watch the skip instructions. The ripple depends on skipping the correct stitch or chain; accidentally working into a skipped stitch can flatten the design.
- Check the row sequence before beginning. Rows 2–5, Rows 6–7, and Rows 8–13 each have distinct color and texture functions.
- Secure loose ends as you go if preferred. Although the pattern directs you to weave in ends at the finish, handling some ends earlier can make final finishing less crowded.
- Center the back seam during assembly. Flattening the cover before closing the side seam helps the finished pillow sit neatly.
Color and Styling Variations
The approved pattern uses green, red, and white/silver for a traditional Christmas palette, but the color roles can be adapted as an optional styling choice.
- Replace the red accent with a deeper burgundy for a richer holiday look.
- Use cream or ivory in place of white/silver for a softer farmhouse palette.
- Try forest green with gold-toned yarn if a more elegant seasonal combination is desired.
- Make two covers in the same palette for a coordinated pair, or reverse the dominant and accent colors between them.
- Pair the ripple pillow with solid-color cushions so the popcorn texture remains the focal point.
Changing yarn or hook size is also optional, but it can affect stitch tension, texture, finished dimensions, and yarn requirements. If you substitute yarn, make sure the fabric remains firm enough to support the pillow form and that the hook works comfortably with the replacement yarn.
Frequently Asked Questions
Is this pattern suitable for a beginner?
It can suit a confident beginner who is comfortable with single crochet, double crochet, skipped stitches, color changes, and basic seaming. The popcorn stitch is explained directly in the pattern.
How many pillow covers does the pattern make?
The instructions specify Pillow Cover (make 2), so you will make two covers in total.
What hook size should I use?
Use a 6mm [US J-10] crochet hook as specified.
Which yarn colors are used?
Color A is RED HEART® “Holiday Yarn” 6060 Green/Green, Color B is 9090 Red/Red, and Color C is 0140 White/Silver.
Can I change the colors?
Yes. Color changes are an optional variation, but changing colors may alter the appearance of the ripple and popcorn sections. Keep the color roles organized so you can follow the row instructions accurately.
How are the pillow covers assembled?
Fold each cover in half with right sides together, whipstitch the first row to the last row, center the seam on the back, close one side, turn the cover right side out, insert the pillow form, and whipstitch the remaining side seam.
What pillow forms are required?
The pattern specifies two 18” x 18” pillow forms.
How should I protect the popcorn stitches?
Avoid snagging the raised stitches on jewelry, rough furniture, or storage materials. Gentle dusting and careful spot cleaning help preserve their texture.
Can I use a different yarn?
A substitute may be possible, but yarn changes can affect tension, fabric thickness, texture, dimensions, and the amount of yarn required. The listed yarn and hook provide the approved material specifications for this pattern.
Conclusion
This DIY Crochet Christmas Ripple Pillow Pattern combines rhythmic ripple shaping, colorful holiday stripes, and raised popcorn accents in a useful handmade home accessory. Make the two covers for a coordinated seasonal display, give them as a thoughtful gift, or adapt the color palette for your own décor. For another seasonal pillow option, compare it with this Christmas ripple pillow pattern.