
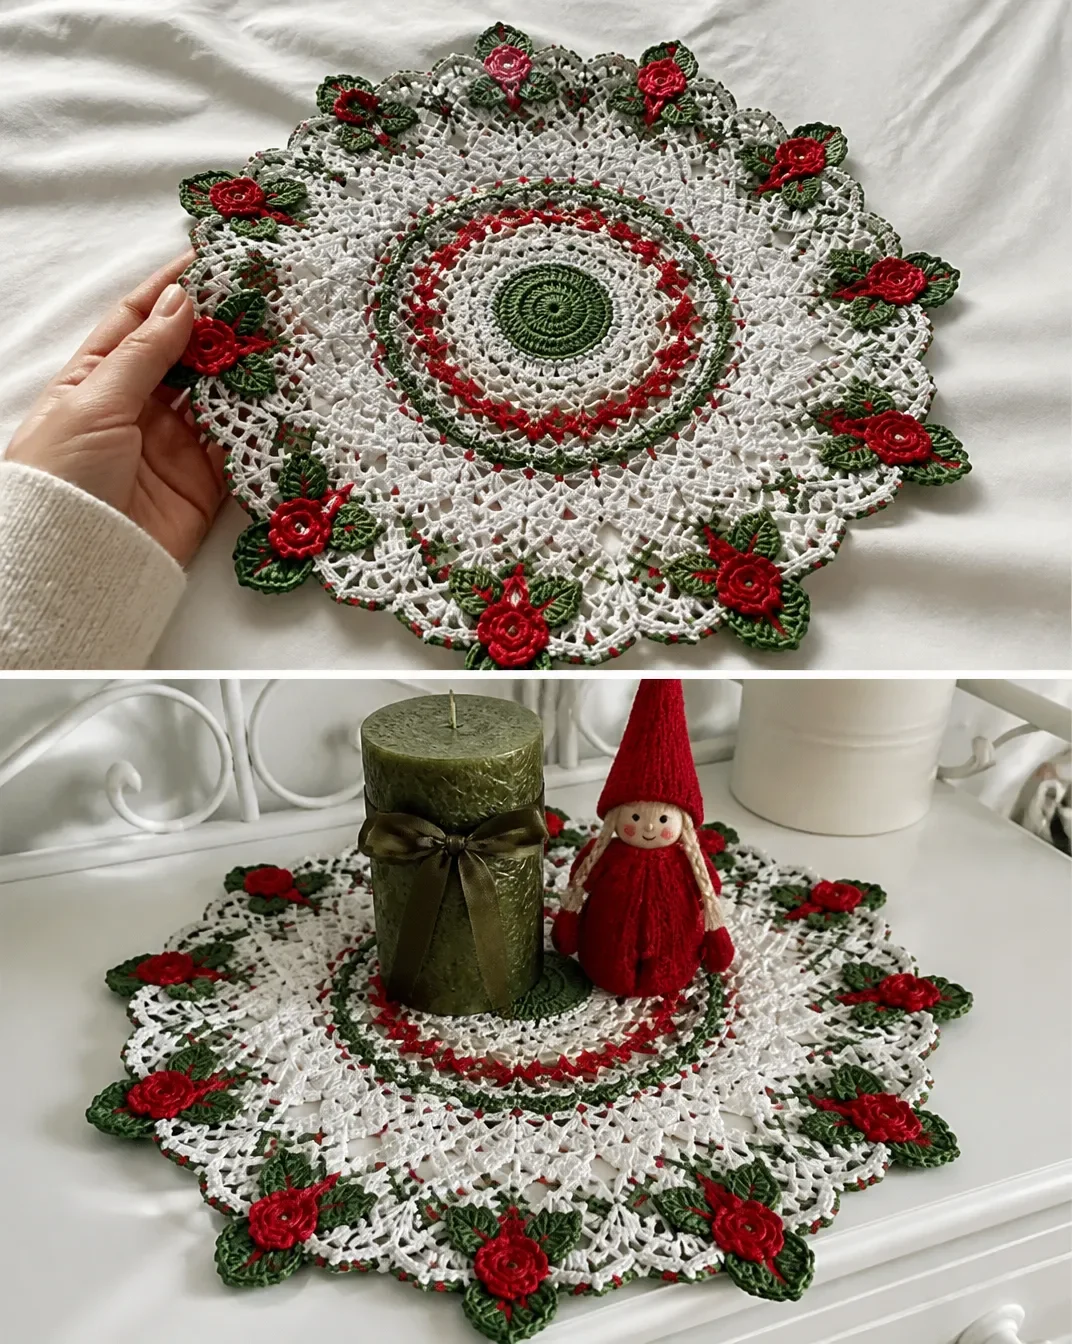
The Holly and Lace Doily Crochet Pattern creates an elegant round centerpiece with open lacework, pointed sections, green leaves, and red berries. Worked in fine crochet thread, it has a delicate heirloom look that suits holiday tables, winter decorating, handmade gifts, and seasonal displays. The pattern is especially appealing to crocheters who enjoy detailed stitch combinations, color changes, and decorative finishing. You can also pair the doily with other botanical projects, such as these handmade crochet flower patterns, for a coordinated display.
Why You’ll Love This Crochet Project
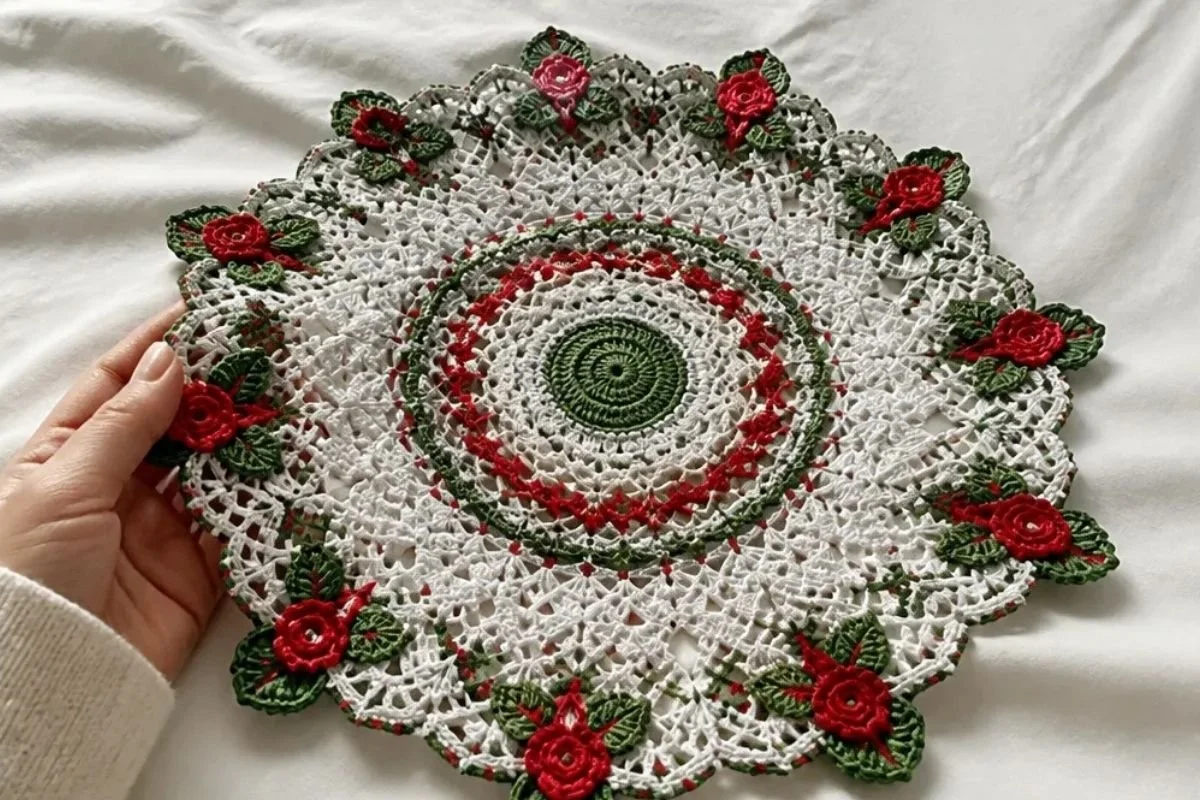
- It combines lace and botanical details. The doily begins with circular lacework and ends with twelve pointed sections decorated with leaves and berries.
- It offers valuable stitch practice. You will work single crochet, double crochet, treble crochet, double treble crochet, triple treble crochet, clusters, chain spaces, and slip-stitch joins.
- It makes a thoughtful handmade gift. The finished piece can be presented as a holiday hostess gift, a seasonal table accent, or a keepsake for someone who appreciates traditional crochet.
- It creates a reusable decoration. Unlike fresh greenery, this thread doily can be brought out year after year when stored carefully.
- It teaches decorative assembly. Making the leaves in pairs, attaching the berries, and sewing the botanical pieces to the points all contribute to the final design.
My Crochet Flower Tip: Block the doily before attaching the leaves. This helps the points open evenly and makes it easier to position the leaf sets symmetrically.
Before You Start Crocheting
The project has three main parts: one circular doily, twelve sets of paired leaves, and twelve red berries. The doily is worked first in rounds, beginning with green thread and changing to white thread at Round 12. After Round 24, twelve individual points are worked in rows. The leaves and berries are made separately and sewn on during finishing.
The pattern uses several types of clusters and tall stitches. Keep the stitch placement exact, particularly around the chain spaces in Rounds 12–24. The leaves are worked through back loops only from Rows 3–12, which gives them subtle ridges and helps define their shape.
Useful Abbreviations
- ch: chain
- sc: single crochet
- dc: double crochet
- tr: treble crochet
- dtr: double treble crochet
- trtr: triple treble crochet
- sl st: slip stitch
- st/sts: stitch/stitches
- RS: right side
- WS: wrong side
Materials You’ll Need
- AUNT LYDIA’S® Classic Crochet Thread, Size 10
- Color A: 1 ball White 001 or 453 Shaded Christmas A
- Color B: 1 ball 484 Myrtle Green B
- Color C: 1 ball 494 Victory Red C
- Steel crochet hook: 1.5 mm [US 7]
Color B forms the opening rounds and leaves, Color A forms the main lace points, and Color C creates the berries.
Step-by-Step Crochet Instructions
Doily
Work in rounds. With B, ch 6; join with a slip st to form a ring.
Round 1
Ch 1, 12 sc in ring; join with a slip st to first sc – 12 sc.
Round 2
Ch 1, 2 sc in each sc around; join with slip st to first sc – 24 sc.
Round 3
Ch 1, 2 sc in joining slip st, sc in next 2 sc, [2 sc in next sc, sc in next 2 sc] 7 times; join with slip st to first sc – 32 sc.
Round 4
Ch 1, 2 sc in joining slip st, sc in next 3 sc, [2 sc in next sc, sc in next 3 sc] 7 times; join with slip st to first sc – 40 sc.
Round 5
Ch 3, tr in joining slip st, ch 3, (tr, dc) all in next sc, skip next sc, sc in next sc, skip next sc*, (dc, tr) all in next sc, ch 3, (tr, dc) all in next sc; repeat from * around, ending at **; join with slip st to top of ch-3 – 8 shells.
Round 6
Slip st in next tr, ch 1, *sc in next ch-3 space, ch 8; repeat from * around; join with slip st to first sc.
Round 7
Slip st in next 3 chs, ch 7, [dtr in next ch, ch 2] twice, dtr in next ch, ch 5, skip next 2 ch, skip next sc, skip next 2 ch*, [dtr in next ch, ch 2] 3 times; repeat from * around, ending at **; join with slip st to 5th ch of ch-7.
Round 8
Ch 1, sc in joining slip st, [2 sc in ch-2 space, sc in dtr] 3 times; 5 sc in ch-5 space*; sc in next dtr; repeat from * around, ending at **; join with slip st to first sc – 120 sc.
Rounds 9 and 10
Ch 1, sc in each sc around; join with slip st to first sc.
Round 11
Repeat Round 5 – 24 shells. Fasten off.
Round 12
With right side facing, join A to first ch-3 space, ch 3; work 2-dc cluster in joining ch-3 space; ch 8, sc in next ch-3 space, ch 8*; 3-dc cluster in next ch-3 space; repeat from * around, ending at **; join with a slip st to top of 2-dc cluster – 12 clusters.
Round 13
Ch 2, 2-dc cluster in slip st; ch 3, (sc, ch 5, sc) all in next ch-8 space; ch 5, (sc, ch 5, sc) all in next ch-8 space; ch 3*, 3-dc cluster in top of next 3-dc cluster; repeat from * around, ending at **; join with a slip st to top of 2-dc cluster.
Round 14
Ch 2, 2-dc cluster in slip st; ch 5, skip ch-3 space, [sc in next ch-5 space, ch 5] 3 times*; 3-dc cluster in top on next 3-dc cluster; repeat from * around, ending at **; join with a slip st to top of 2-dc cluster.
Round 15
Ch 2, 2-dc cluster in slip st; ch 3, sc in next ch-5 space, [ch 5, sc in next ch-5 space] 3 times; ch 3*, 3-dc cluster in top of next 3-dc cluster; repeat from * around, ending at **; join with a slip st to top of 2-dc cluster.
Round 16
Repeat Round 14.
Round 17
Repeat Round 15, working ch 6 instead of ch 5.
Round 18
Repeat Round 14, working ch 6 instead of ch 5.
Round 19
Ch 2, 2-dc cluster in slip st; ch 4, sc in next ch-6 space, [ch 7, sc in next ch-6 space] 3 times; ch 4**, 3-dc cluster in top of next 3-dc cluster; repeat from * around, ending at **; join with a slip st to top of 2-dc cluster.
Round 20
Ch 2, 2-dc cluster in slip st; ch 7, skip ch-4 space, [sc in ch-7 space, ch 7] 3 times*; 3-dc cluster in top of next 3-dc cluster; repeat from * around, ending at **; join with a slip st to top of 2-dc cluster.
Round 21
Ch 2, 2-dc cluster in slip st; ch 4, sc in next ch-7 space, [ch 8, sc in next ch-7 space] 3 times; ch 4*, 3-dc cluster in top of next 3-dc cluster; repeat from * around, ending at **; join with a slip st to top of 2-dc cluster.
Round 22
Ch 2, 2-dc cluster in slip st; ch 7, skip ch-4 space, sc in ch-8 space; [(dtr, trtr, ch 3, trtr, dtr) all in next sc, sc in next ch-8 space] twice; ch 7*, 3-dc cluster in top of next 3-dc cluster; repeat from * around, ending at **; join with a slip st to top of 2-dc cluster.
Round 23
Ch 2, 2-dc cluster in slip st; ch 4, sc in ch-7 space, [ch 7, sc in next ch-3 space] twice; ch 7, sc in next ch-7 space, ch 4*; 3-dc cluster in top of next 3-dc cluster; repeat from * around, ending at **; join with a slip st to top of 2-dc cluster.
Round 24
Ch 2, 2-dc cluster in slip st; ch 6, skip ch-4 space, sc in ch-7 space, [ch 6, sc in next ch-7 space] twice; ch 6*, (2-dc cluster, ch 3, sl st, ch 3, 2-dc cluster) all in top of next 3-dc cluster; repeat from * around, ending at **; 3-dc cluster in same st first 2-dc cluster made; do not join; mark right side of work; turn – 24 clusters.
Points
With right side facing, skip next cluster on Round 24, join A to next cluster; turn. Work Rows 1–6 for point. Repeat until all 12 points are completed. Weave in ends. Block doily before sewing on leaves.
Row 1 Wrong Side
Ch 3, 2-dc cluster in top of next cluster; ch 3, sc in next ch-6 space, ch 4, sc in next ch-6 space, ch 6, sc in next ch-6 space, ch 4, sc in next ch-6 space, ch 3; 3-dc cluster in top of next cluster; turn.
Row 2
Ch 3, 2-dc cluster in top of next cluster; ch 4, skip next ch-3 space, [sc in next ch-4 space, ch 4] 3 times; skip next ch-3 space; 3-dc cluster in top of next cluster; turn.
Row 3
Ch 3, 2-dc cluster in top of next cluster; ch 3, sc in next ch-4 space, [ch 4, sc in next ch-4 space] 3 times; ch 3, 3-dc cluster in top of next cluster; turn.
Row 4
Ch 3, 2-dc cluster in top of next cluster; ch 3, skip next ch-3 space, [sc in next ch-4 space, ch 3] 3 times; skip next ch-3 space, 3-dc cluster in top of next cluster; turn.
Row 5
Ch 3, 2-dc cluster in top of next cluster; ch 3, skip next ch-3 space, [sc in next ch-3 space, ch 3] twice; skip next ch-3 space, 3-dc cluster in top of next cluster; turn.
Row 6
Ch 3, 2-dc cluster in top of next cluster; 3-dc cluster in top of next cluster. Fasten off.
Leaves Make 12 Sets
First Leaf
With B, ch 12.
Row 1 Right Side: Sc in 2nd ch from hook – tip made; sc in next 9 ch, (sc, ch 3, sc) all in last ch; working along opposite side of chain, sc in next 8 ch; turn.
Row 2: Ch 3, sc in next 9 sc, (sc, ch 3, sc) all in ch-3 space, sc in next 8 sc; turn.
Rows 3–12: Working in back loops only, repeat Row 2. At end of Row 12, slip st in last sc. Fasten off.
Second Leaf
Rows 1–11: Work same as for First Leaf.
Row 12 Joining Row: With right sides of each leaf facing and working through both thicknesses, ch 3; slip st in next 9 sts and next ch-3 space; working on 2nd Leaf only, sc in back loop of next 8 sc; slip st in last sc worked. Fasten off.
Berries Make 12
With C, ch 12; join with a slip st to form a ring.
Round 1: [Slip st into next ch, ch 3; work 5-tr cluster into same ch; ch 3, slip st in same ch, skip next ch] 6 times; turn; keeping right side facing, work 5-tr cluster in same ch as last cluster. Fasten off.
Finishing
Sew tip of last cluster to 6th ch of ring.
Sew berries to leaves.
Sew leaves between points of doily with the joining of the 2 leaves just touching the 2 clusters of Round 24.
Weave in ends.
Ways to Display Your Finished Crochet
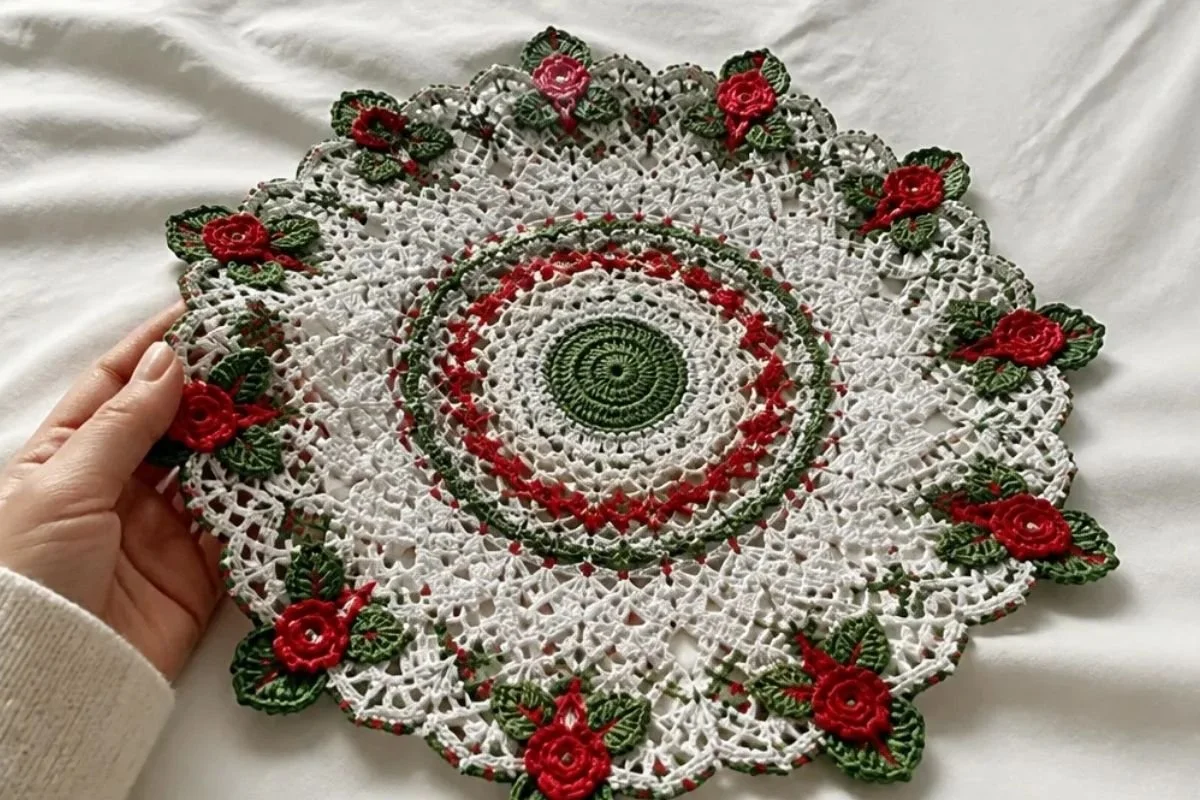
- Use the doily as a holiday centerpiece beneath a candle holder or decorative bowl.
- Place it on a side table, entryway table, or buffet where the pointed lace edge can be seen clearly.
- Give it as a seasonal handmade gift, especially when folded with tissue paper and stored in a shallow box.
- Layer it over a plain table runner to highlight the green leaves and red berries.
- Create a coordinated seasonal display by combining it with other projects from these crochet bouquet pattern ideas.
- Use it as a decorative base beneath a small vase, provided the vase is stable and does not catch on the lace points.
Caring for Your Crochet Project
The fine thread and lace structure deserve gentle handling. Dust the doily with a soft, dry brush or shake it carefully outdoors rather than pulling at the openwork.
For small marks, use cautious spot cleaning with a barely damp cloth and allow the area to dry completely. Avoid soaking or wringing the piece, since moisture and handling can distort the pointed sections and sewn-on berries.
Store the doily flat in a clean, dry container. Place acid-free tissue or a soft cloth between folded layers if folding is unavoidable. Keep it away from excessive heat, direct sunlight, rough surfaces, and anything that could snag the chain spaces.
If the points lose their shape, gently reposition them by hand. A full reblocking can be done carefully, but test your chosen cleaning and blocking method on a small area or a separate thread sample first.
Tips for Better Results
- Use a fine, consistent tension. The 1.5 mm hook and Size 10 thread create delicate lace, so uneven tension can make chain spaces noticeably different.
- Mark the right side at Round 24. The pattern specifically tells you to mark the right side before turning, which helps keep the point construction organized.
- Count the shells and clusters. Round 5 has 8 shells, Round 11 has 24 shells, and Round 12 has 12 clusters. These landmarks make it easier to catch mistakes early.
- Watch the changing chain lengths. The later rounds move from ch 5 to ch 6, then to ch 7 and ch 8. Read each round carefully rather than relying on the previous repeat.
- Work through back loops only for the leaves. Rows 3–12 of the First Leaf use back-loop-only stitches; missing this detail will change the leaf texture.
- Block before sewing the leaves. Blocking the doily first makes the twelve points easier to space and gives the attached leaves a cleaner foundation.
- Secure sewn attachments firmly but discreetly. The berries and leaves should be anchored without tightening the lace or puckering the points.
- Keep completed components organized. Pair each set of two leaves and keep all twelve berries together so assembly proceeds evenly around the doily.
Color and Styling Variations
These ideas are optional and do not change the approved instructions.
- Use White 001 for a classic snowy lace appearance, or choose 453 Shaded Christmas A for a more variegated seasonal effect.
- Keep Myrtle Green and Victory Red for a traditional holly palette, or coordinate the colors with your holiday table linens.
- A white doily with green leaves and deep red berries works well for winter displays, while a softer neutral thread can create a less traditional decorative look if the same thread characteristics are maintained.
- Pair the finished piece with a simple glass, ceramic, or wooden centerpiece so the lace remains the focal point.
- For a coordinated botanical display, combine the doily with crochet flowers in complementary colors.
Changing the thread type or hook size is optional, but it can affect the lace density, finished dimensions, drape, stitch definition, and amount of yarn required. If you substitute materials, make a small sample and expect the project to look different from the specified version.
Frequently Asked Questions
Is this pattern suitable for a beginner?
It is best suited to a crocheter comfortable with fine thread, joined rounds, tall stitches, clusters, chain spaces, and careful stitch counting. A confident beginner can approach it slowly, but the later rounds require close attention.
What yarn is recommended?
The specified yarn is AUNT LYDIA’S® Classic Crochet Thread, Size 10: Color A in White 001 or 453 Shaded Christmas A, Color B in 484 Myrtle Green B, and Color C in 494 Victory Red C.
What hook size should I use?
Use a 1.5 mm [US 7] steel crochet hook.
How many leaf sets and berries are made?
Make 12 sets of leaves. Each set contains a First Leaf and a Second Leaf. Make 12 berries.
Can I change the colors?
Yes, color changes are an optional styling choice. Keep the color roles clear while crocheting: Color B is used for the opening doily rounds and leaves, Color A is used for the main doily points, and Color C is used for the berries.
When are the leaves attached?
Complete and block the doily before sewing on the leaves. Sew the leaves between the points, with the joining of the two leaves just touching the two clusters of Round 24.
How do I keep the lace points even?
Maintain consistent tension, count the chain spaces carefully, mark the right side at Round 24, and block the doily before assembly.
Can I use a different yarn?
You can try another yarn, but changing yarn weight or hook size may affect the lace openings, shape, drape, dimensions, and yarn requirements. A substitute may not produce the same result as Size 10 crochet thread with the specified hook.
How should I store the finished doily?
Store it clean and dry, preferably flat in a protective container. Avoid heavy items that could crush the berries or distort the lace points.
Conclusion
This Holly and Lace Doily Crochet Pattern brings together delicate circular lace, pointed edging, textured leaves, and bright berries in one seasonal keepsake. Its detailed construction offers satisfying practice while producing a useful decoration or handmade gift. For the original pattern reference, you can also consult the Aunt Lydia’s Holly & Lace Doily pattern.