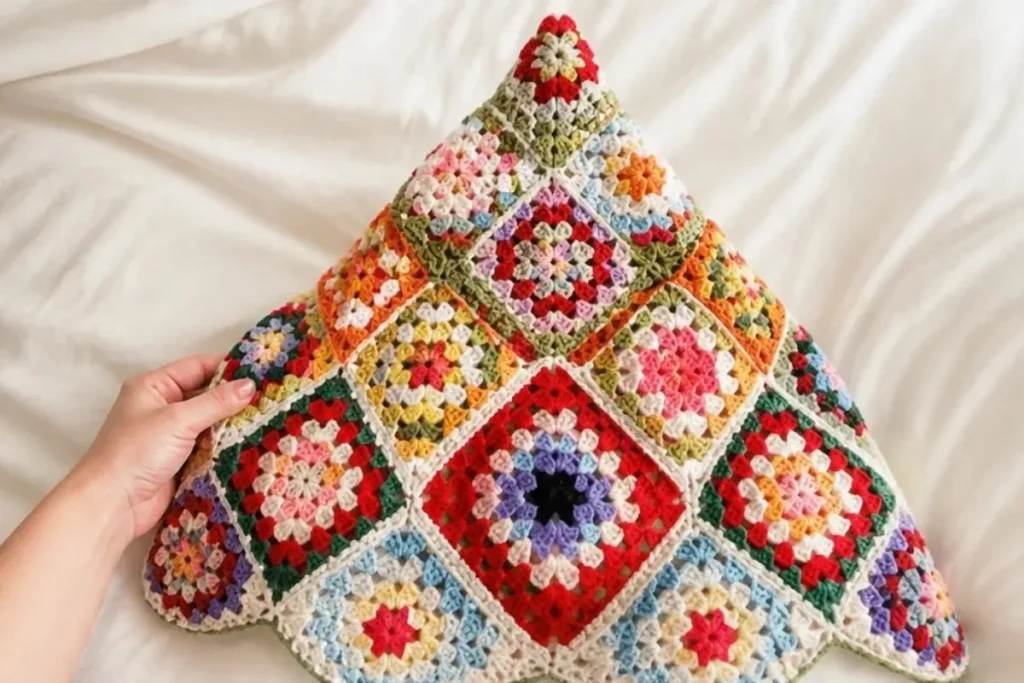
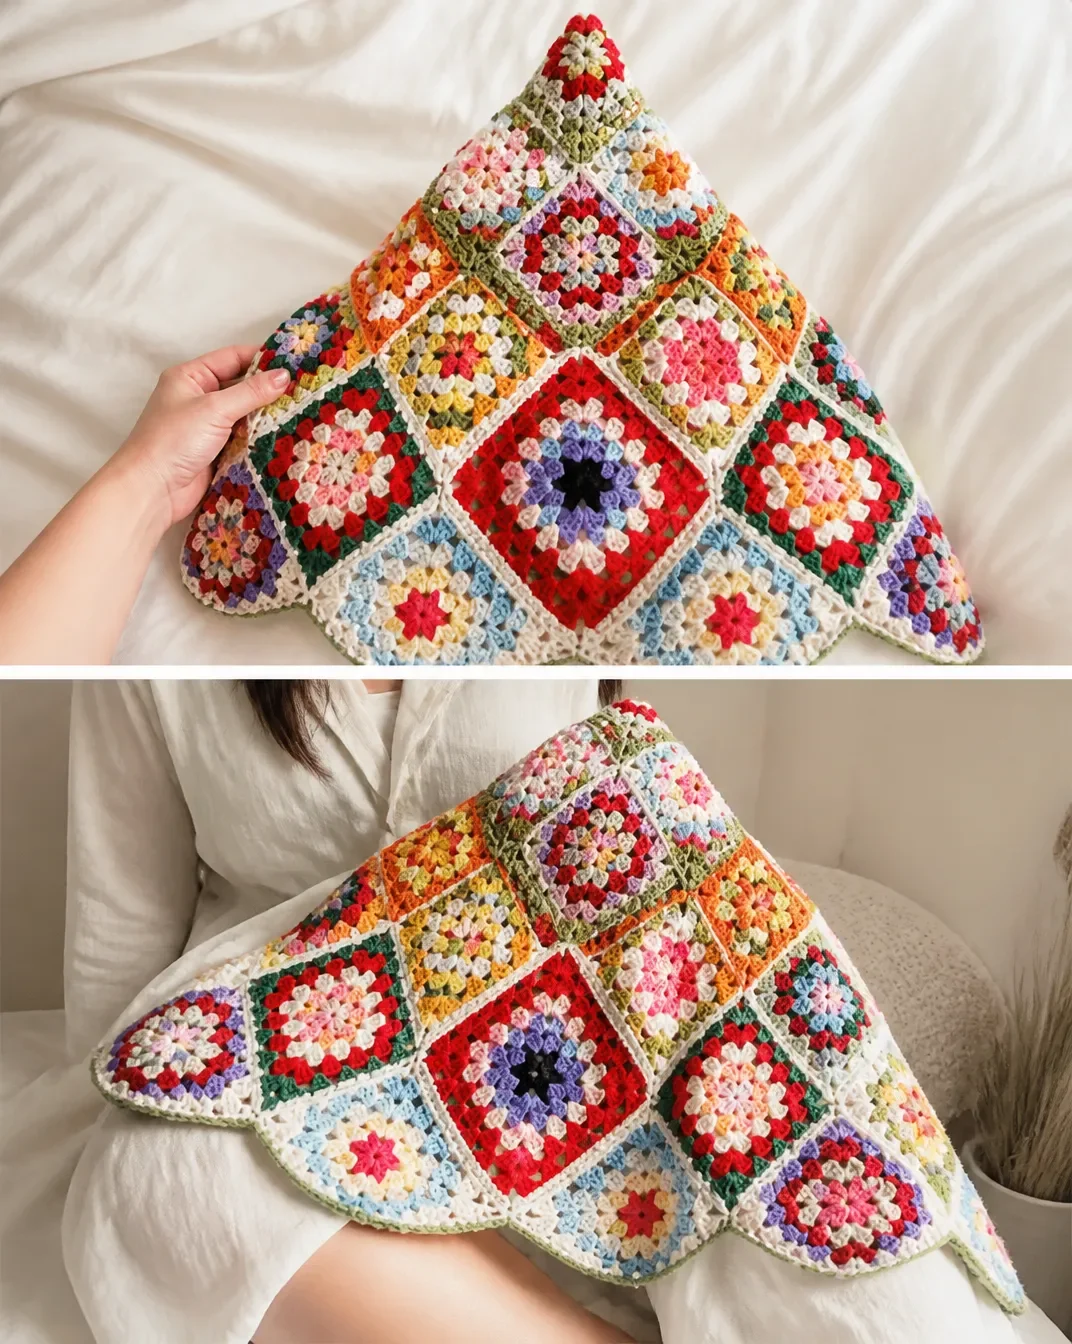
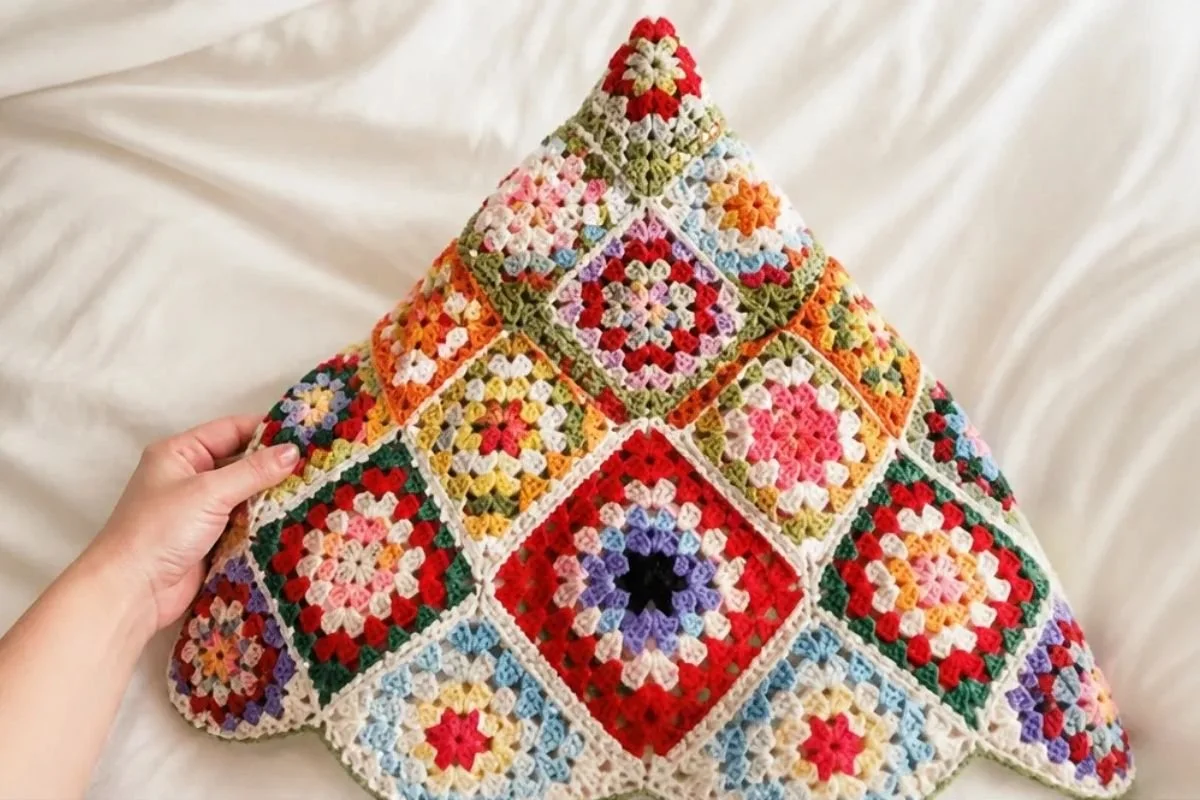
A Granny Christmas Tree crochet pattern turns colorful granny motifs into a dimensional holiday decoration with a classic handmade look. This project combines petite, standard, and grande motifs in festive shades, then joins them into six coordinated clusters before closing the top of the tree. It is an engaging choice for crocheters who enjoy repeating motifs and careful assembly. Display the finished tree on a mantel, shelf, or holiday table, or give it as a thoughtful handmade decoration. For more seasonal crochet inspiration, explore these all-in-one crochet bouquet patterns for additional motif ideas.
Why You’ll Love This Crochet Project
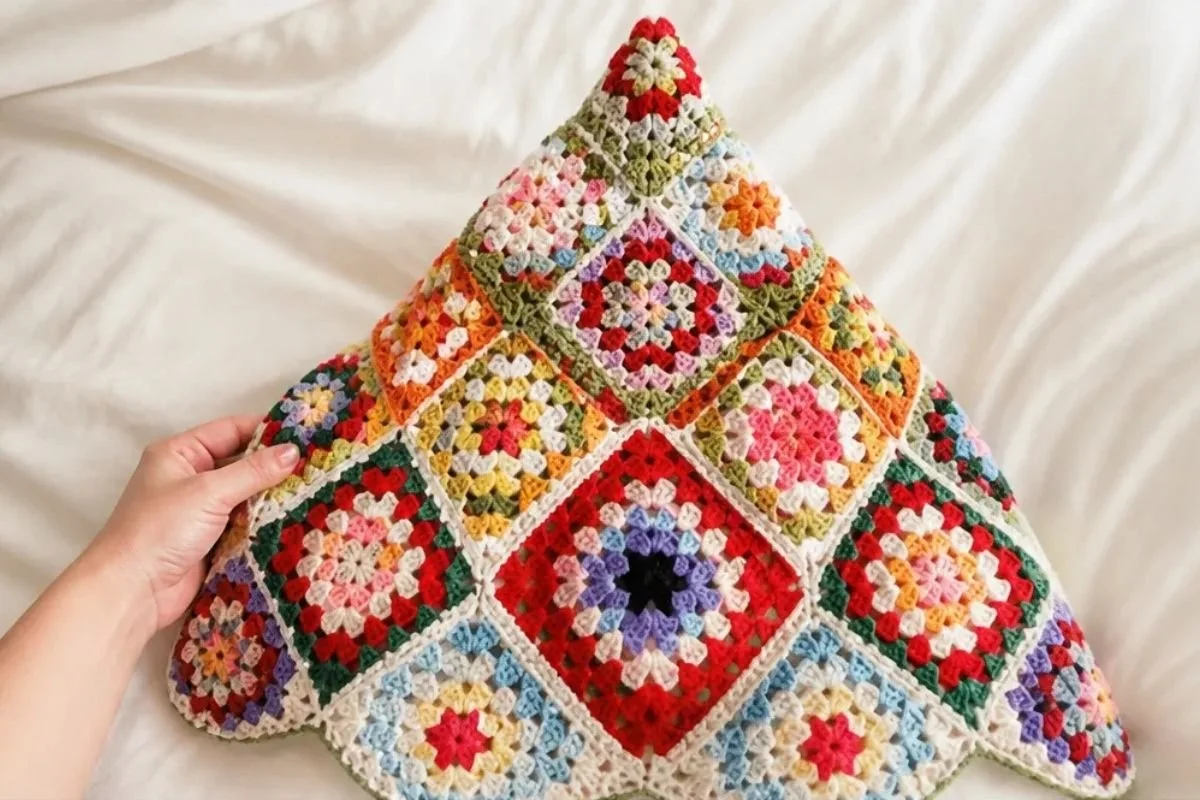
- It creates a dimensional decoration. Instead of making a flat granny-square project, you assemble the motifs into a standing Christmas tree shape.
- The color-changing yarn does much of the decorating. Red Heart® All in One™ yarns create coordinated color sections while you work.
- It provides useful motif practice. The petite, granny square, and grande motifs all begin with the same granny-style foundation, then grow to different sizes.
- It is ideal for holiday gifting. A finished crochet tree is lightweight, decorative, and easy to display during the season.
- It develops assembly skills. The project teaches whip-stitch seaming, overlapping motifs, cluster construction, and shaping through strategic joins.
My Crochet Flower Tip: Make and organize all motifs by letter and size before beginning assembly. This makes it much easier to follow the cluster keys and place each color correctly. You may also find Crochet Rose For Wine Glasses Easy Flower Pattern useful.
How This Crochet Project Comes Together
The finished tree is built from three motif sizes:
- 48 petite motifs: 27 with A and 21 with B
- 36 granny square motifs: 13 with C, 10 with D, and 13 with E
- 12 grande motifs: 4 with F, 4 with G, and 4 with H
The project begins with individual granny-style motifs. The petite motifs have 3 rounds, the granny square motifs have 5 rounds, and the grande motifs have 10 rounds. Each motif uses a color-changing pull-skein, so the color sequence aligns with designated rounds.
After crocheting the motifs, you use the long leftover tails for whip-stitch seaming. The assembly proceeds through A-, B-, C-, D-, E-, and F-clusters. Six completed F-clusters are joined at their edges to close the top of the tree.
Abbreviations and Stitch Key
- ch: chain
- sl st: slip stitch
- dc: double crochet
- RS: right side
- sp: space
- tog: together
For the motif stitch key, 1 represents chain, 2 represents slip stitch, and 3 represents double crochet.
Materials You’ll Need
- Red Heart® All in One™ Granny Square Petite™ (8.8 oz / 250 g; 402 m / 440 yds), 1 ball makes 36 motifs:
- Contrast A Foxy (0003): 1 ball
- Contrast B Snazzy (0007): 1 ball
- Red Heart® All in One™ Granny Square™ (8.8 oz / 250 g; 417 yds / 381 m), 1 ball makes 14 motifs:
- Contrast C Soft-White Citrus Twist (2002): 1 ball
- Contrast D Aran Lily Pad (2014): 1 ball
- Contrast E Soft-White Hot Stuff (2000): 1 ball
- Red Heart® All in One™ Granny Square Grande™ (8.8 oz / 250 g; 402 m / 440 yds), 1 ball makes 4 motifs:
- Contrast F Humdinger (0003): 1 ball
- Contrast G Fantabulous (0002): 1 ball
- Contrast H Topnotch (0004): 1 ball
- Size U.S. I/9 (5.5 mm) Susan Bates® Silvalume® crochet hook, or size needed to obtain gauge
- Susan Bates® yarn needle
The long tails left on selected motifs are used for seaming, so avoid cutting them shorter than specified.
Step-by-Step Crochet Instructions
Petite Motif
With A, make 27.
With B, make 21.
Petite Motif Notes
Motifs begin with Color 1, the shortest color repeat, from the center of the pull-skein. Leave a 4″ [10 cm] tail to weave in.
Each color aligns with 1 round in the motif, with 3 colors in total.
If too much color is left at the end of a round, pull back some stitches and slightly loosen your gauge to re-work the stitches and finish at the color change. If too little color is left, pull back some stitches and slightly tighten your gauge to re-work the stitches and finish at the color change.
When the motif is complete, cut the yarn where Color 3, the longest color repeat, ends, leaving approximately 24″ [61 cm] for seaming.
Begin the next motif with Color 1 and repeat the 3 rounds for each motif.
Petite Motif Instructions
With Color 1, ch 4. Join with sl st to first ch to form ring.
1st rnd: (RS). Ch 6. (3 dc. Ch 3) 3 times in ring. 2 dc in ring. Join.
2nd rnd: Sl st in next ch-3 sp. Ch 6. 3 dc in same sp as last sl st.
*Ch 1. (3 dc. Ch 3. 3 dc) in next ch-3 sp. Rep from * twice more.
Ch 1. 2 dc in first ch-3 sp. Join.
3rd rnd: Sl st in next ch-3 sp. Ch 6. 3 dc in same sp as last sl st.
*Ch 1. 3 dc in next ch-1 sp. Ch 1. (3 dc. Ch 3. 3 dc) in next ch-3 sp. Rep from * twice more.
Ch 1. 3 dc in last ch-1 sp. Ch 1. 2 dc in first ch-3 sp. Join.
Fasten off, leaving 24″ [61 cm] tail.
Granny Square Motif
With C, make 13.
With D, make 10.
With E, make 13.
Granny Square Motif Notes
Motifs begin with Color 1, the shortest color repeat, from the center of the pull-skein. Leave a 4″ [10 cm] tail to weave in.
Each color aligns with 1 round in the motif, with 5 colors in total.
If too much color is left at the end of a round, pull back some stitches and slightly loosen your gauge to re-work the stitches and finish at the color change. If too little color is left, pull back some stitches and slightly tighten your gauge to re-work the stitches and finish at the color change.
When the motif is complete, cut the yarn where Color 5, the longest color repeat, ends, leaving a tail for weaving in.
Begin the next motif with Color 1 and repeat the 5 rounds for each motif.
Granny Square Motif Instructions
With Color 1, ch 4. Join with sl st to first ch to form ring.
1st rnd: (RS). Ch 6. (3 dc. Ch 3) 3 times in ring. 2 dc in ring. Join.
2nd rnd: Sl st in next ch-3 sp. Ch 6. 3 dc in same sp as last sl st.
*Ch 1. (3 dc. Ch 3. 3 dc) in next ch-3 sp. Rep from * twice more.
Ch 1. 2 dc in first ch-3 sp. Join.
3rd rnd: Sl st in next ch-3 sp. Ch 6. 3 dc in same sp as last sl st.
*Ch 1. 3 dc in next ch-1 sp. Ch 1. (3 dc. Ch 3. 3 dc) in next ch-3 sp. Rep from * twice more.
Ch 1. 3 dc in last ch-1 sp. Ch 1. 2 dc in first ch-3 sp. Join.
4th and 5th rnds: Sl st in next ch-3 sp. Ch 6. 3 dc in same sp as last sl st.
(Ch 1. 3 dc) in each ch-1 sp to next ch-3 sp. Ch 1.*
(3 dc. Ch 3. 3 dc) in next ch-3 sp. Rep from * twice more, then from * to once.
2 dc in first ch-3 sp. Join.
Fasten off.
Grande Motif
With F, make 4.
With G, make 4.
With H, make 4.
Grande Motif Notes
Motifs begin with Color 1, the shortest color repeat, from the center of the pull-skein. Leave a 4″ [10 cm] tail to weave in.
- 1st and 2nd rounds will be worked in Color 1.
- 3rd and 4th rounds will be worked in Color 2.
- 5th round will be worked in Color 3.
- 6th and 7th rounds will be worked in Color 4.
- 8th and 9th rounds will be worked in Color 5.
- 10th round will be worked in Color 6.
If too much color is left at the end of a round, pull back some stitches and slightly loosen your gauge to re-work the stitches and finish at the color change. If too little color is left, pull back some stitches and slightly tighten your gauge to re-work the stitches and finish at the color change.
When the motif is complete, cut the yarn where Color 6, the final color repeat, ends, leaving approximately 42″ [106.5 cm] at the end of the motif for seaming.
Begin the next motif with Color 1 and repeat the 10 rounds for each motif.
Grande Motif Instructions
With Color 1, ch 4. Join with sl st to first ch to form ring.
1st rnd: (RS). Ch 6. (3 dc. Ch 3) 3 times in ring. 2 dc in ring. Join.
2nd rnd: Sl st in next ch-3 sp. Ch 6. 3 dc in same sp as last sl st.
*Ch 1. (3 dc. Ch 3. 3 dc) in next ch-3 sp. Rep from * twice more.
Ch 1. 2 dc in first ch-3 sp. Join.
3rd rnd: Sl st in next ch-3 sp. Ch 6. 3 dc in same sp as last sl st.
*Ch 1. 3 dc in next ch-1 sp. Ch 1. (3 dc. Ch 3. 3 dc) in next ch-3 sp. Rep from * twice more.
Ch 1. 3 dc in last ch-1 sp. Ch 1. 2 dc in first ch-3 sp. Join.
4th to 10th rnds: Sl st in next ch-3 sp. Ch 6. 3 dc in same sp as last sl st.
*(Ch 1. 3 dc) in each ch-1 sp to next ch-3 sp. Ch 1.
(3 dc. Ch 3. 3 dc) in next ch-3 sp. Rep from * twice more, then from * to once.
2 dc in first ch-3 sp. Join.
Fasten off, leaving 42″ [106.5 cm] tail.
Whip-Stitch Assembly
The assembly stitch key is:
- Double crochet (dc)
- Chain (ch)
- Slip stitch (sl st)
Following the assembly diagram, sew motifs together using whip stitch as follows.
Step 1
Join 12 Grande Motifs, 6 Granny Motifs, and 12 Petite Motifs as shown in Step 1.
Step 2
Following the diagram, make 6 A-Clusters, overlapping Granny Motifs at the center to make squares.
There are two 3-dc groups at each side of the overlapping corner.
A-Cluster Key
- A = Petite Motif with A
- C = Granny Motif with C
- B = Petite Motif with B
- D = Granny Motif with D
- E = Granny Motif with E
- F = Grande Motif with F
- G = Grande Motif with G
- H = Grande Motif with H
Step 3
Following the diagram, make 6 B-Clusters, leaving two 3-dc groups unsewn on the side edges of the Granny Motifs.
B-Cluster Key
- A = Petite Motif with A
- C = Granny Motif with C
- B = Petite Motif with B
- D = Granny Motif with D
- E = Granny Motif with E
- F = Grande Motif with F
- G = Grande Motif with G
- H = Grande Motif with H
Step 4
To make C-Cluster, 6 pieces, sew Petite Motif under B-Cluster, leaving two 3-dc groups unsewn at each side of the top corner.
Make D-Cluster by sewing Granny Motif between C-Cluster.
Step 5
To make E-Cluster, 6 pieces, sew Granny Motif under D-Cluster, leaving three 3-dc groups unsewn at each side of the top corner.
For F-Cluster, sew Petite Motif under E-Cluster, leaving two 3-dc groups unsewn at each side of the top corner.
Step 6
Sew edges of F-Cluster together to close the top of the tree.
Finishing
Use the leftover tails:
- Petite Motif: 24″ [61 cm] tail for seaming after cutting where Color 3 ends
- Granny Square Motif: tail for weaving in, cut where Color 5 ends
- Grande Motif: approximately 42″ [106.5 cm] tail at the end of the motif for seaming, cut where Color 6 ends
Handmade Gift and Decoration Ideas
- Place the completed tree on a mantel beside candles, ornaments, or other seasonal crochet decorations.
- Use it as a tabletop centerpiece during a holiday meal, keeping it on a stable, uncluttered surface.
- Give the tree as a handmade Christmas gift to someone who enjoys colorful fiber art.
- Display several trees together by positioning different motif colorways at varying angles.
- Pair the tree with crocheted seasonal accents, such as small ornaments or floral-inspired decorations, while keeping the tree as the main focal point.
- Wrap the finished tree carefully in tissue paper and present it as a reusable holiday decoration.
Cleaning and Storing Your Crochet
- Remove dust with a soft, dry brush or gentle bursts of air rather than pulling at the joined motifs.
- For small marks, use careful spot cleaning with a slightly damp cloth and avoid saturating the crocheted structure.
- Do not twist or wring the tree, as aggressive handling may distort the whip-stitched seams.
- Allow any spot-cleaned area to dry completely before storing.
- Keep the tree away from excessive heat, open flames, and prolonged direct sunlight.
- Store it upright or lightly supported in a clean, dry container so the clusters are not crushed.
- Before packing it away, check the seams and weave in any ends that may have loosened.
Tips for Better Results
- Identify each color before crocheting. Label the balls or keep a written key for A through H so the motifs remain easy to sort.
- Start at the center of the pull-skein. This helps the color changes align with the intended rounds.
- Watch the color length at each round. Slightly loosen or tighten your gauge when necessary so the color change lands at the round ending.
- Leave the specified seaming tails. The 24″ [61 cm] petite tails and 42″ [106.5 cm] grande tails are important during assembly.
- Keep the right side consistent. Place motifs with the same side facing outward as you arrange clusters.
- Mark unfinished cluster edges. Stitch markers or small scraps of contrasting yarn can help identify the sections that must remain unsewn.
- Use the cluster keys carefully. Confirm both motif size and letter before sewing a motif into place.
- Do not close openings too early. The unsewn 3-dc groups are part of the shaping and must remain open during the specified steps.
- Whip stitch evenly. Use consistent stitch spacing and moderate tension to keep the tree’s seams neat without puckering.
- Secure tails after construction. Weave in the Granny Square Motif tails and any remaining loose ends once the structure is stable.
Color and Styling Variations
The approved pattern uses the specified A through H colorways, but you can make optional changes while keeping the construction intact.
- Substitute a different coordinated palette of Red Heart® All in One™ Granny Square yarns for a more traditional red-and-green tree, a snowy white-and-blue tree, or a warm neutral display.
- Use one color family for the petite motifs and a contrasting family for the granny square and grande motifs to emphasize the tree’s tiers.
- Arrange completed trees in complementary seasonal colors for a small holiday collection.
- Pair the tree with a simple ceramic, glass, or wooden display base that supports the finished shape without altering the crochet assembly.
- Add other handmade seasonal decorations nearby rather than attaching them directly to the motif seams.
If you change yarn type or hook size, the motif dimensions, color transitions, seam alignment, texture, and yarn requirements may change. Make a test motif before committing to a substitution, and do not silently alter the approved round instructions.
Frequently Asked Questions
Is this Granny Christmas Tree crochet pattern suitable for beginners?
The individual motifs use familiar granny-style stitches, but the full project requires careful color management and multi-step assembly. Beginners who are comfortable with chain, slip stitch, double crochet, and whip stitch can work through it patiently.
How many motifs are needed?
You will make 48 petite motifs, 36 Granny Square Motifs, and 12 Grande Motifs. The assembly instructions use 12 Grande Motifs, 6 Granny Motifs, and 12 Petite Motifs in Step 1, followed by the specified cluster construction.
Which crochet hook should I use?
Use a U.S. I/9 (5.5 mm) Susan Bates® Silvalume® crochet hook, or use the size needed to obtain gauge.
Can I change the yarn colors?
Yes, color changes are an optional styling choice. Keep the motif letters and quantities organized, and remember that another yarn or color sequence may affect the visual balance and color placement.
Why do the motifs need long tails?
The petite motifs require approximately 24″ [61 cm] tails for seaming, while the grande motifs require approximately 42″ [106.5 cm] tails. These tails reduce the need to attach separate yarn during assembly.
How are the motifs joined?
The motifs are joined with whip stitch. The assembly proceeds through the A-Clusters, B-Clusters, C-Clusters, D-Clusters, E-Clusters, and F-Clusters, with specific 3-dc groups left unsewn at several stages.
How should I care for the completed tree?
Dust it gently, spot clean only when necessary, avoid soaking and twisting, and store it in a dry place where the assembled clusters will not be crushed.
Can I use a different yarn?
A different yarn can be used as an optional experiment, but it may change the motif size, texture, color transitions, drape, and amount of yarn required. Test a motif first and maintain the specified hook relationship as closely as possible.
Conclusion
This Granny Christmas Tree crochet pattern combines classic granny motifs, coordinated color changes, and thoughtful whip-stitch assembly into a memorable seasonal decoration. Once the motifs are organized, the cluster sequence gives the project its distinctive tree shape. Display it on a shelf or table, gift it to another crochet lover, or create a complementary holiday set. For another take on a granny Christmas tree, see this granny Christmas tree design from Tw-In Stitches.