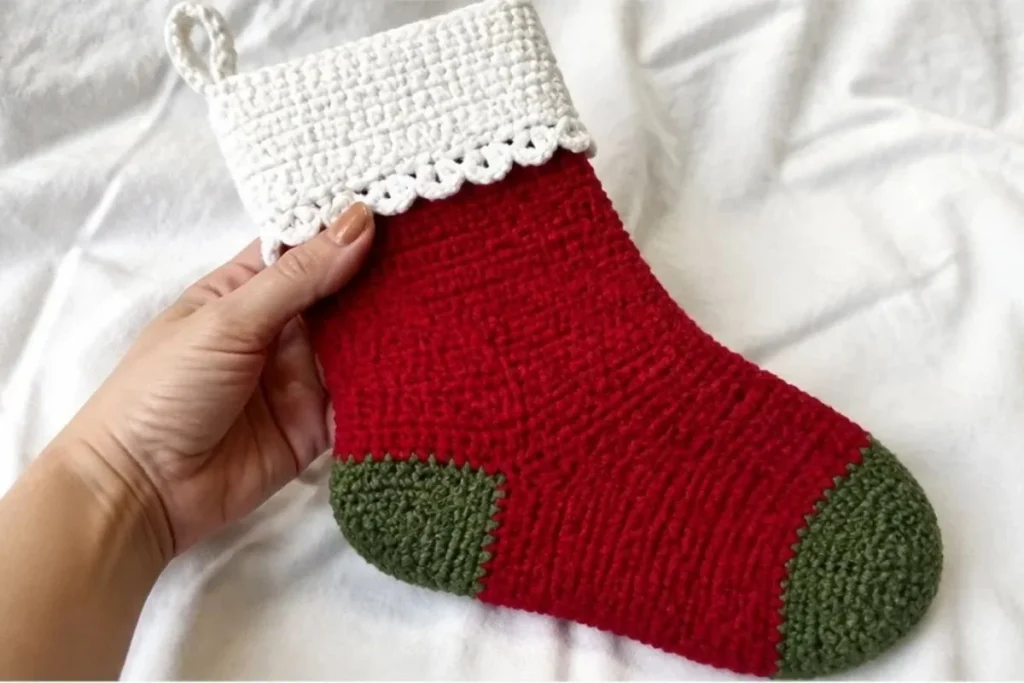
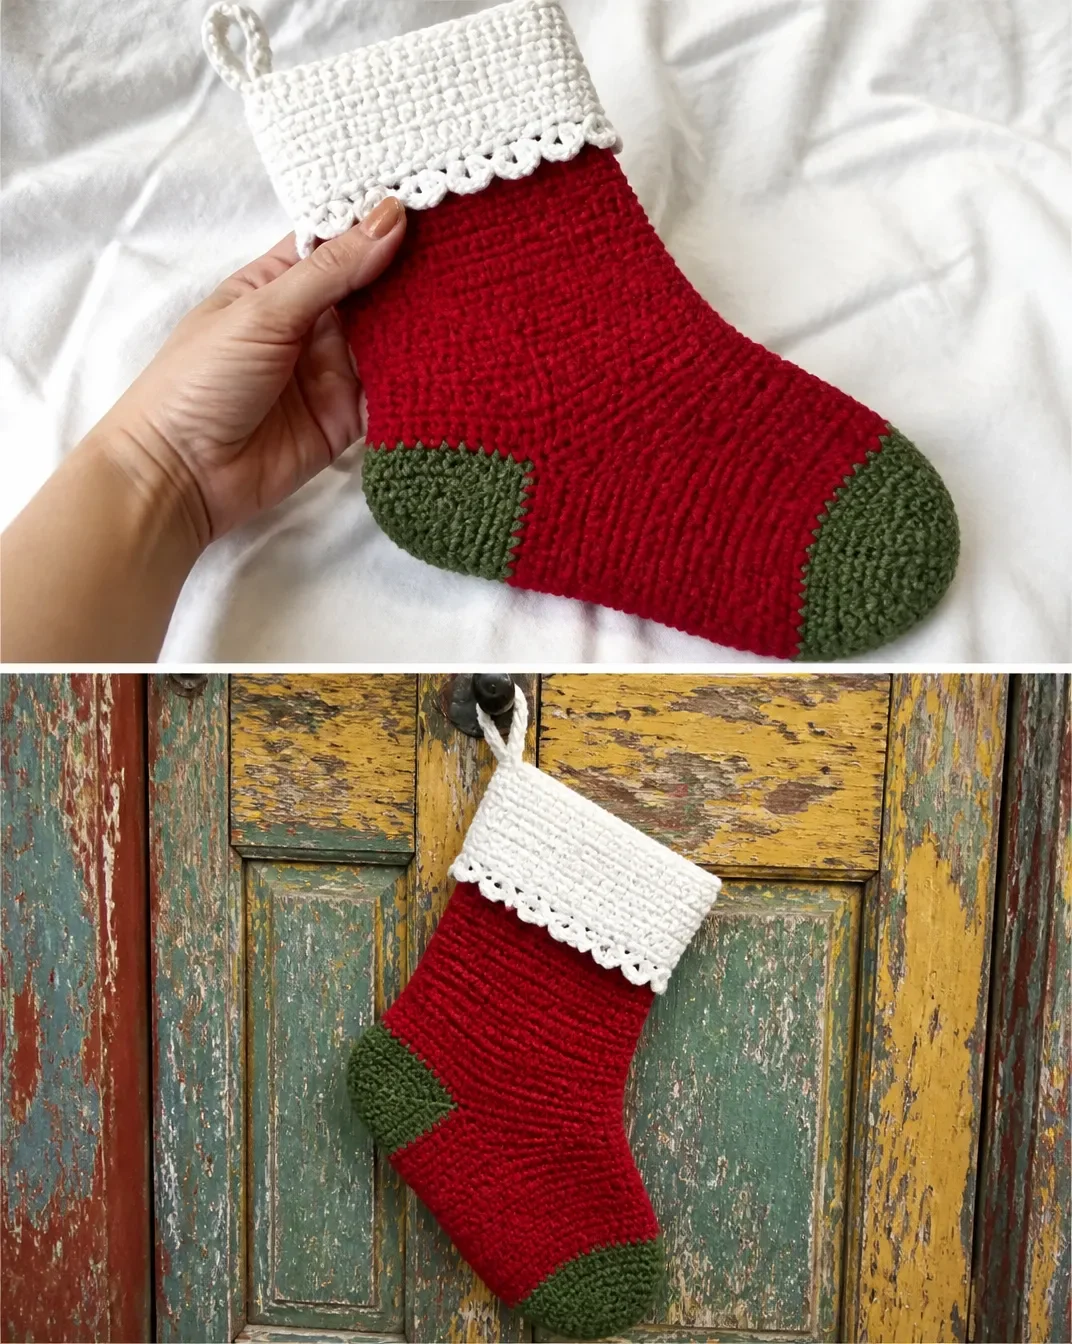
An easy crochet Christmas stocking is a practical seasonal project that combines simple rows, short-row shaping, and decorative edging. This beginner-friendly design uses classic Ranch Red, Dark Sage, and Soft White to create a festive stocking with a textured body, shaped heel and toe, and a hanging loop. It can hold small gifts, decorate a mantel, or become a handmade holiday keepsake. For another small seasonal crochet idea, pair it with a crochet rose for wine glasses at a Christmas table.
Why You’ll Love This Crochet Project
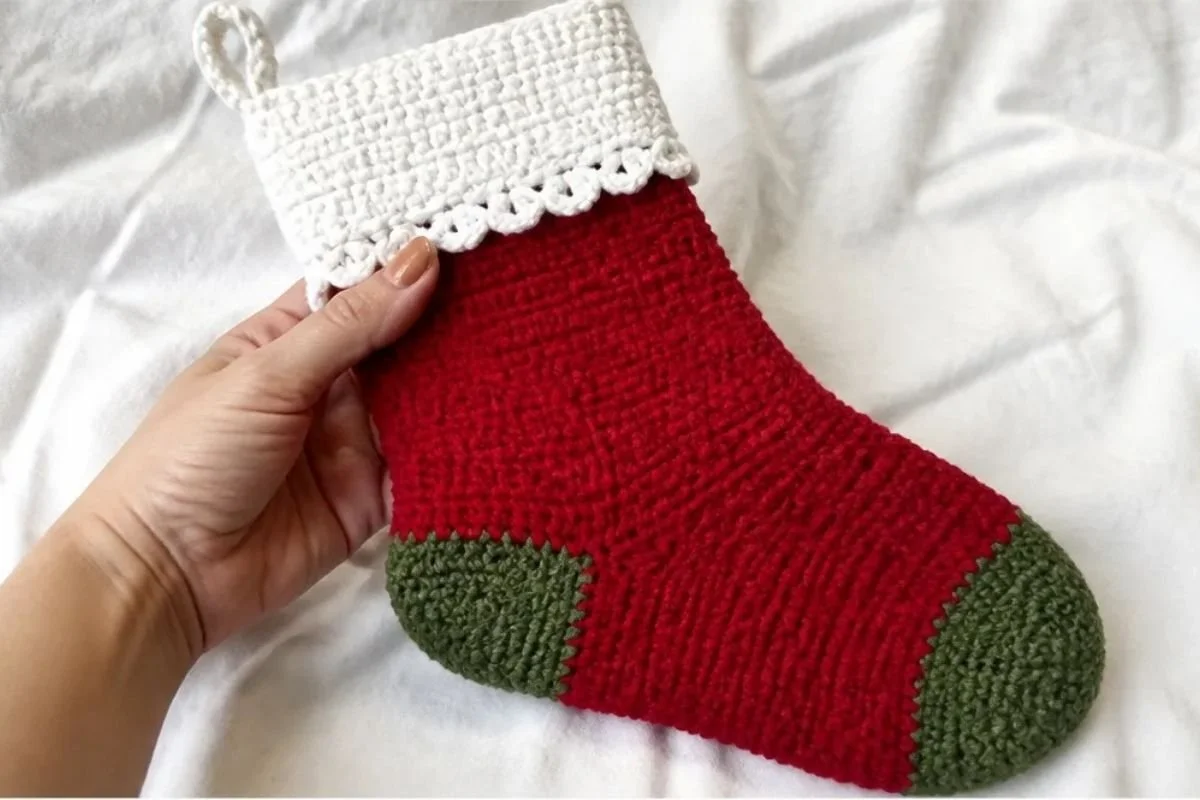
- It practices useful beginner techniques. You will work chains, single crochet, double crochet, short rows, decreases, seaming, and simple edging.
- The color plan feels traditionally festive. Ranch Red, Dark Sage, and Soft White create a warm Christmas palette without requiring complicated colorwork.
- The heel and toe add shaping practice. The stocking is built from a straightforward rectangular body, then shaped with short rows and decreases.
- It makes a thoughtful handmade gift. Fill the finished stocking with treats, ornaments, gift cards, or other small presents.
- The hanging loop is built into the top edging. You can display the stocking on a mantel, wall hook, staircase railing, or cabinet handle.
My Crochet Flower Tip: Keep the three yarn colors together in your project bag and label them A, B, and C before beginning. This makes color changes easier to follow as you move between the body, heel, toe, cuff, and edging.
Before You Start Crocheting
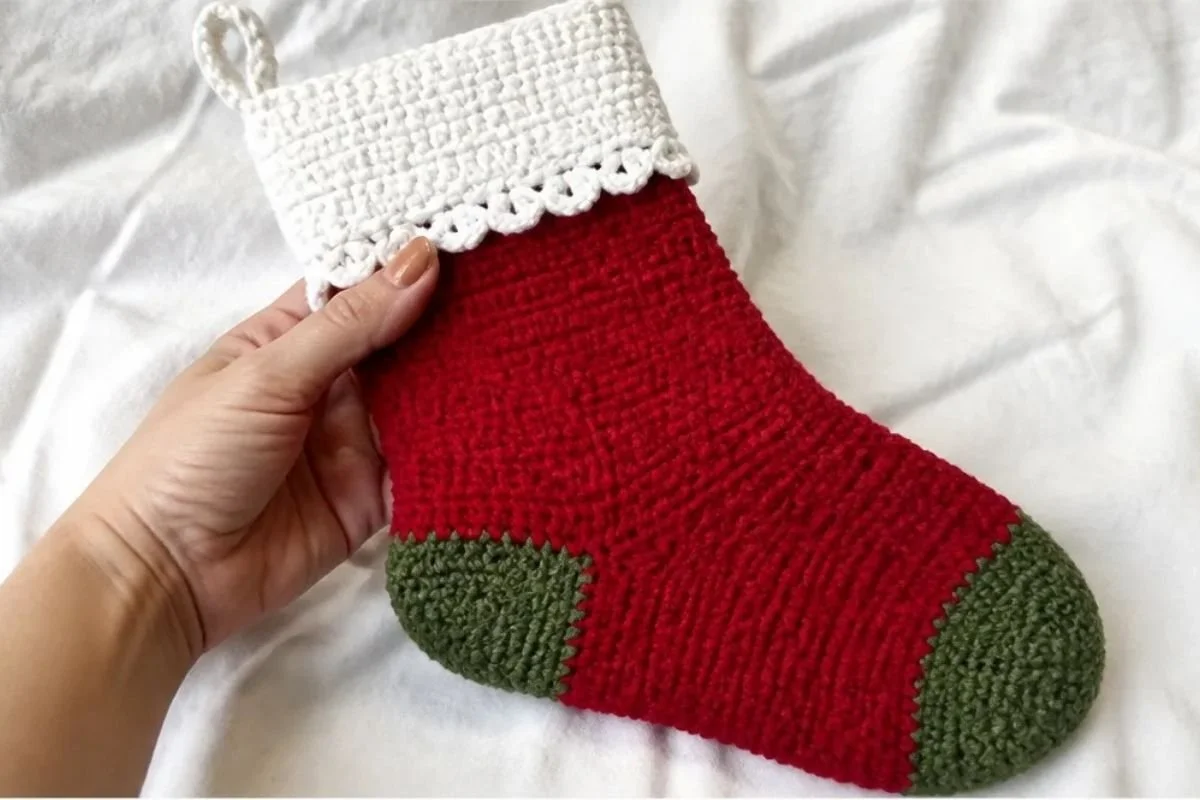
This pattern creates one Christmas stocking from a crocheted body, a shaped heel, a foot, a two-part toe, and a separate cuff. The stocking body is worked first with Color A and the larger hook. Color B shapes the heel and toe, while Color C creates the cuff and decorative edgings.
The construction sequence is:
- Crochet the stocking body.
- Add and shape the heel.
- Work the foot.
- Shape both halves of the toe.
- Sew the toe, foot, back, and heel openings.
- Crochet and sew the cuff.
- Add the lower cuff edging, attach the cuff, and finish the top edging with a hanging loop.
The pattern uses a 5 mm [US H-8] hook as the larger hook and a 4 mm [US G-6] hook as the smaller hook. The stocking body is worked until it measures 10” from the beginning.
Useful Abbreviations
- ch: chain
- dc: double crochet
- mm: millimeters
- sc: single crochet
- st(s): stitch(es)
- tog: together
- yo: yarn over
- A, B, C: Color A, Color B, and Color C
- Sc2tog: [draw up a loop in next st] twice, yo and draw through all 3 loops on hook.
When the instructions say to repeat Rows 2 and 3, continue working those two rows in sequence. For the heel and toe, follow the short-row boundaries exactly. For the edgings, work the stated pattern around the edge and join as directed.
Materials You’ll Need
Yarn
- RED HEART® Super Saver®: 1 skein each
- 332 Ranch Red (A)
- 633 Dark Sage (B)
- 316 Soft White (C)
Crochet Hooks
- 4 mm [US G-6]
- 5 mm [US H-8]
Notions
- Yarn needle
Step-by-Step Crochet Instructions
The following instructions preserve the complete construction sequence, stitch counts, color plan, and finishing details for the stocking.
Color Plan
- Color A: 332 Ranch Red
- Color B: 633 Dark Sage
- Color C: 316 Soft White
Stocking Body
With larger hook and A, ch 43.
Row 1 (Right Side): Sc in 2nd ch from hook and in each ch across; turn.
Stitch count: 42 sc
Row 2: Ch 3 (counts as dc), skip first sc, dc in next sc and in each sc across; turn.
Row 3: Ch 1, sc in each dc across, sc in top of ch-3; turn.
Repeat Rows 2 and 3 for pattern until 10” from beginning, end by working Row 2. Fasten off.
Heel
With right side facing and larger hook, skip first 32 sts of last row, join B in next st; ch 1, sc in same st and in next 9 sts, bring other side of stocking around and sc in first 11 sts; turn 21 sts.
Shape Heel
Work the short rows as follows, continuing until all 21 heel sts are worked:
- Next row: Ch 1, sc in first 14 sc; turn.
- Next row: Ch 1, sc in first 7 sc; turn.
- Next row: Ch 1, sc in first 7 sc, sc in next st of long row below; turn 8 sc.
- Next row: Ch 1, sc in first 8 sc, sc in next st of long row below; turn 9 sc.
Continue in this manner until all 21 heel sts are worked. Fasten off.
Foot
With right side facing and larger hook, skip first 10 sc of heel, join A in next sc; ch 1, sc in same sc and in next 10 sc of heel, skip next 2 sts of stocking, sc in next 17 sts of stocking, skip next 2 sts, sc in next 10 sts of heel; turn 38 sc.
Repeat pattern Rows 2 and 3 five more times, then Row 2 once more. Fasten off.
Toe
First Half of Toe
With right side facing and larger hook, join B in first st of foot.
Ch 1, sc2tog, sc in next 15 dc, sc2tog, turn 17 sc.
Continue in sc only and decrease 1 st each end of every row until 3 sts remain. Fasten off.
Second Half of Toe
With right side facing, join B in next st of last long row.
Work the same as the first half of the toe:
Ch 1, sc2tog, sc in next 15 dc, sc2tog, turn 17 sc.
Continue in sc only and decrease 1 st each end of every row until 3 sts remain. Fasten off.
Finishing the Stocking Seams
Sew toe, foot, and back seams.
Sew openings closed at corners of heel.
Cuff
With larger hook and C, ch 47.
Work 11 rows of sc over 46 sts. Fasten off.
Sew cuff seam.
Lower Cuff Edging
With right side facing and smaller hook, join C at back seam; ch 1, sc in first 2 sc.
*Skip next sc, (dc, [ch 1, dc] twice) all in next sc, skip next sc, sc in next sc; repeat from * around; join with a slip st in first sc.
Fasten off.
Attach the Cuff
With right side facing and smaller hook, join C at upper edge of back seam of cuff; ch 1, sc in first sc.
Place cuff over right side of stocking and, beginning at first st after back seam of stocking, work 21 sc through both layers at same time, sc in next sc of cuff only, sc in next 21 sc through both layers, sc in last sc of cuff only; join.
Fasten off.
Top Edging and Hanging Loop
Work the same as the lower edging:
With right side facing and smaller hook, join C at back seam; ch 1, sc in first 2 sc.
*Skip next sc, (dc, [ch 1, dc] twice) all in next sc, skip next sc, sc in next sc; repeat from * around; join with a slip st in first sc.
Ch 12 for hanging loop, slip st in first sc again.
Fasten off. Weave in all ends.
Ways to Display Your Finished Crochet
- Create a mantel arrangement. Hang several stockings together and alternate the direction of the toes for a balanced display.
- Use it as a small gift bag. Place wrapped sweets, ornaments, notes, or other lightweight gifts inside.
- Make a personalized family set. Keep the approved color plan for a coordinated look, then identify each stocking with a separate tag.
- Decorate a staircase or entryway. The hanging loop makes the stocking suitable for hooks, knobs, and decorative rails.
- Pair it with handmade holiday accents. A crochet bottle topper can complement the stocking when you are assembling a festive serving or gift display; see this beginner crochet bottle topper pattern for a related project.
Caring for Your Crochet Project
Treat the finished stocking gently, especially around the sewn seams, cuff edging, and hanging loop. Remove dust with a soft brush or by gently shaking the stocking outdoors.
For small marks, use careful spot cleaning rather than soaking the entire stocking. Avoid excessive heat, which can affect the shape and texture of the crocheted fabric. Allow any cleaned area to dry completely before storing.
When the holiday season ends, empty the stocking and check that all seams and ends remain secure. Store it in a clean, dry container away from moisture, direct sunlight, and sharp objects that could snag the yarn. Avoid overfilling it during display because excess weight may stretch the hanging loop or seams.
Tips for Better Results
- Identify the larger and smaller hooks before starting. The 5 mm [US H-8] hook is used for the main stocking, heel, foot, toe, and cuff. The 4 mm [US G-6] hook is used for the edgings and attachment.
- Count the foundation chain carefully. The starting chain is 43, but Row 1 finishes with 42 sc. This difference is intentional because the first chain is skipped.
- Mark the right side. The heel, foot, toe, and edging instructions depend on working with the right side facing.
- Track the 21 heel stitches. The heel begins with 21 sts, and the short rows gradually bring all of those stitches into the shaped section.
- Watch the foot skips. The foot begins with 38 sc and includes two skipped stitches on each side of the stocking section. Keep the placement of these skips accurate so the heel and foot join cleanly.
- Count each toe decrease. The first toe row has 17 sc after working sc2tog at both ends. Continue decreasing 1 st at each end of every row until 3 sts remain.
- Sew before attaching the cuff. Complete the toe, foot, back, and heel-corner seams before joining the cuff to the stocking.
- Use a yarn needle for neat finishing. Weave in all ends securely, especially around the cuff, edging, and hanging loop.
Creative Ways to Customize Your Project
The approved pattern uses Ranch Red, Dark Sage, and Soft White, but the color assignments can be changed as an optional styling choice. For example, use a pale neutral for the body and reserve the strongest color for the heel and toe, or use two shades of green for a woodland-inspired stocking.
You can also coordinate several stockings with a seasonal palette such as red and cream, evergreen and natural white, or burgundy and soft gray. Keep the same construction and stitch counts when changing colors so the shape remains consistent.
If you substitute yarn, choose a similar yarn type and monitor your tension carefully. A different yarn or hook size may affect the dimensions, texture, drape, and amount of yarn required. Changes should be treated as optional modifications rather than part of the approved instructions.
Frequently Asked Questions
Is this stocking suitable for beginners?
Yes. The pattern uses foundational stitches and introduces shaping through short rows and decreases. Beginners should read the heel and toe instructions carefully and count stitches after each key section.
Which hook is used for most of the stocking?
The larger hook is used for the stocking body, heel, foot, toe, and cuff. The materials list includes a 5 mm [US H-8] hook as the larger hook.
When is the smaller hook used?
The smaller 4 mm [US G-6] hook is used for the lower cuff edging, attaching the cuff, and working the top edging.
How many stitches are made in the first row?
The foundation chain is 43, and Row 1 produces 42 sc because the first chain is skipped.
How is the heel shaped?
The heel begins with 21 sts in Color B. Short rows are worked with progressively shorter sections, then additional stitches are worked from the long row below until all 21 heel sts are worked.
Does the toe use decreases?
Yes. Each toe half begins with sc2tog at both ends of the row, producing 17 sc. Continue in sc only while decreasing 1 st at each end of every row until 3 sts remain.
When should the seams be sewn?
After completing both toe halves, sew the toe, foot, and back seams. Also sew the openings closed at the corners of the heel before attaching the cuff.
Can the colors be changed?
Yes, color changes are an optional design choice. Keep the pattern’s stitch counts and construction sequence the same, and remember that a different yarn may affect the finished fabric and dimensions.
How does the stocking hang?
The top edging includes a chain-12 hanging loop, which is secured with a slip stitch in the first sc again.
Conclusion
This easy crochet Christmas stocking pattern combines festive colors with approachable shaping and decorative edging. It offers practice with short rows, decreases, seams, and finishing while creating a useful holiday decoration or gift holder. Once complete, display it proudly, fill it with small surprises, or make a coordinated set. For another stocking idea, compare it with this basic crochet stocking pattern.