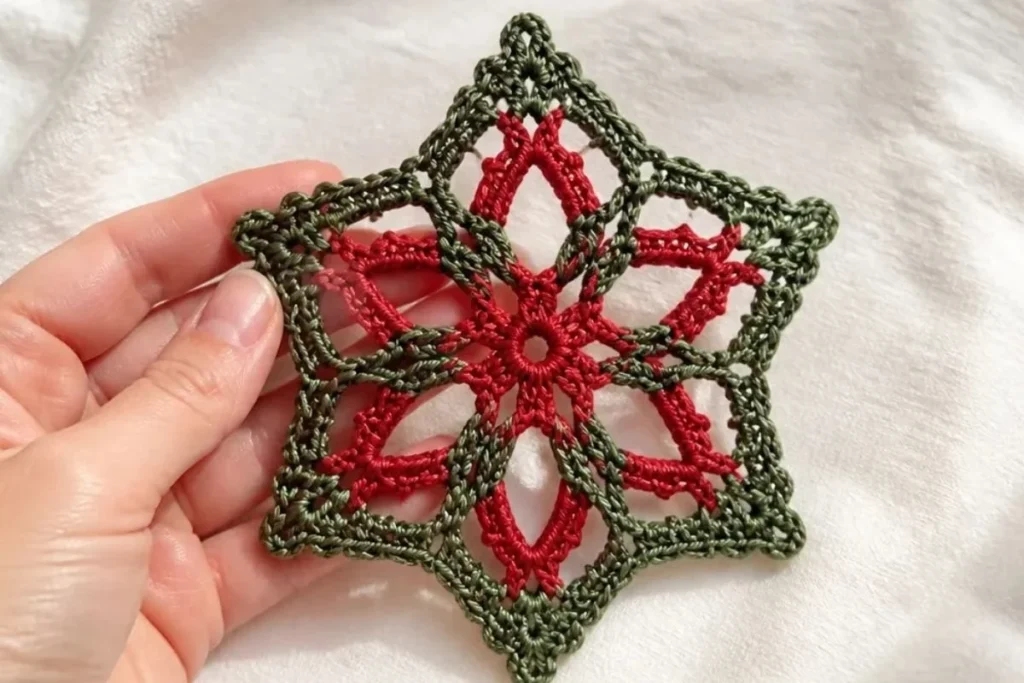
An easy crochet Christmas star ornament is a cheerful way to add handmade color to a holiday tree, gift package, mantel, or seasonal centerpiece. This five-pointed design uses Autumn Red for the first portion and Dark Sage for the final round, creating a rich, festive contrast. The pattern is approachable for beginners who are comfortable with chains, single crochet, slip stitches, and working into chain spaces. For another small handmade decoration idea, pair it with a crochet rose ornament project for a varied holiday display.
Why You’ll Love This Crochet Project
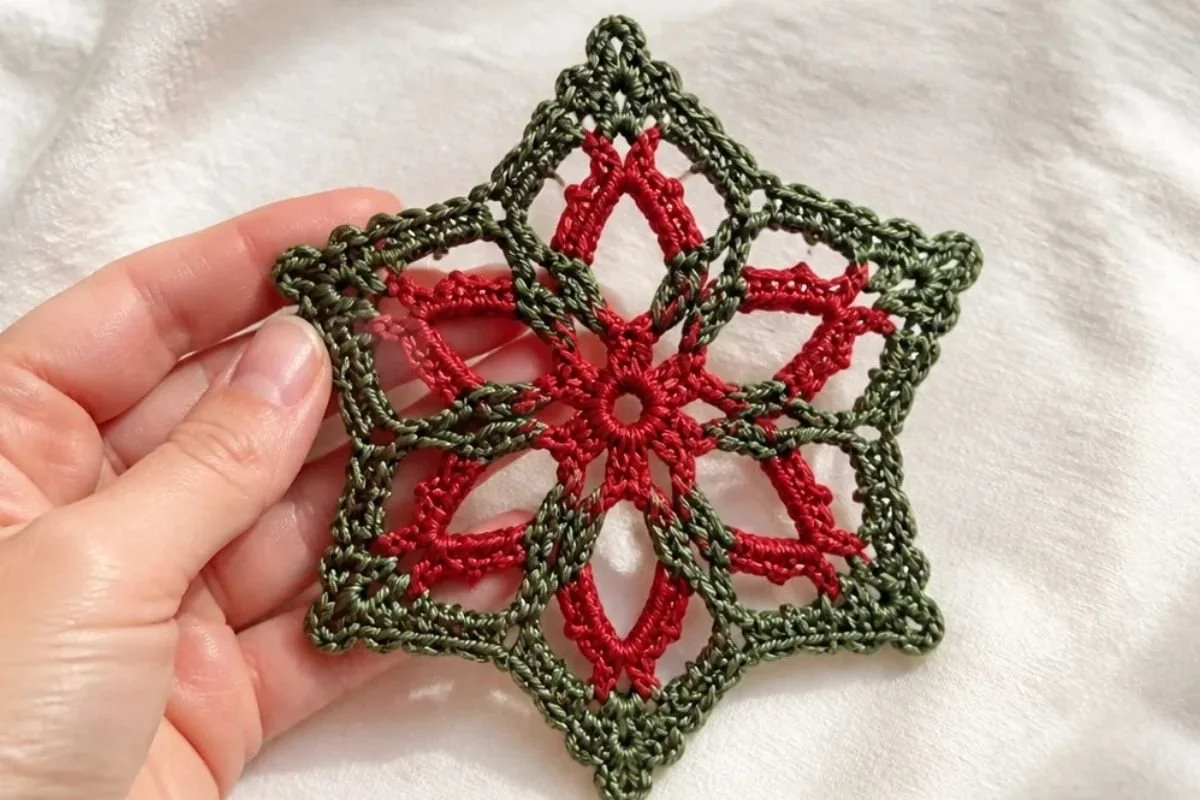
- Beginner-friendly construction: The star is built in four rounds with familiar stitches and a simple color change.
- Quick decorative impact: A small amount of yarn creates a recognizable five-pointed ornament suitable for many seasonal uses.
- Useful stitch practice: You will work into a ring, create chain spaces, shape corners, and join rounds neatly.
- Gift-ready versatility: Finished stars can decorate wrapped presents, holiday cards, wreaths, or table settings.
- Easy color coordination: The supplied red and sage combination feels festive while remaining soft and natural enough for rustic or botanical décor.
My Crochet Flower Tip: Keep the center ring snug but not tightly closed. A firm center helps the star hold its shape, while enough room for the stitches makes Round 1 easier to work.
Before You Start Crocheting
This pattern makes one five-pointed crochet star ornament. The design begins with Contrast A, Autumn Red, and develops from a five-stitch-space foundation. After Round 3, Contrast B, Dark Sage, is joined for the final shaping round.
The project uses single crochet, chain stitches, slip stitches, skipped stitches, and work into chain spaces. The approved instructions also include a reference to the center of the ring, “see photo,” and the symbols + and “skip 2 sc” in Round 4. Those details are retained exactly in the pattern below rather than interpreted or changed.
Useful Abbreviations
- ch: chain
- sc: single crochet
- sl st: slip stitch
Work with consistent tension throughout the first three rounds so the five corner spaces remain evenly sized. The final round adds definition around those corners and completes the star shape.
Materials You’ll Need
- Simply Soft: 170 g/6. oz; 288 m/315 yds
- Contrast A, Autumn Red (9730): 1
- Contrast B, Dark Sage (9707): 1
- Yarn needle: for weaving in all ends
The supplied materials list does not specify a crochet hook size, so use the hook size recommended for your selected Simply Soft yarn or the size that allows you to form even, flexible stitches.
Step-by-Step Crochet Instructions
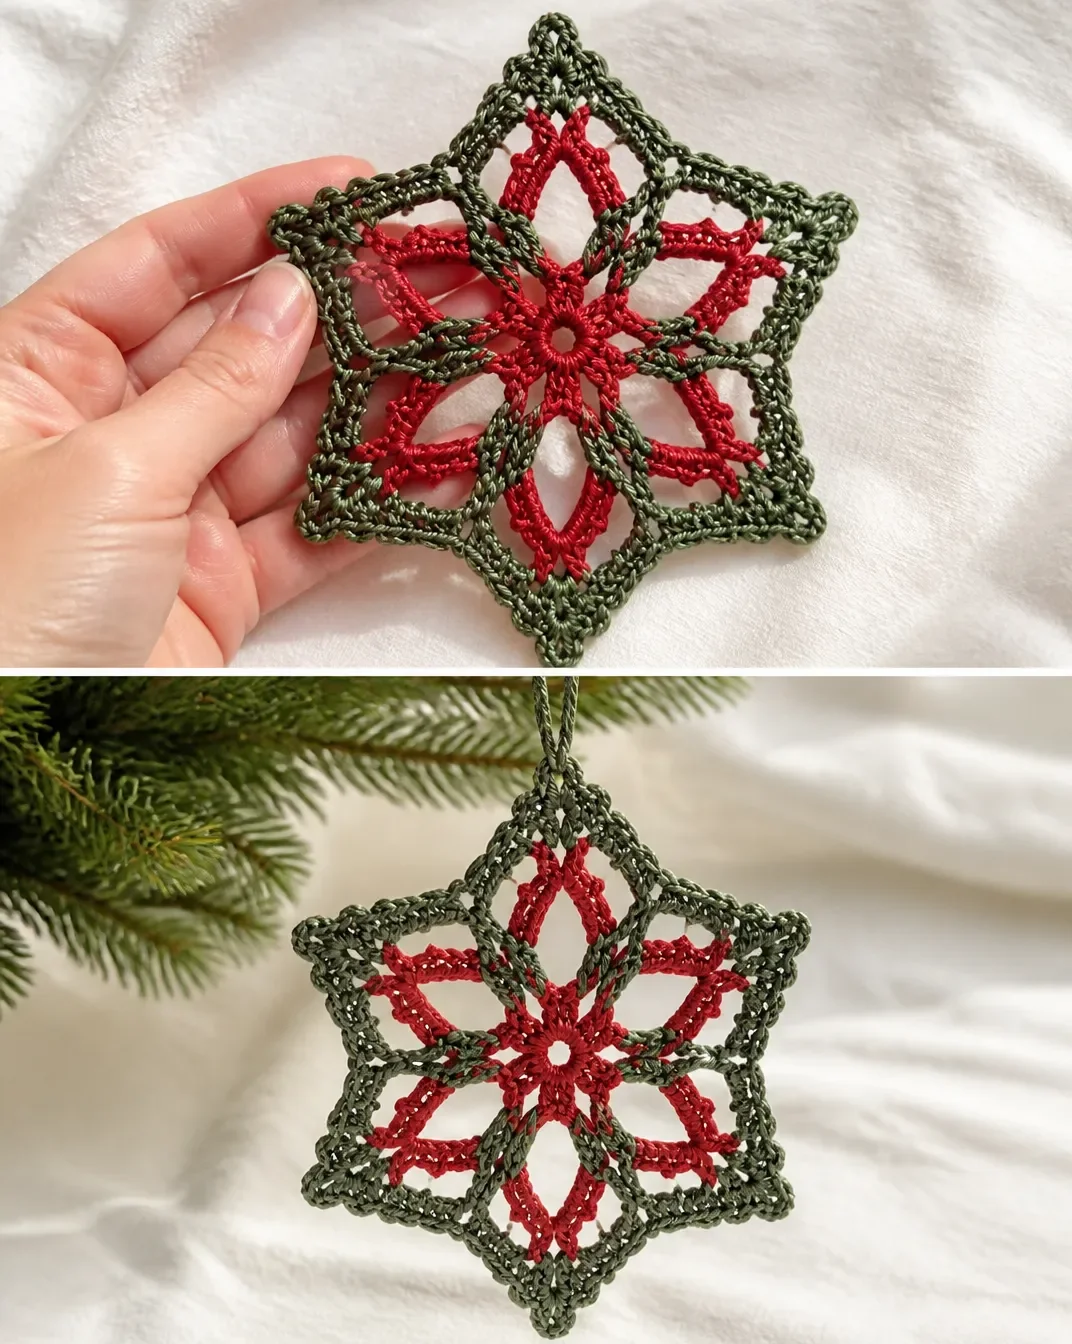
Follow the rounds in order. Stitch counts and space results are included exactly where provided.
Setup
Using A, chain 5; join with slip stitch to form ring.
Round 1
- Ch 1.
- Work 10 sc in ring.
- Join with slip stitch to first sc.
- Stitch count: 10 sc.
Round 2
- Ch 6, skip next sc, slip st in next sc; repeat from * 4 times.
- Join with a slip stitch in the base of beginning ch-6.
- Stitch/space result: five ch-6 spaces.
The five chain spaces create the framework for the star’s points. Keep each chain length consistent so the spaces have similar size and shape.
Round 3
- Ch 1.
- Work [3 sc, ch 5, 3 sc] in each ch-6 space.
- Join with slip stitch to first sc.
- Stitch/space result: five ch-5 corner spaces.
The corner sequence [3 sc, ch 5, 3 sc] is worked in each of the five ch-6 spaces.
Color Change / Transition to B
- Fasten off A.
- Join B with a sc in any ch-5 corner space (counts as first sc).
When joining the new color, select any corner space as your starting point. Since all five corners are formed alike in Round 3, the choice of starting space does not change the star’s basic shape.
Round 4
- Work [2 sc ch 3, 3 sc] in same space as joining.
- sc in next 2 sc, sc in center of ring (see photo), skip 2 sc, + sc in next 2 sc, work [3 sc, ch 3, 3 sc) in next corner space; repeat from * 4 times, end last repeat at +, sc in last two sc, join with a slip st to first sc.
- Fasten off.
Pattern note: Round 4 includes the bracketed and symbol instructions exactly as written, including the reference “see photo,” the symbol +, and “skip 2 sc.”
Finishing
Using yarn needle, weave in all ends.
Take care not to pull the finishing tails so tightly that the five points curl inward. Weaving the ends securely through nearby stitches helps preserve the outline without adding bulk to the corners.
Ways to Display Your Finished Crochet
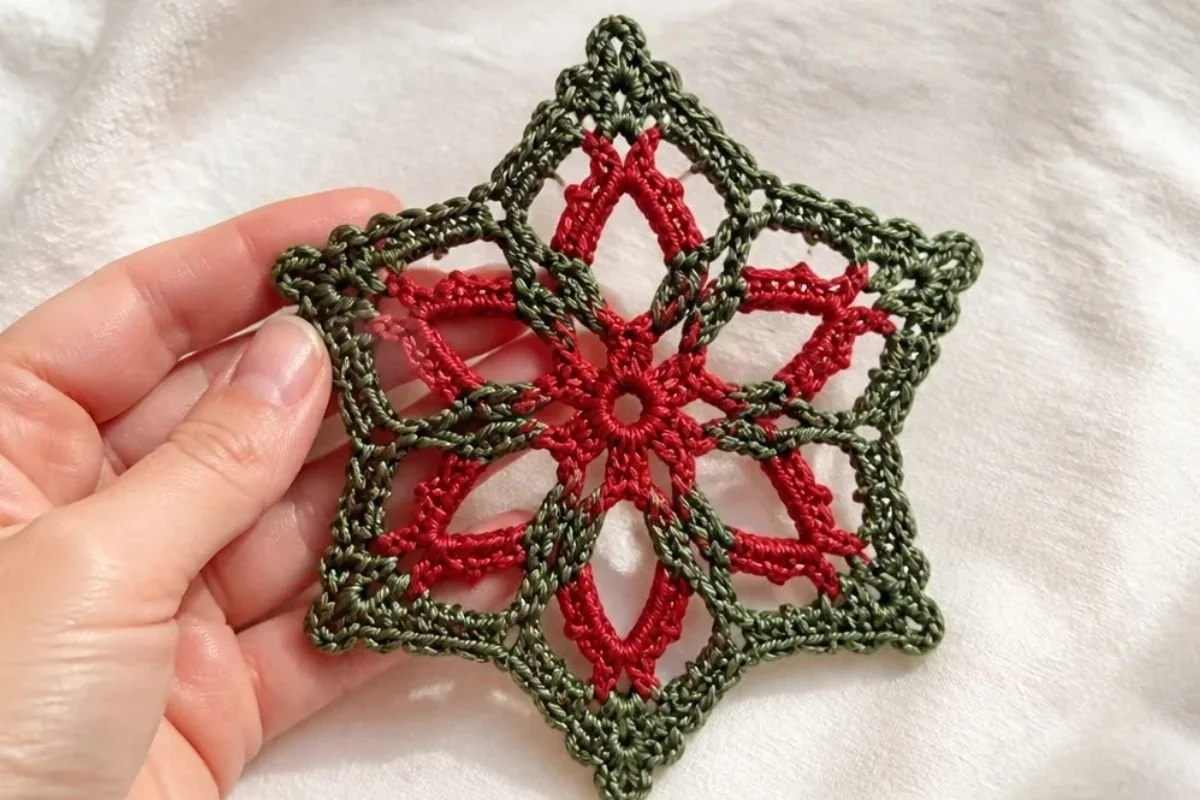
- Tree ornament: Add a discreet hanging loop using matching yarn, then place the star among glass, wood, or metallic ornaments.
- Gift decoration: Tie one star to ribbon or twine on a wrapped present for a reusable embellishment.
- Holiday table setting: Position a star beside each napkin or place one at the center of a seasonal tablescape.
- Wreath accent: Attach several stars around a greenery wreath, keeping the red and sage colors evenly distributed.
- Mantel or shelf display: Arrange stars in a shallow bowl or along a garland for a small handmade seasonal accent.
- Coordinated handmade décor: Combine the star with other small crochet decorations, such as a beginner-friendly crochet bottle topper pattern, for a cohesive holiday gift set.
Caring for Your Crochet Project
Keep the finished star clean by gently dusting it with a soft, dry cloth or a clean, soft brush. If a small area needs attention, use careful spot cleaning with minimal moisture and avoid soaking the ornament.
Allow any damp area to dry completely at room temperature before storing. Do not place the star near excessive heat, since heat can affect the yarn’s shape and make the points curl or flatten.
For storage, lay the ornament flat between sheets of acid-free tissue or place it in a clean, dry container. Avoid compressing it beneath heavy decorations. Store it away from direct sunlight when not in use to help preserve the color.
Tips for Better Results
- Make the beginning ring secure. Join the five-chain foundation with a slip stitch, but avoid tightening it so much that inserting the hook into the ring becomes difficult.
- Count the first round carefully. Round 1 must contain 10 sc. Counting before joining helps prevent uneven chain spaces in Round 2.
- Keep the five spaces even. In Round 2, repeat the chain-and-slip-stitch sequence consistently so all five ch-6 spaces match.
- Identify every corner space. In Round 3, each ch-6 space receives
[3 sc, ch 5, 3 sc]. The ch-5 sections become the five corner spaces used for the color transition. - Join Contrast B cleanly. The sc used to join B in a ch-5 corner space counts as the first sc, so include it when following Round 4.
- Watch the special wording in Round 4. Keep the “see photo,”
+, and “skip 2 sc” references visible while working rather than rewriting or rearranging that round. - Do not over-tighten the corners. A relaxed, even tension allows the points to spread into a recognizable star shape.
- Weave in ends securely. Use the yarn needle to pass each tail through nearby stitches several times, then trim excess yarn neatly.
Color and Styling Variations
The approved pattern uses Contrast A Autumn Red and Contrast B Dark Sage, but the finished ornament can be personalized with other color combinations as an optional styling choice.
- Use cream and gold for a softer, traditional holiday palette.
- Try icy blue and white for a winter-themed display.
- Pair burgundy with forest green for a deeper seasonal arrangement.
- Work the first three rounds in one color and the final round in a strongly contrasting shade to emphasize the five points.
- Make a group of stars in several coordinated colors and arrange them together in a bowl or across a garland.
- Add the star to a natural display with pinecones, dried greenery, or unfinished wood accents.
These are optional color changes only; keep the approved stitch sequence unchanged. Changing yarn type or hook size may affect the ornament’s dimensions, stitch definition, drape, and yarn requirements, so make a small test section if consistent sizing across multiple stars matters.
Frequently Asked Questions
Is this crochet star ornament suitable for beginners?
Yes. The pattern uses chain stitches, single crochet, slip stitches, skipped stitches, and work into spaces. Beginners should be comfortable counting stitches and joining rounds.
How many star components does the pattern make?
The instructions create one complete five-pointed star ornament. The design is worked continuously in four rounds rather than assembled from separate points.
What yarn colors are used?
Contrast A is Autumn Red (9730), and Contrast B is Dark Sage (9707). Autumn Red is used through Round 3, and Dark Sage is joined for Round 4.
When does the color change happen?
Fasten off A after Round 3. Then join B with a sc in any ch-5 corner space; that joining sc counts as the first sc of Round 4.
Can I use different colors?
Yes. You can substitute other colors as an optional variation while keeping the pattern instructions the same. Choose colors with enough contrast if you want the final round and star points to stand out.
What should I do if the points curl?
Check your tension first. Very tight stitches can pull the corner spaces inward. Gently reshape the star by spreading the five points while the piece rests flat, and avoid excessive heat.
How should I finish the ornament?
After fastening off in Round 4, use a yarn needle to weave in all ends. If you want to hang the star, you may add a small yarn loop as a display adaptation.
Can I make several stars for a matching set?
Yes. Repeat the complete pattern for each additional ornament, keeping your tension consistent if you want the stars to be similar in size. You can also vary the color placement for a coordinated collection.
Conclusion
This easy crochet Christmas star ornament is a compact project with clear round-by-round shaping and plenty of room for seasonal creativity. The red-and-sage color combination makes a warm holiday accent, while alternate colors can coordinate with any décor. Display the finished stars on a tree, package, table, or garland, and explore another free crochet star ornament pattern for even more handmade inspiration.