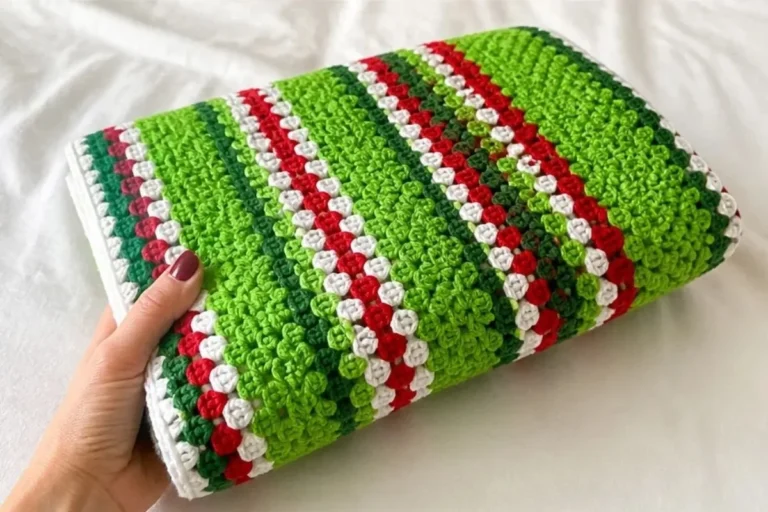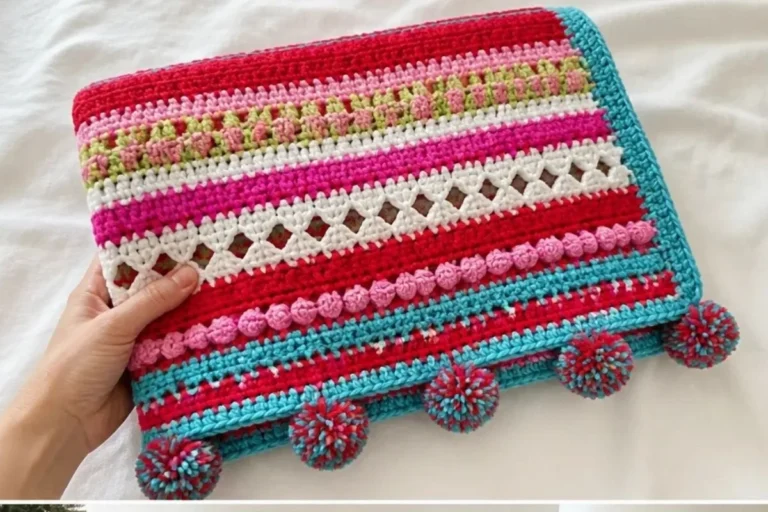
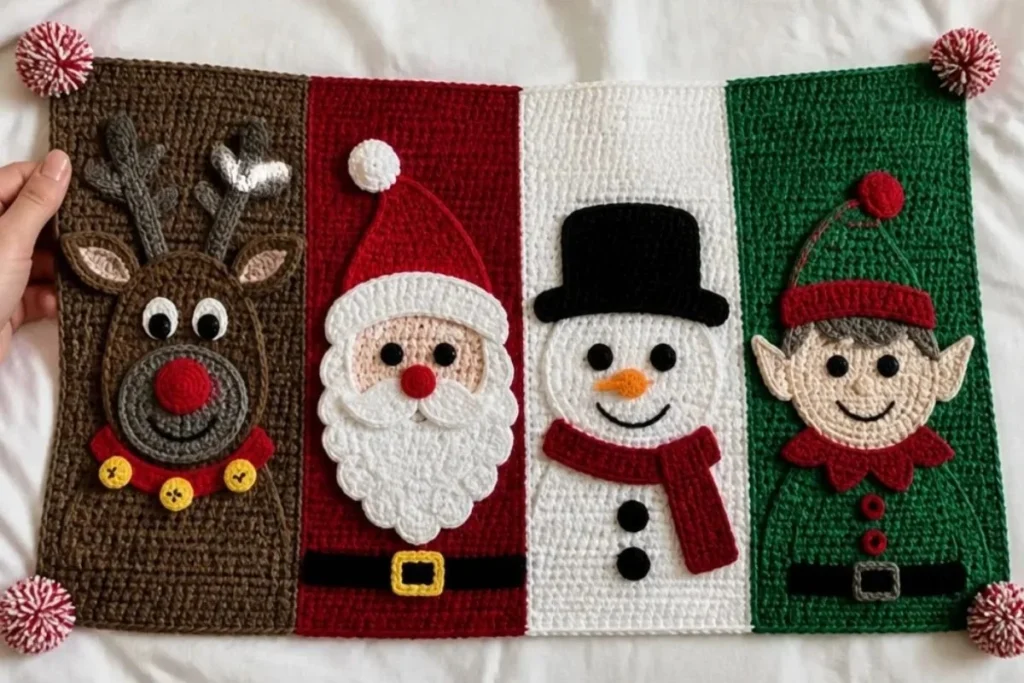
A cheerful Crochet Blanket Pattern: Christmas Characters for Holiday Decor brings Rudolph, Santa, a snowman, and an elf together across four colorful panels. The bold stripes and dimensional stitched appliqués make this blanket especially appealing for seasonal decorating, holiday gifts, or cozy family use. Crocheters who enjoy working small shaped pieces will practice increases, decreases, magic loops, color changes, and embroidery-style assembly. For another festive handmade accent, pair the blanket with a crochet floral decoration for holiday entertaining.
Why You’ll Love This Crochet Project
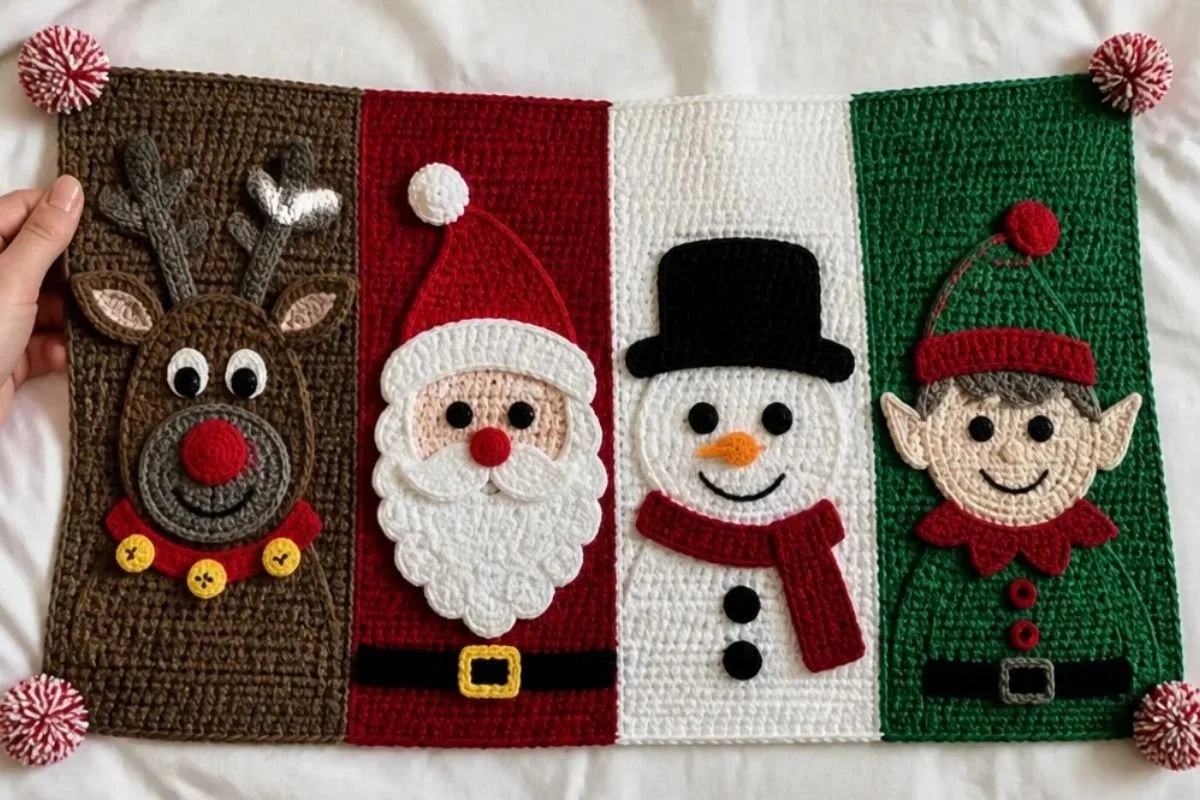
- Four festive characters: Each panel has its own personality, from Rudolph’s antlers to the elf’s fringe.
- Useful stitch practice: The pattern combines single crochet, half double crochet, double crochet, treble crochet, decreases, magic loops, and backstitching.
- Strong seasonal color scheme: Walnut, red, white, Kelly green, yellow, black, and dark heather create an unmistakable Christmas palette.
- Giftable home décor: The completed blanket can be displayed over a chair, folded in a basket, or given as a handmade holiday gift.
- Creative finishing details: Optional corner pompoms add extra texture and a playful frame.
My Crochet Flower Tip: Keep each character’s pieces together in a labeled bag or envelope as you work. This makes assembly much easier after the blanket stripes are complete.
Before You Start Crocheting
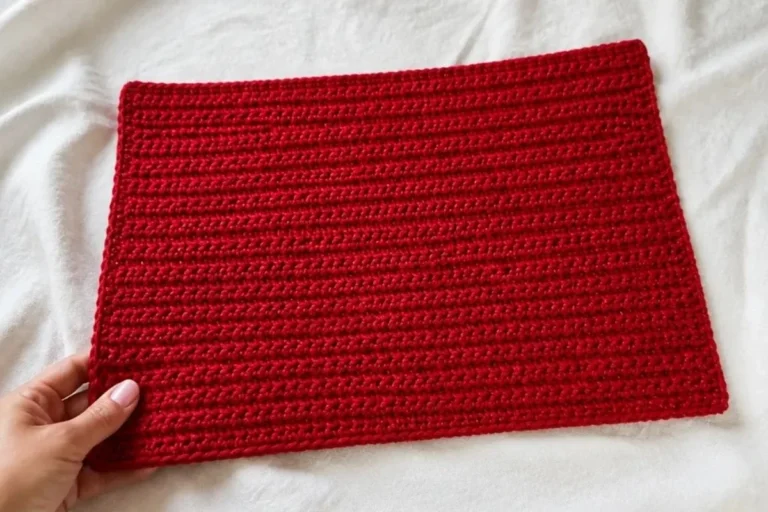
The blanket begins with a 160-row striped foundation worked side-to-side in four 40-row color sections. The foundation has 112 single crochet stitches across each row. Rudolph, Santa, the snowman, and the elf are then made from separate crocheted pieces and stitched onto their corresponding color panels.
Important techniques include working into a magic loop, shaping with increases and decreases, joining new colors, crocheting evenly around small pieces, and sewing through the tops or fronts of stitches. The supplied pattern does not specify a skill level or finished dimensions, so use the stated hook or the size needed to obtain gauge and let your tension guide the fabric.
Useful Abbreviations
- ch: chain
- sc: single crochet
- hdc: half double crochet
- dc: double crochet
- tr: treble crochet
- sl st: slip stitch
- sc2tog: single crochet two together
- dc2tog: double crochet two together
- rnd: round
- RS: right side
- rem: remaining
Materials You’ll Need
- Bernat® Super Value™ (7 oz / 197 g; 440 yds / 402 m): 7 balls total
- Contrast A Walnut (07483): 1 ball
- Contrast B True Red (53707): 1 ball
- Contrast C White (07391): 1 ball
- Contrast D Kelly (00609): 1 ball
- Contrast E Bright Yellow (00608): 1 ball
- Contrast F Black (07421): 1 ball
- Contrast G Dark Heather (53022): 1 ball
- Size U.S. H/8 (5 mm) crochet hook, or size needed to obtain gauge
- Yarn needle
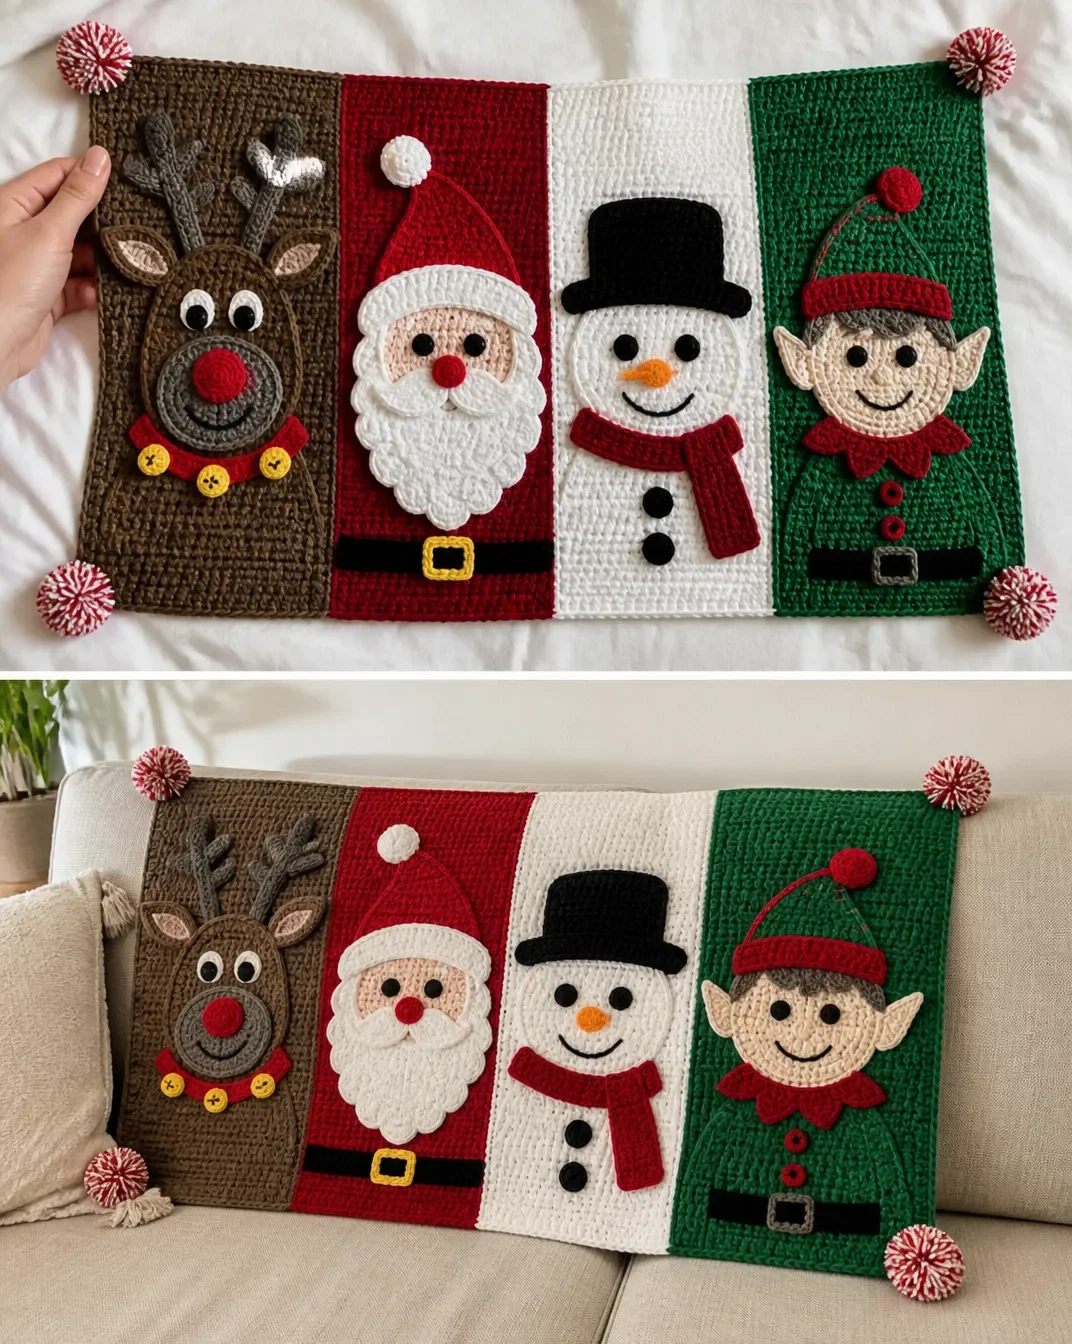
Complete Crochet Tutorial
Main Blanket Structure: Four Stripes or Panels
Stripe Foundation
The blanket is worked side-to-side in four color sections.
With A, ch 113.
- 1st row: (RS). 1 sc in 2nd ch from hook. 1 sc in each ch to end of chain. Turn. 112 sc.
- 2nd row: Ch 1. 1 sc in each st to end of row. Turn.
- 3rd to 40th rows: As 2nd row. Break A. Join B.
- 41st to 80th rows: With B, as 2nd row. Break B. Join C.
- 81st to 120th rows: With C, as 2nd row. Break C. Join D.
- 121st to 160th rows: With D, as 2nd row. Fasten off.
Panel I: Rudolph
Left Antler
With G, ch 17.
- 1st row: (RS). 1 sc in 2nd ch from hook. 1 sc in each ch to end of chain. Turn. 16 sc.
- 2nd row: Ch 1. 1 sc in each st to end of row. Turn.
- 3rd rnd: Ch 1. 1 sc in each of first 5 sts. Skip next 2 sts. 7 dc in next st. Skip next 2 sts. 1 sc in next st. Skip next 2 sts. 8 dc in next st. Skip next 2 sts. Do not turn. Work 1 rnd of sc evenly along top, side, and bottom of Right Antler. Join with sl st to first sc. Fasten off.
Right Antler
Work from ** to ** as for Left Antler.
3rd row: Ch 1. Skip first 2 sts. 8 dc in next st. Skip next 2 sts. 1 sc in next st. Skip next 2 sts. 7 dc in next st. Skip next 2 sts. 1 sc in each of last 5 sts. Do not turn. Work 1 rnd of sc evenly along bottom, side, and top of Left Antler. Join. Fasten off.
Ears (Make 2)
With A, ch 5.
- 1st row: 1 sc in 2nd ch from hook. 1 sc in each ch to end of chain. Turn. 4 sc.
- 2nd row: Ch 1. 2 sc in first st. 1 sc in each of next 2 sts. 2 sc in last st. Turn. 6 sc.
- 3rd row: Ch 1. 2 sc in first st. 1 sc in each of next 4 sts. 2 sc in last st. Turn. 8 sc.
- 4th to 8th rows: Ch 1. 1 sc in each st to end of row. Turn. 9 sc.
- 9th row: Ch 1. Sc2tog. 1 sc in each of next 4 sts. Sc2tog. Turn. 6 sc.
- 10th row: Ch 1. Sc2tog. 1 sc in each of next 2 sts. Sc2tog. Turn. 4 sc.
- 11th row: Ch 1. Sc2tog twice. 2 sc.
- 12th rnd: Ch 1. Sc2tog. Do not turn. Work 1 rnd of sc evenly around Ear. Join. Fasten off, leaving a long tail.
Eyes (Make 2)
With F, beg using magic loop.
- 1st rnd: Ch 1. 8 sc in loop. Join.
- 2nd rnd: Ch 1. 2 sc in each st around. Join. 16 sts. Break F. Join C.
- 3rd rnd: Ch 1. 2 sc in each of first 4 sts. 2 hdc in next st. 2 dc in each of next 6 sts. 2 hdc in next st. 2 sc in each of last 4 sts. Join. Fasten off, leaving a long tail.
Nose
With B, beg using magic loop.
- 1st rnd: Ch 1. 10 sc in loop. Join.
- 2nd rnd: Ch 1. 2 sc in each st around. Join. 20 sts. Fasten off, leaving a long tail.
Snout
With G, beg using magic loop.
- 1st rnd: Ch 1. 10 sc in loop. Join.
- 2nd rnd: Ch 1. 2 sc in each st around. Join. 20 sts.
- 3rd rnd: Ch 1. *2 sc in next st. 1 sc in next st. Rep from * around. Join. 30 sts.
- 4th rnd: Ch 1. 1 sc in each st around. Join.
- 5th rnd: Ch 1. *2 sc in next st. 1 sc in each of next 2 sts. Rep from * around. Join. 40 sts.
- 6th rnd: Ch 1. *2 sc in next st. 1 sc in each of next 3 sts. Rep from * around. Join. 50 sts.
- 7th rnd: Ch 2. *1 dc in each of first 15 sts. 1 hdc in next st. 1 sc in each of next 18 sts. 1 hdc in next st. 1 dc in each of last 15 sts. Join. Fasten off, leaving a long tail.
Optional: Using strand of F, backstitch a smile between 3rd and 4th rnds as shown in photo (see page 6).
Collar
Note: Starting chain is worked tightly to shape curved collar.
With B, ch 34.
- 1st row: 1 dc in 3rd ch from hook (counts as first dc). 1 sc in each ch to end of ch. Turn. 32 sts.
- 2nd row: Ch 2. 1 dc in each st to end of row. Fasten off.
Collar Bells (Make 3)
With E, beg using magic loop.
- 1st rnd: Ch 1. 10 sc in loop. Join. Fasten off, leaving a long tail.
Assembly and Stitching for Panel I
Stitch Nose to Snout.
Stitch Antlers, Ears, Nose/Snout, Collar, and Bells to Blanket, as shown in photo (see page 6).
When sewing pieces to Blanket, work through tops/fronts of sts.
Panel II: Santa
Hat
With C, ch 25.
- 1st row: 1 sc in 2nd ch from hook. 1 sc in each ch to end of chain. Turn. 24 sts.
- 2nd and 3rd rows: Ch 1. 1 sc in each st to end of row. Turn. Break C. Join B.
- 4th row: With B, ch 1. Sc2tog. 1 sc in each st to last 2 sts. Sc2tog. Turn. 22 sts.
- 5th row: Ch 1. 1 sc in each st across. Turn.
- 6th to 23rd rows: Rep 4th and 5th rows 9 times more. 4 sts.
- 24th and 25th rows: As 5th row.
- 26th row: Ch 1. (Sc2tog) twice. 2 sts.
- 27th row: Ch 1. 1 sc in each st to end of row. Fasten off.
Hat Pompom
With C, beg using magic loop.
- 1st rnd: Ch 1. 10 sc in loop. Join.
- 2nd rnd: Ch 1. 2 sc in each st around. Join. 20 sts. Fasten off.
Santa Head with Beard
With G, beg using magic loop.
- 1st rnd: Ch 1. 10 sc in loop. Join.
- 2nd rnd: Ch 1. 2 sc in each st around. Join. 20 sts.
- 3rd rnd: Ch 1. *2 sc in first st. 1 sc in next st. Rep from * around. Join. 30 sts.
- 4th rnd: Ch 1. 1 sc in each st around. Join.
- 5th rnd: Ch 1. *2 sc in first st. 1 sc in each of next 2 sts. Rep from * around. Join. 40 sts.
- 6th rnd: Ch 1. *2 sc in first st. 1 sc in each of next 3 sts. Rep from * around. Join. 50 sts.
- 7th rnd: As 4th rnd.
- 8th rnd: Ch 1. *2 sc in first st. 1 sc in each of next 4 sts. Rep from * around. Join. 60 sts.
- 9th rnd: As 4th rnd.
- 10th rnd: Ch 1. *2 sc in first st. 1 sc in each of next 5 sts. Rep from * around. Join. 70 sts.
- 11th and 12th rnds: As 4th rnd. Break G. Join C.
- 13th row: Ch 2. 1 dc in each of next 26 sts. Turn, leaving rem sts unworked.
- 14th row: Ch 2. Dc2tog. 1 dc in each st to last 2 sts. Dc2tog. Turn. 24 sts.
- Rep 14th row until 10 sts rem. Fasten off, leaving a long tail.
Santa Eyes (Make 2)
With F, beg using magic loop.
- 1st rnd: Ch 1. 10 sc in loop. Join with sl st to first sc. Fasten off.
Santa Nose
With B, beg using magic loop.
- 1st rnd: Ch 2. (3 dc in loop. 1 hdc in loop. 1 sc in loop. 1 hdc in loop) twice. Join. Fasten off, leaving a long tail.
Santa Mustache
With C, ch 18.
- 1st row: 1 sl st in 2nd ch from hook. 1 sl st in next ch. 1 sc in next ch. 1 dc in each of next 2 ch. 1 tr in each of next 2 ch. 1 dc in next ch. 1 sl st in next ch. 1 dc in next ch. 1 tr in each of next 2 ch. 1 dc in each of next 2 ch. 1 sc in next ch. 1 sl st in each of last 2 ch. Fasten off, leaving a long tail.
Santa Belt
With F, ch 34.
- 1st row: 1 dc in 4th ch from hook (counts as 2 dc). 1 dc in each ch to end of ch. Turn. 32 sts.
- 2nd and 3rd rows: Ch 2. 1 dc in each st to end of row. Turn. Fasten off, leaving a long tail.
Belt Buckle
With E, beg using magic loop.
- 1st rnd: Ch 1. (5 sc in ring. Ch 2). 4 times. Join with sl st to first sc. Fasten off loosely.
Assembly and Finishing for Panel II
Stitch all embellishments onto red panel of Blanket as shown in photo (see page 6).
Panel III: Snowman
Hat
With F, ch 25.
- 1st row: (RS). 1 sc in 2nd ch from hook. 1 sc in each ch to end of chain. Turn. 24 sts.
- 2nd to 4th rows: Ch 1. 1 sc in each st to end of row. Turn. Break F.
- 5th row: Join F in 5th st. Ch 1. 1 sc in each of next 16 sts. Turn, leaving rem sts unworked.
- 6th to 13th rows: Ch 1. 1 sc in each st across. Turn. Fasten off, leaving a long tail.
Eyes (Make 2)
With F, beg using magic loop.
- 1st rnd: Ch 1. 10 sc in ring. Join with sl st to first sc. Fasten off, leaving a long tail.
Nose
With E, ch 10.
- 1st row: 1 sc in 2nd ch from hook. 1 hdc in each of next 2 sts. 1 dc in each of next 3 sts. 1 tr in each of last 3 sts. Ch 3. Join to base of last tr. Fasten off, leaving a long tail.
Buttons (Make 3)
With F, beg using magic loop.
- 1st rnd: Ch 1. 10 sc in loop. Join with sl st to first sc.
- 2nd rnd: Ch 1. 2 sc in each st around. Join. 20 sts. Fasten off.
Scarf
With B, ch 34.
- 1st row: 1 dc in 3rd ch from hook (counts as 2 dc). 1 dc in each ch to end of ch. Turn. 32 sts.
- 2nd and 3rd rows: Ch 2. 1 dc in each st to end of row. Turn. Break B.
- 4th row: Join B to 8th st. Ch 2. 1 dc in each of next 5 sts. Turn, leaving rem sts unworked.
- 5th and 6th rows: Ch 2. 1 dc in each st to end of row. Turn. Fasten off.
Scarf Fringe
Cut strands of B 6″ [15 cm] long.
Fold in half and knot into fringe along bottom of Scarf.
Trim fringe evenly.
Assembly and Finishing for Panel III
Stitch Hat, Eyes, Nose, and Scarf to panel as shown in photo.
Using a strand of F, backstitch a smile as shown in photo (see page 6).
Panel IV: Elf
Hat
With D, ch 25.
- 1st row: 1 ch in 2nd ch from hook. 1 sc in each ch to end of chain. Turn. 24 sts.
- 2nd and 3rd rows: Ch 1. 1 sc in each ch to end of row. Turn.
- 4th row: Ch 1. Sc2tog. 1 sc in each st to last 2 sts. Sc2tog. Turn. 22 sts.
- 5th row: Ch 1. 1 sc in each st to end of row. Turn.
- 6th row: Ch 1. Sc2tog. 1 sc in each st to last 2 sts. Sc2tog. Turn. 20 sts.
- 7th row: Ch 1. 1 sc in each st to end of row. Turn. Break D. Join B.
- 8th to 13th rows: As 6th and 7th rows. Turn. 14 sts. Break B. Join D.
- 14th row: Ch 1. Sc2tog, 1 sc in each st to last 2 sts. Sc2tog. Turn. 12 sts.
- 15th row: Ch 1. 1 sc in each st to end of row. Turn.
- 16th to 23rd rows: As 14th and 15th rows. 4 sts.
- 24th and 25th rows: As 15th row. Turn.
- 26th row: Ch 1. (Sc2tog) twice. Turn. 2 sts.
- 27th row: As 15th row. Fasten off, leaving a long tail.
Hat Pompom
With B, beg using magic loop.
- 1st rnd: Ch 1. 10 sc in loop. Join.
- 2nd rnd: Ch 1. 2 sc in each st to around. Join. Fasten off, leaving a long tail.
Head and Neck Fringe
With G, beg using magic loop.
- 1st rnd: Ch 1. 10 sc in loop. Join with sl st to first sc.
- 2nd rnd: Ch 1. 2 sc in each st to around. Join. 20 sts.
- 3rd rnd: Ch 1. *2 sc in next st. 1 sc in next st. Rep from * around. Join. 30 sts.
- 4th rnd: Ch 1. 1 sc in each st around. Join.
- 5th rnd: Ch 1. *2 sc in next st. 1 sc in each of next 2 sts. Rep from * around. Join. 40 sts.
- 6th rnd: Ch 1. *2 sc in next st. 1 sc in each of next 3 sts. Rep from * around. Join. 50 sts.
- 7th rnd: As 4th rnd.
- 8th rnd: Ch 1. *2 sc in next st. 1 sc in each of next 4 sts. Rep from * around. Join. 60 sts.
- 9th rnd: As 4th rnd.
- 10th rnd: Ch 1. *2 sc in next st. 1 sc in each of next 5 sts. Rep from * around. Join. 70 sts.
- 11th and 12th rnds: As 4th rnd. Break G. Join B.
- 13th row: *Ch 8. 1 sc in 2nd ch from hook. 1 hdc in each of next 2 ch. 1 dc in each of next 2 ch. 1 tr in each of last 2 ch. Skip next 3 sts from 12th rnd. Sl st in next st. Rep from * 4 times more. Fasten off.
Ears (Make 2)
With G, ch 5.
- 1st row: 1 sc in 2nd ch from hook. 1 sc in each ch to end of chain. Turn. 4 sts.
- 2nd row: Ch 1. *2 sc in first st. 1 sc in each st to last st. 2 sc in last st. Turn. 6 sts.
- 3rd row: As 2nd row. 8 sts.
- 4th to 8th rows: Ch 1. 1 sc in each st to end of row. Turn.
- 9th row: Ch 1. *Sc2tog. 1 sc in each st to last 2 sts. Turn. 6 sts.
- 10th row: As 9th row.
- 11th row: Ch 1. (Sc2tog) twice. 2 sts.
- 12th rnd: Ch 1. Sc2tog. Ch 1. Work 1 rnd of sc evenly around edge of Ear. Join. Fasten off.
Eyes and Buttons (Make 2 in F and 2 in B)
Beg using magic loop.
- Eyes and Buttons: 1st rnd: Ch 1. 10 sc in loop. Join. Fasten off, leaving a long tail.
- Nose: With G, beg using magic loop.
1st rnd: Ch 2. [(3 dc. 1 hdc. 1 sc. 1 hdc) twice] all in loop. Join. Fasten off, leaving a long tail.
Belt
With B, ch 34.
- 1st row: 1 dc in 4th ch from hook. 1 dc in each ch to end of chain. Turn. 32 sts.
- 2nd and 3rd rows: Ch 2. 1 dc in each st to end of row. Turn. Fasten off, leaving a long tail.
Belt Buckle
With F, beg using magic loop.
- 1st rnd: Ch 1. (5 sc in ring. Ch 2). 4 times. Join with sl st to first sc. Fasten off loosely.
Finishing for Panel IV
With F and yarn needle, backstitch a face as shown in photo (see page 6).
Stitch Buckle to Belt.
Stitch Pompom to Hat.
Stitch Hat, Eyes and Ears to Head.
Stitch Buttons, Belt, Hat, Collar and Head to panel as shown in photo.
Optional Corner Pompoms
Additional yarn may be required.
Make 4.
Wind B and C held together around 4 fingers approximately 30 times.
Remove from fingers and tie tightly in center.
Cut through each side of loops.
Trim to a smooth round shape.
Attach one pompom to the Blanket at each corner.
Assembly and Final Finishing
- Panel I: Stitch pieces to blanket as shown; sew through tops/fronts of sts.
- Panel II: Stitch all embellishments onto the red panel of Blanket as shown in photo (see page 6).
- Panel III: Stitch Hat, Eyes, Nose, and Scarf to panel; backstitch smile with strand of F.
- Panel IV: Stitch Belt Buckle, Pompom, assemble Elf parts, then stitch Hat, Eyes, Ears, Buttons, Belt, Hat, Collar, and Head to panel; add optional corner pompoms.
Finished Project Inspiration
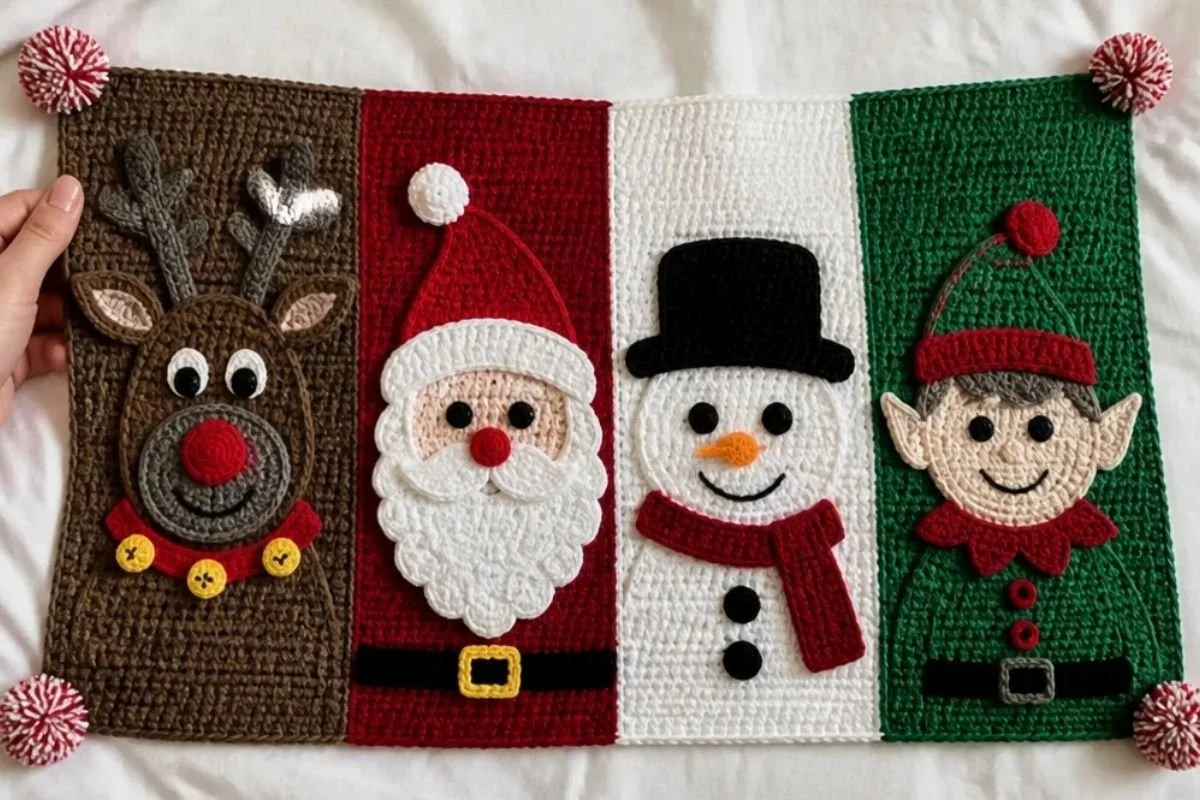
- Drape the blanket over a sofa arm or reading chair so all four characters remain visible.
- Fold it at the foot of a guest bed for a bright seasonal accent.
- Place it in a holiday gift basket with other handmade accessories.
- Use it as a festive photo backdrop for wrapped gifts or family gatherings.
- Display it in a nursery, playroom, or craft room during the Christmas season.
- Omit the optional corner pompoms for a cleaner look, or add them for a more playful child-friendly finish.
Caring for Your Crochet Project
- Dust the blanket gently with a soft brush or use low-suction vacuuming through a clean cloth.
- Spot-clean carefully rather than soaking the stitched appliqués.
- Avoid pulling the antlers, fringe, pompoms, scarf, and small facial pieces.
- Keep the blanket away from excessive heat, which can affect the yarn’s shape and surface.
- Store it clean and completely dry in a breathable container or folded on a shelf.
- Place tissue or smooth fabric between folded sections if the embellishments press against one another.
- Follow the yarn manufacturer’s care instructions when laundering is necessary, and test any cleaning method on an inconspicuous area first.
Tips for Better Results
- Count the foundation chain carefully. The starting chain is 113, producing 112 single crochet stitches in the first row.
- Mark color changes. Place a removable marker at rows 40, 80, and 120 so the four 40-row sections remain easy to identify.
- Keep magic loops adjustable. Close each loop firmly after working the first round, but do not pull so tightly that the center puckers.
- Track component quantities. Rudolph requires two ears and two eyes; the collar bells are made three times; the snowman has three buttons; and the elf has two ears plus the stated eyes and buttons.
- Leave long tails where instructed. These tails are used for sewing pieces to the blanket and help prevent loose appliqués.
- Pin before stitching. Arrange each character on its panel first, then check spacing and alignment before sewing permanently.
- Sew through the tops or fronts of stitches. This is especially important when attaching pieces to the blanket so the appliqués sit securely and neatly.
- Work increases evenly. In the rounded heads, snout, eyes, and buttons, spread increases exactly as written to preserve the intended shapes.
For a separate floral project that can complement handmade seasonal décor, a beginner crochet peony tutorial offers another way to practice rounded petals and decorative shaping.
Color and Styling Variations
These ideas are optional and do not change the approved pattern:
- Replace the traditional red-and-green emphasis with icy blue, silver-gray, and white for a winter palette.
- Use a different contrasting color for the optional corner pompoms while keeping B and C for the character details.
- Make the blanket in softer neutrals, such as cream, tan, muted red, and forest green, for a rustic holiday display.
- Use the same character colors but rearrange the blanket’s display orientation so a favorite character faces outward on a chair.
- If substituting yarn, choose a similar yarn weight and check gauge first. A different yarn or hook size can change the blanket’s dimensions, fabric density, drape, and yarn requirements.
Frequently Asked Questions
Is this blanket suitable for a beginner?
It includes beginner-friendly single crochet sections, but the complete project also uses shaping, magic loops, several stitch heights, color changes, and appliqué assembly. A beginner may find it manageable by completing one component at a time.
What yarn does the pattern recommend?
The pattern uses Bernat® Super Value™ in seven colors: Walnut, True Red, White, Kelly, Bright Yellow, Black, and Dark Heather, with one ball of each specified color.
What hook size should I use?
Use a U.S. H/8 (5 mm) crochet hook or the size needed to obtain gauge.
How many panels are included?
The blanket has four striped sections, each decorated with one character: Rudolph, Santa, a snowman, and an elf.
Can I change the character colors?
Yes. Color changes are optional, but they may alter the visual contrast and can affect yarn quantities if the replacement color is used more heavily.
How are the character pieces attached?
The pieces are stitched to the blanket with a yarn needle. For Panel I, work through the tops or fronts of stitches when sewing pieces to the blanket; the other panels are assembled and stitched as specified in their finishing instructions.
Are the corner pompoms required?
No. The four corner pompoms are optional, and the pattern notes that additional yarn may be required.
How should I store the finished blanket?
Store it clean and dry, protected from excessive heat and pressure. Fold it carefully so the appliqués, fringe, and pompoms are not crushed.
Conclusion
This Christmas character blanket combines a practical striped foundation with playful Rudolph, Santa, snowman, and elf appliqués. The project makes a memorable seasonal decoration, handmade gift, or family keepsake, and the optional pompoms add even more holiday charm. For another cozy seasonal project to enjoy alongside it, explore these Christmas crochet afghans for cozy holiday decorating.