
A Hexi Crochet Christmas Stocking Pattern for Holiday Decor turns colorful granny-style hexagons into a charming seasonal decoration with plenty of handmade character. The geometric design, bright holiday palette, shaped toe, and textured top edge make it attractive on a mantel, staircase, or wall. It is a rewarding project for crocheters who enjoy working in rounds and assembling motifs, while the finished stocking also makes a thoughtful handmade gift. For another festive crochet accent, explore this crochet rose pattern for wine glasses to coordinate a holiday table display.
Why You’ll Love This Crochet Project
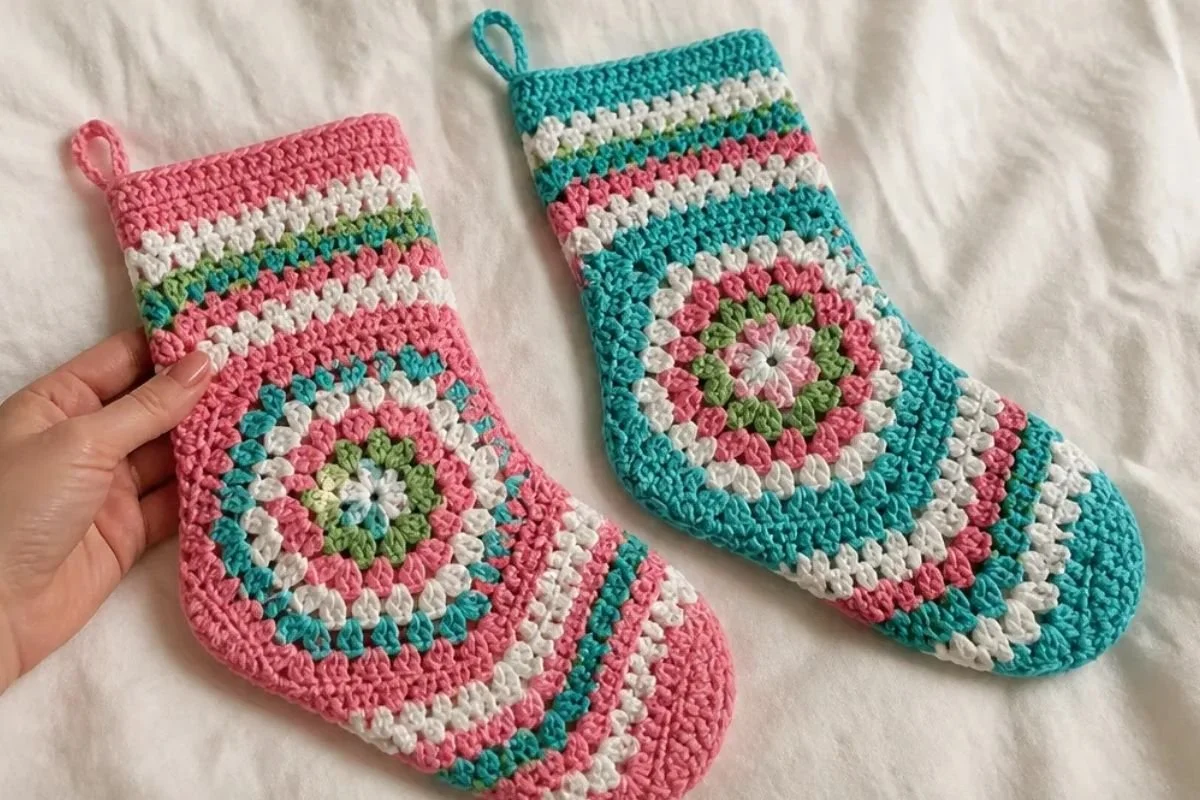
- It uses a classic hexagon construction. The stocking begins as a colorful motif worked in joined rounds, then shaping transforms it into a recognizable stocking silhouette.
- The color changes create visual interest. Turqua, Pretty n’ Pink, Spring Green, and Soft White form a cheerful palette with clear bands of color.
- You practice useful techniques. The pattern includes granny-style clusters, corner chain spaces, marked sections, a dc3tog decrease, seaming, and reverse single crochet.
- It makes a versatile decoration. Hang the completed stocking from a mantel, banister, wall hook, or seasonal display.
- There are two color-placement versions. Both versions use the same general construction while changing which contrast colors appear in specific rounds and finishing sections.
My Crochet Flower Tip: Place a removable stitch marker in every specified corner space before beginning the toe shaping. The markers make it much easier to identify the shaping points after several colorful rounds.
Before You Start Crocheting
This pattern creates one hexagon-based Christmas stocking. The project is worked in rounds through the 10th round, where the toe is shaped with a centered decrease section. Two rows then form the stocking sides, followed by four rows for the top edge. Finally, the piece is folded and seamed.
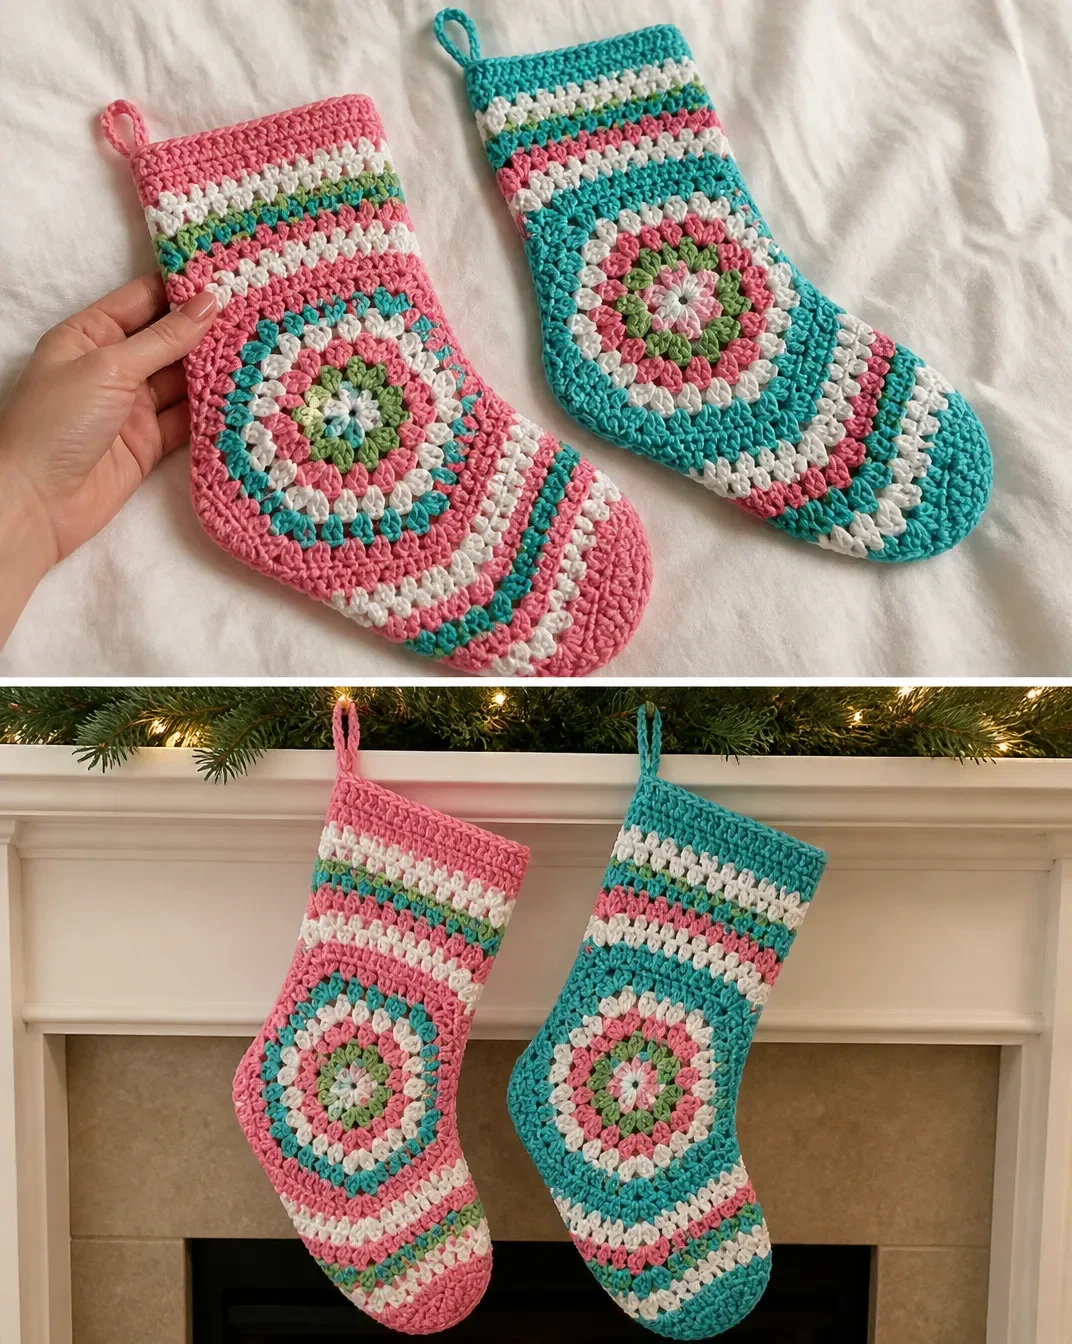
Version 1 and Version 2 use the same hexagon structure and shaping instructions. Their differences are color placement:
- Version 1: Contrast C begins the hexagon, Contrast B is used in Round 2 and the toe, and Contrast C is used for the first stocking-side row.
- Version 2: The hexagon changes in Rounds 4, 6, 7, and 8, and the stocking-side colors differ from Version 1.
The pattern uses US crochet terminology. Important abbreviations include:
- ch: chain
- dc: double crochet
- dc3tog: double crochet three together
- PM: place marker
- rnd: round
- RS: right side
- sl st: slip stitch
- sp/sps: space/spaces
- WS: wrong side
Materials You’ll Need
Version 1 yarn
- Red Heart® Super Saver™ (7 oz/198 g; 364 yds/333 m)
- Contrast A Turqua (0512): 1 ball or 94 yds/85.5 m
- Contrast B Pretty n’ Pink (0722): 1 ball or 24 yds/22 m
- Contrast C Spring Green (0672): 1 ball or 32 yds/29 m
- Contrast D Soft White (0316): 1 ball or 24 yds/22 m
Version 2 yarn
- Red Heart® Super Saver™ (7 oz/198 g; 364 yds/333 m)
- Contrast A Turqua (0512): 1 ball or 32 yds/29 m
- Contrast B Spring Green (0672): 1 ball or 32 yds/29 m
- Contrast C Pretty n’ Pink (0722): 1 ball or 80 yds/73 m
- Contrast D Soft White (0316): 1 ball or 80 yds/73 m
Tools
- Crochet hook: Sizes U.S. H/8 (5 mm) Susan Bates® Silvalume® crochet hook or size needed to obtain gauge
- Stitch markers: Susan Bates® stitch markers
- Needle: Susan Bates® steel yarn needle
Use the color version you prefer, and keep the contrast labels nearby while crocheting. Because several shades are joined and broken throughout the motif, labeling the balls can prevent accidental color swaps.
Complete Crochet Instructions
The approved instructions below are given separately for each version. Work only one version unless you intentionally want to compare the color layouts.
Version 1 Hexagon
With C, ch 4. Join with sl st to first ch to form ring.
1st rnd: Ch 3 (counts as dc at beg of this and subsequent rnds). 2 dc in ring. (Ch 2. 3 dc) 5 times in ring. Ch 2. Join with sl st to top of ch 3.
Completes: 6 groups of 3 dc and 6 ch-2 sps.
Break C.
2nd rnd: Join B with sl st in first ch-2 sp. Ch 3. (2 dc. Ch 2. 3 dc) in same sp as last sl st.
Skip next 3 dc. (3 dc. Ch 2. 3 dc) in next ch-2 sp. Rep from * 4 times more. Join with sl st to top of ch 3.
Break B.
3rd rnd: Join D with sl st in first ch-2 sp. Ch 3. (2 dc. Ch 2. 3 dc) in same sp as last sl st.
Skip next 3 dc. 3 dc in sp between next 2 groups of 3-dc. Skip next 3 dc. (3 dc. Ch 2. 3 dc) in next corner ch-2 sp. Rep from * 4 times more. Skip next 3 dc. 3 dc in sp between next 2 groups of 3-dc. Skip last 3 dc. Join with sl st to top of ch 3.
Break D.
4th rnd: Join C with sl st in first ch-2 sp. Ch 3. (2 dc. Ch 2. 3 dc) in same sp as last sl st.
(Skip next 3 dc 3 dc in sp between next 2 groups of 3-dc) twice. Skip next 3 dc. (3 dc. Ch 2. 3 dc) in next corner ch-2 sp. Rep from * 4 times more. (Skip next 3 dc 3 dc in sp between next 2 groups of 3-dc) twice. Skip last 3 dc. Join with sl st to top of ch 3.
Break C.
5th rnd: Join A with sl st in first ch-2 sp. Ch 3. (2 dc. Ch 2. 3 dc) in same sp as last sl st.
[Skip next 3 dc. 3 dc in sp between next 2 groups of 3-dc. Rep from * to * to next corner ch-2 sp. Skip next 3 dc. (3 dc. Ch 2. 3 dc) in next corner ch-2 sp] 5 times. Rep from * to * to end of rnd. Skip last 3 dc. Join with sl st to top of ch 3.
6th and 7th rnds: Sl st in each of next 2 dc and next ch-2 sp. Ch 3. (2 dc. Ch 2. 3 dc) in same sp as last sl st.
[Skip next 3 dc. 3 dc in sp between next 2 groups of 3-dc. Rep from * to * to next corner ch-2 sp. Skip next 3 dc. (3 dc. Ch 2. 3 dc) in next corner ch-2 sp] 5 times. Rep from * to * to end of rnd. Skip last 3 dc. Join with sl st to top of ch 3.
Break A at end of 7th rnd.
8th rnd: With C, as 5th rnd. Break C.
9th rnd: Join D with sl st in first ch-2 sp. Ch 3. (2 dc. Ch 2. 3 dc) in same sp as last sl st.
*(Skip next 3 dc. 3 dc in sp between next 2 groups of 3-dc) 7 times. Skip next 3 dc. (3 dc. Ch 2. 3 dc) in next corner ch-2 sp – PM in ch-2 sp just worked. Rep from * once more. (Skip next 3 dc. 3 dc in sp between next 2 groups of 3-dc) 7 times. Skip next 3 dc. (3 dc. Ch 2. 3 dc) in next corner ch-2 sp. Rep from twice more. (Skip next 3 dc. 3 dc in sp between next 2 groups of 3-dc) 7 times. Skip last 3 dc. Join with sl st to top of ch 3.
Break D.
Version 1 Toe Shaping and Marker Placement
Shape toe, 10th rnd: Join B with sl st in first ch-2 sp. Ch 3. (2 dc. Ch 2. 3 dc) in same sp as last sl st.
(Skip next 3 dc. 3 dc in sp between next 2 groups of 3-dc) 8 times. (3 dc. Ch 2. 3 dc) in next marked corner ch-2 sp.
(Dc3tog in sp between next 2 groups of 3 dc) 8 times. (3 dc. Ch 2. 3 dc) in next marked corner ch-2 sp.
(Skip next 3 dc. 3 dc in sp between next 2 groups of 3-dc) 8 times. Skip next 3 dc. (3 dc. Ch 2. 3 dc) in next corner ch-2 sp. Rep from * twice more. (Skip next 3 dc. 3 dc in sp between next 2 groups of 3-dc) 8 times. Skip last 3 dc. Join with sl st to top of ch 3.
Break B.
PM in 4th corner ch-2 sp of 10th rnd.
Version 1 Stocking Sides
1st row: With RS of Hexagon facing, join C with sl st in marked 4th corner ch-2 sp. Ch 3. 2 dc in same sp.
(3 dc in sp between next 2 groups of 3-dc) 9 times. (3 dc. Ch 2. 3 dc) in next corner ch-2 sp. Rep from * once more. (3 dc in sp between next 2 groups of 3-dc) 9 times. 3 dc in next corner ch-2 sp.
Break C. Leave rem sts unworked.
2nd row (RS): Join A with sl st in top of ch 3 at beg of 1st row. Ch 3.
(3 dc in sp between next 2 groups of 3-dc) 10 times. (3 dc. Ch 2. 3 dc) in next corner ch-2 sp. Rep from * once more. (3 dc in sp between next 2 groups of 3-dc) 10 times. Skip next 2 dc. 1 dc in last dc.
Break A.
PM in each of the two ch-2 corner sps of last row.
Version 1 Stocking Top Edge
1st row: With RS of Stocking facing, join A with sl st in first marked corner ch-2 sp. Ch 3. 2 dc in same sp.
(3 dc in sp between next 2 groups of 3-dc) 11 times. 3 dc in second marked corner ch-2 sp. Turn.
2nd row (WS): Ch 3. (3 dc in sp between next 2 groups of 3-dc) 12 times. Skip next 2 dc. 1 dc in top of ch 3. Turn.
3rd row: Ch 3. 1 dc in each dc to end of row. Do not turn.
4th row: Ch 1. Working from left to right instead of from right to left, as usual, work 1 reverse sc in each dc to end of row. Fasten off.
Version 1 Finishing and Assembly
Fold Stocking with sides, bottom and toe edges aligned (see photo). Using matching shade, join sides, bottom edge and toe seams.
Hanging Loop: Using 2 strands of A held tog, join with sl st to top edge at side seam. Ch 24. Join with sl st in seam. Fasten off.
Version 2 Hexagon
With C, ch 4. Join with sl st to first ch to form ring.
1st rnd: Ch 3 (counts as dc at beg of this and subsequent rnds). 2 dc in ring. (Ch 2. 3 dc) 5 times in ring. Ch 2. Join with sl st to top of ch 3.
Completes: 6 groups of 3 dc and 6 ch-2 sps.
Break C.
2nd rnd: Join B with sl st in first ch-2 sp. Ch 3. (2 dc. Ch 2. 3 dc) in same sp as last sl st.
Skip next 3 dc. (3 dc. Ch 2. 3 dc) in next ch-2 sp. Rep from * 4 times more. Join with sl st to top of ch 3.
Break B.
3rd rnd: Join D with sl st in first ch-2 sp. Ch 3. (2 dc. Ch 2. 3 dc) in same sp as last sl st.
Skip next 3 dc. 3 dc in sp between next 2 groups of 3-dc. Skip next 3 dc. (3 dc. Ch 2. 3 dc) in next corner ch-2 sp. Rep from * 4 times more. Skip next 3 dc. 3 dc in sp between next 2 groups of 3-dc. Skip last 3 dc. Join with sl st to top of ch 3.
4th rnd: Sl st in each of next 2 dc and first ch-2 sp. Ch 3. (2 dc. Ch 2. 3 dc) in same sp as last sl st.
(Skip next 3 dc. 3 dc in sp between next 2 groups of 3-dc) twice. Skip next 3 dc. (3 dc. Ch 2. 3 dc) in next corner ch-2 sp. Rep from * 4 times more. (Skip next 3 dc. 3 dc in sp between next 2 groups of 3-dc) twice. Skip last 3 dc. Join with sl st to top of ch 3.
Break D.
5th rnd: Join A with sl st in first ch-2 sp. Ch 3. (2 dc. Ch 2. 3 dc) in same sp as last sl st.
[Skip next 3 dc. 3 dc in sp between next 2 groups of 3-dc. Rep from * to * to next corner ch-2 sp. Skip next 3 dc. (3 dc. Ch 2. 3 dc) in next corner ch-2 sp] 5 times. Rep from * to * to end of rnd. Skip last 3 dc. Join with sl st to top of ch 3.
6th rnd: Sl st in each of next 2 dc and next ch-2 sp. Ch 3. (2 dc. Ch 2. 3 dc) in same sp as last sl st.
[Skip next 3 dc. 3 dc in sp between next 2 groups of 3-dc. Rep from * to * to next corner ch-2 sp. Skip next 3 dc. (3 dc. Ch 2. 3 dc) in next corner ch-2 sp] 5 times. Rep from * to * to end of rnd. Skip last 3 dc. Join with sl st to top of ch 3.
Break A.
7th rnd: Join C with sl st in first ch-2 sp. Ch 3. (2 dc. Ch 2. 3 dc) in same sp as last sl st.
[Skip next 3 dc. 3 dc in sp between next 2 groups of 3-dc. Rep from * to * to next corner ch-2 sp. Skip next 3 dc. (3 dc. Ch 2. 3 dc) in next corner ch-2 sp] 5 times. Rep from * to * to end of rnd. Skip last 3 dc. Join with sl st to top of ch 3.
Break C.
8th rnd: With D, as 7th rnd.
9th rnd: Sl st in each of next 2 dc and first ch-2 sp. Ch 3. (2 dc. Ch 2. 3 dc) in same sp as last sl st.
*(Skip next 3 dc. 3 dc in sp between next 2 groups of 3-dc) 7 times. Skip next 3 dc. (3 dc. Ch 2. 3 dc) in next corner ch-2 sp – PM in ch-2 sp just worked. Rep from * once more. (Skip next 3 dc. 3 dc in sp between next 2 groups of 3-dc) 7 times. Skip next 3 dc. (3 dc. Ch 2. 3 dc) in next corner ch-2 sp. Rep from twice more. (Skip next 3 dc. 3 dc in sp between next 2 groups of 3-dc) 7 times. Skip last 3 dc. Join with sl st to top of ch 3.
Break D.
Version 2 Toe Shaping and Marker Placement
10th rnd: Join B with sl st in first ch-2 sp. Ch 3. (2 dc. Ch 2. 3 dc) in same sp as last sl st.
(Skip next 3 dc. 3 dc in sp between next 2 groups of 3-dc) 8 times.
(3 dc. Ch 2. 3 dc) in next marked corner ch-2 sp.
(Dc3tog in sp between next 2 groups of 3 dc) 8 times.
(3 dc. Ch 2. 3 dc) in next marked corner ch-2 sp.
(Skip next 3 dc. 3 dc in sp between next 2 groups of 3-dc) 8 times. Skip next 3 dc. (3 dc. Ch 2. 3 dc) in next corner ch-2 sp. Rep from * twice more. (Skip next 3 dc. 3 dc in sp between next 2 groups of 3-dc) 8 times. Skip last 3 dc. Join with sl st to top of ch 3.
Break B.
PM in 4th corner ch-2 sp of 10th rnd.
Version 2 Stocking Sides
1st row: With RS of Hexagon facing, join D with sl st in marked 4th corner ch-2 sp. Ch 3. 2 dc in same sp.
(3 dc in sp between next 2 groups of 3-dc) 9 times. (3 dc. Ch 2. 3 dc) in next corner ch-2 sp. Rep from * once more. (3 dc in sp between next 2 groups of 3-dc) 9 times. 3 dc in next corner ch-2 sp.
Break D. Leave rem sts unworked.
2nd row (RS): Join C with sl st in top of ch 3 at beg of 1st row. Ch 3.
(3 dc in sp between next 2 groups of 3-dc) 10 times. (3 dc. Ch 2. 3 dc) in next corner ch-2 sp. Rep from * once more. (3 dc in sp between next 2 groups of 3-dc) 10 times. Skip next 2 dc. 1 dc in last dc.
Break C.
PM in each of the two ch-2 corner sps of last row.
Version 2 Stocking Top Edge
With C, work as for Version 1.
Version 2 Finishing and Assembly
Work as for Version 1.
Hanging Loop: With C, work as for Version 1.
Finished Project Inspiration
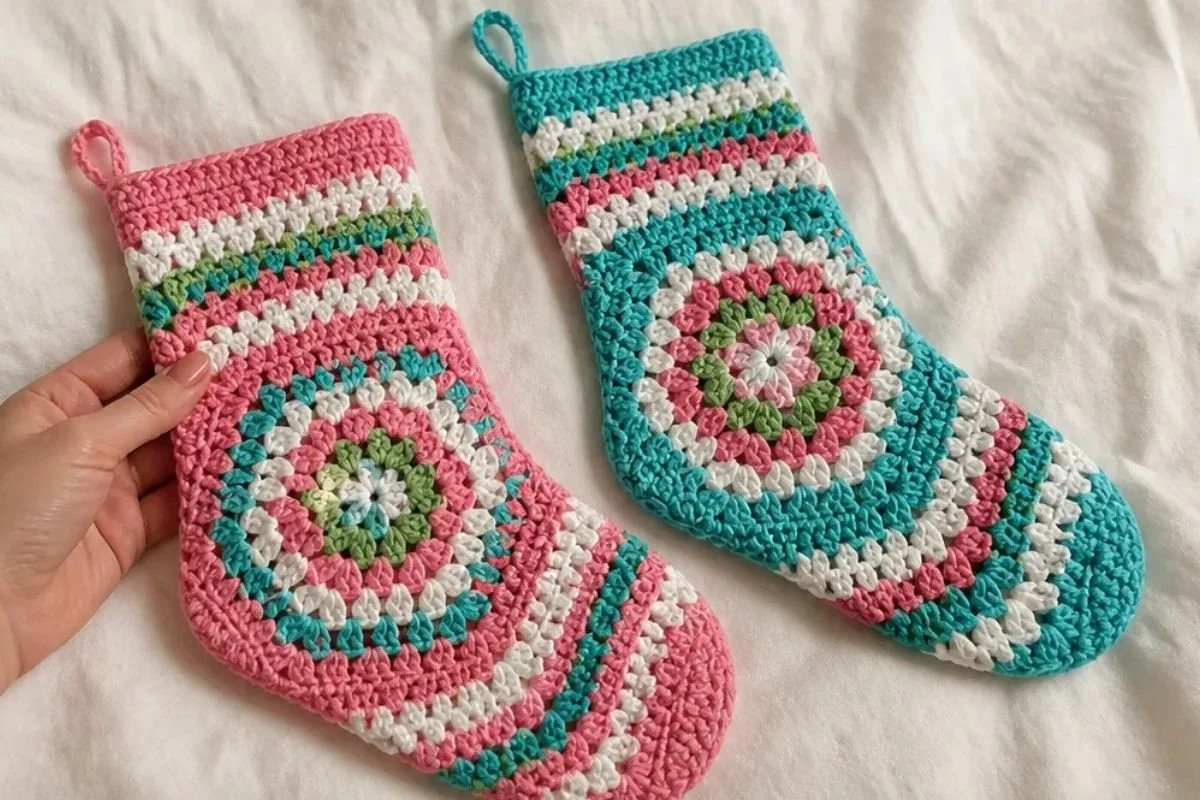
- Hang the stocking from a mantel or shelf edge as part of a traditional Christmas display.
- Use it as a decorative pocket for lightweight wrapped treats, notes, or small gifts.
- Add it to a staircase or entryway arrangement with other handmade holiday accents.
- Display several stockings in both color versions for a coordinated but varied garland.
- Give the finished stocking as a handmade seasonal gift, especially when paired with a small wrapped item.
- Combine it with other colorful crochet decorations; a collection of all-in-one crochet bouquet patterns can also inspire a broader handmade holiday display.
Caring for Your Crochet Project
- Dust the stocking gently with a soft brush or use low suction from a handheld vacuum held slightly away from the stitches.
- For a small mark, spot-clean carefully with a lightly damp cloth and avoid saturating the fabric.
- Do not pull the stocking by its hanging loop, especially when it contains items.
- Reshape the hexagon and toe gently by hand after handling.
- Store it flat or loosely folded in a clean, dry container between seasons.
- Keep it away from excessive heat, open flames, and prolonged direct sunlight, which can affect the yarn colors and shape.
- Before storing, make sure the stocking is completely dry and that loose yarn ends are secured.
Tips for Better Results
- Track every color change. Keep the four contrast labels visible so the correct shade is used after each break.
- Count corner spaces, not only stitches. The hexagon depends on six corner ch-2 spaces, and these spaces guide the repeated granny clusters.
- Work into spaces cleanly. Insert the hook in the space between groups of 3-dc rather than splitting individual stitches.
- Check the marked corners before Round 10. The toe shaping depends on the marked ch-2 spaces from Round 9.
- Watch the dc3tog section. Work all eight decreases in the specified spaces so the toe curves in the intended area.
- Keep the right side facing during the stocking-side rows. This helps the side shaping and color placement remain consistent.
- Align edges before seaming. Match the side, bottom, and toe edges carefully before joining with the matching shade.
- Use a firm but flexible hanging loop. Hold two strands together as instructed so the loop supports the decorative stocking.
Color and Styling Variations
These options are optional and do not change the approved instructions:
- Reverse the visual emphasis by using the brighter shade for the outer rounds and Soft White for the toe or top edge.
- Make one stocking in Version 1 and another in Version 2 for a coordinated pair with different stripe arrangements.
- Use a traditional palette of red, green, and white if you have suitable yarn colors, but choose a comparable yarn carefully because changing yarn weight can affect gauge, size, and drape.
- Replace the bright palette with icy blues, silver-toned white, and deep green for a winter display.
- Add a simple embroidered initial after assembly, taking care not to distort the granny clusters or seams.
- Make a set of stockings in different color combinations while keeping the same hook size and construction sequence.
Frequently Asked Questions
Is this stocking suitable for a newer crocheter?
It is approachable for a crocheter familiar with double crochet, chain spaces, slip-stitch joins, and working in rounds. The toe shaping and assembly require careful attention, so reading the instructions fully before starting is helpful.
What yarn does the pattern recommend?
The pattern recommends Red Heart® Super Saver™ in the listed contrast colors and quantities for either Version 1 or Version 2.
What hook size should I use?
Use a U.S. H/8 (5 mm) Susan Bates® Silvalume® crochet hook, or use the size needed to obtain gauge.
What is the main construction method?
The project begins with a large hexagon worked in joined rounds. Specific corners are marked, the toe is shaped with dc3tog decreases, and rows are added for the stocking sides and top edge before seaming.
Can I change the colors?
Yes. You can substitute other colors while following the same letter assignments, or create your own palette. Keep the contrast labels organized so each round uses the intended shade.
Why are stitch markers important?
Markers identify corner chain spaces used for toe shaping and the stocking-side section. They reduce the chance of beginning the side rows in the wrong corner.
How is the stocking assembled?
Fold the stocking with the sides, bottom, and toe edges aligned. Use the matching shade to join the side, bottom edge, and toe seams. Add the hanging loop at the side seam.
How should I store the finished stocking?
Dust it gently, spot-clean only when needed, allow it to dry fully, and store it in a clean, dry place away from excessive heat and sunlight.
Conclusion
This Hexi Crochet Christmas Stocking Pattern for Holiday Decor combines colorful granny-style clusters with a practical seasonal shape. The two versions make it easy to choose a favorite color arrangement, while the shaped toe, finished top edge, and hanging loop complete the display. For another hexagon-inspired stocking idea, compare it with this granny crochet stocking pattern before planning your holiday makes.